Like the settings app on your phone, cPanel controls and sets various aspects of your shiny new website.
And like any website, you need an interface behind the scenes to manage your site’s preferences. Your email accounts, database connections, and FTP settings hide behind an easy-to-use interface that most people call cPanel, even if their web host has something completely different.
This type of interface is also called a Web Hosting Control Panel (WHCP for short), and all web hosting companies provide it for end users to set up and manage their sites.
In this article, we’ll share everything you need to know about cPanel, the control we use here at HostPapa. It’s the industry standard for ease of use and performance.
- What Is cPanel?
- What Can I Do in cPanel?
- What Does cPanel Web Hosting Mean?
- Getting Started with cPanel
- Basic Website Management in cPanel
- Software Installation via Softaculous
- Going Pro: Advanced Website Features via the cPanel
What Is cPanel?
cPanel, short for “Control Panel,” is a web-based graphical user interface (GUI) designed to simplify website management and server administration tasks for users of all technical backgrounds.
It’s a robust and user-friendly control panel that has played a pivotal role in the web hosting industry and continues to do so today.
The history of cPanel dates back to the late 1990s when it was first introduced. Developed by cPanel, LLC, and in the Perl programming language, it targeted web hosting companies and website owners that needed a powerful yet accessible toolset for managing websites, domains, email, databases, and more.
What Can I Do in cPanel?
With cPanel, you can configure almost anything related to your website and web server, including:
- Email creation and management
- Domain redirects and management
- Website file manager
- Database manager
- Security features
- Server settings
- Software installation (e.g. via Softaculous)
- Backup and restore
- Server metrics and logs
What Does cPanel Web Hosting Mean?
So far, we’ve explored what cPanel is – it’s a control panel for your website, your domain name and many other integral parts of your site. When looking to get your website up and running, you might have heard the term cPanel hosting provider – what does that mean, exactly?
cPanel web hosting generally refers to the web hosting provider that uses this control panel over other available solutions for website management.
For website administrators, cPanel is often the go-to choice due to its ease of use and performance. Unsurprisingly, many consider it a top pick and an industry standard.
cPanel is present in other types of web hosting plans, like virtual private servers (VPS hosting), and it can be configured to work with many web hosting plans and dedicated servers, too.
For VPS Hosting, HostPapa provides all the options: a self-managed virtual private server with no cPanel present, a cPanel-enabled managed version and lastly, a fully managed VPS plan where you have dedicated system administrators managing all the aspects of your site.
Many expanding small businesses prefer this plan, and it’s easy to see why!
Getting Started with cPanel
Every web hosting provider uses its services in a distinct manner. HostPapa, for instance, has plenty of articles on its knowledge base about logging in your cPanel.
There are even entire pages of useful material for you to go through, but it will only make sense if you’ve bought our affordable web hosting packages.
How to Access cPanel
In short, accessing cPanel happens from your web host’s dashboard with the username and password provided to you with the onboarding communication. Every web host has a different login page.
Accessing your cPanel account isn’t difficult, but you need to make sure that you read the web host’s articles and your onboarding instructions first.
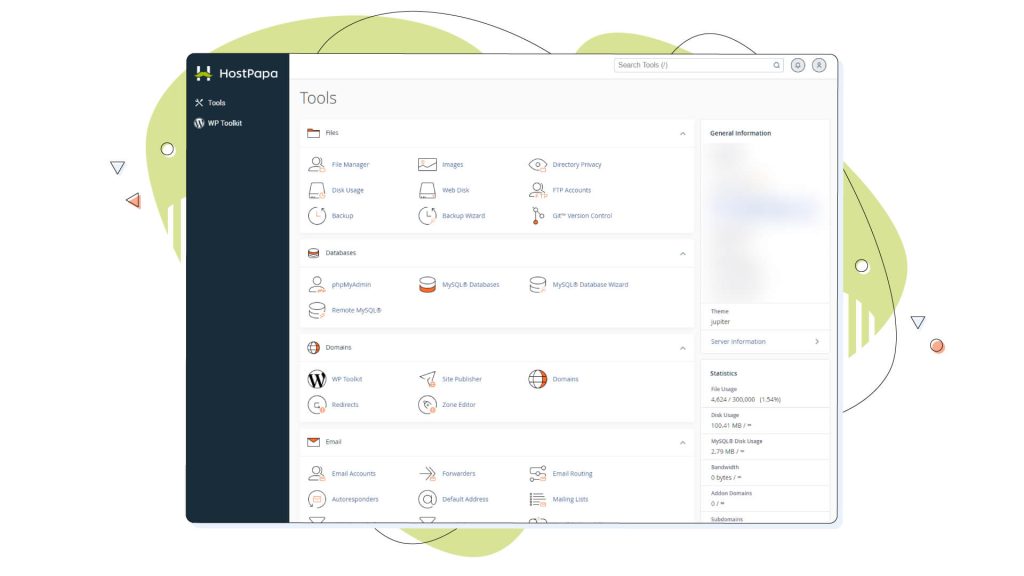
Navigating the cPanel Interface
The more modern versions of cPanel, like the one that sits on top of HostPapa’s hosting solutions, offer a responsive and intuitive interface.
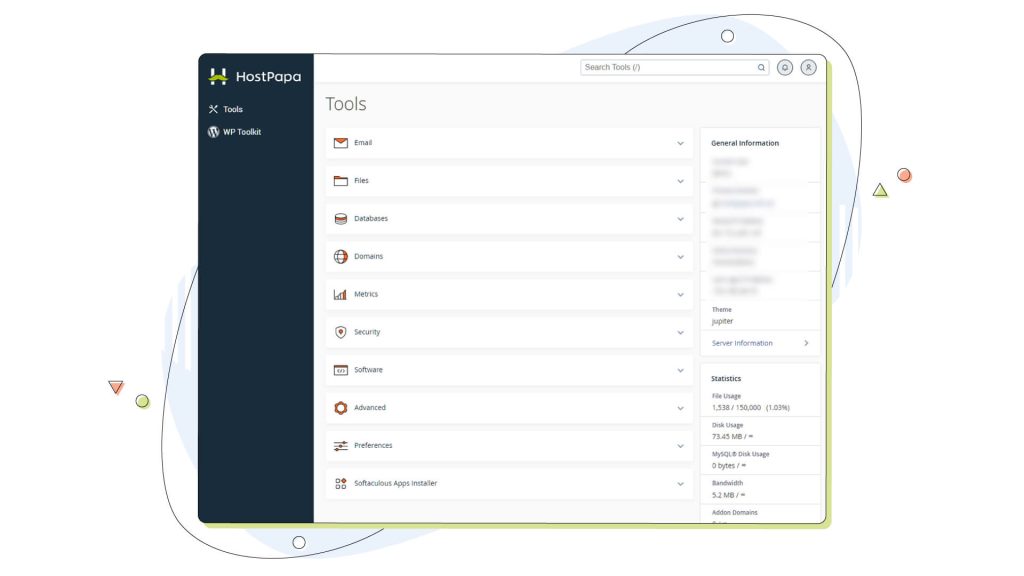
On the left, there’s a list of all your products and services you can manage. Under Tools, you have access to most of the settings we’ll need in this tutorial.
All available tools are split into categories in the centre for easy access. You can reorder any of these by clicking and dragging your mouse.
Your general server information lives on the right sidebar. Here, you can see the domain name of your site, the last logged-in IP address and a few quick statistics about your website’s storage, bandwidth and file usage.
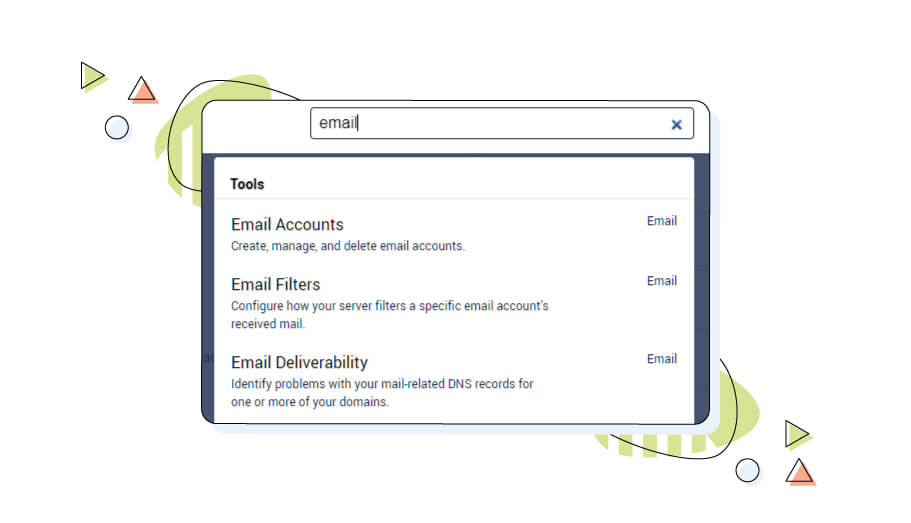
If the available tools are overwhelming, you can use the included search function from the top right of cPanel.
Anyone who knows how to play solitaire can certainly use cPanel on their account! With its point-and-click interface, selecting the option you want is easy, and the descriptions are self-explanatory.
Basic Website Management in cPanel
Managing your website effectively involves handling essential tasks such as creating email accounts, managing website files, and handling databases.
In this section, we’ll explore the fundamentals of these website management aspects within the cPanel environment.
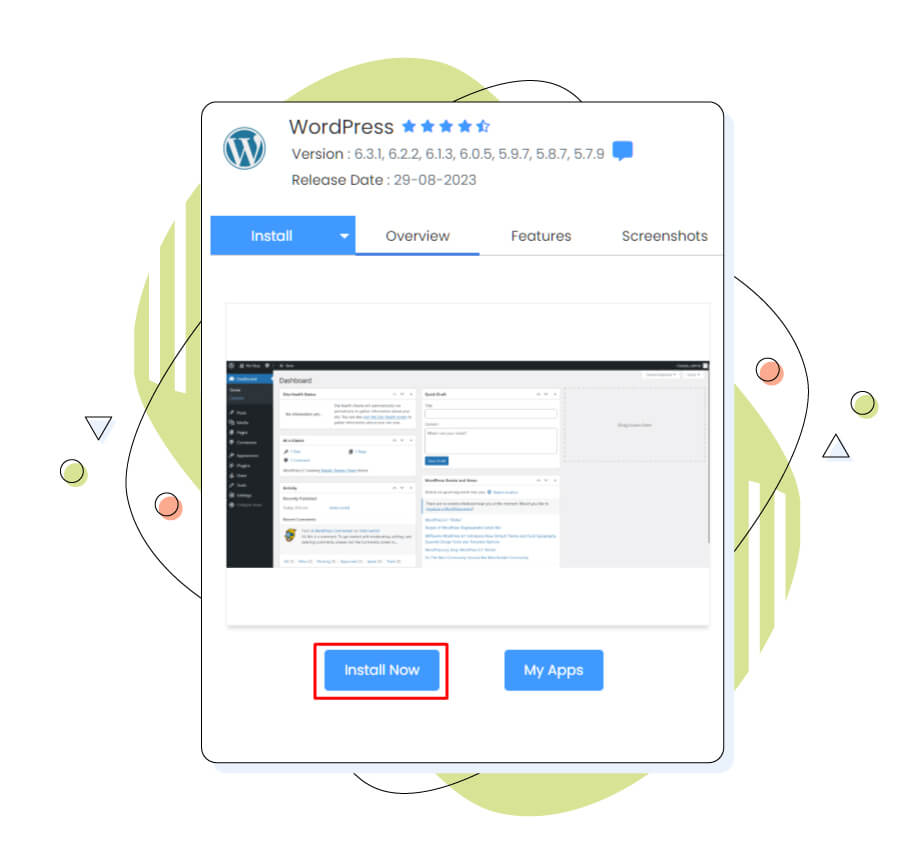
How to Install WordPress from cPanel
If you opted for an affordable shared hosting account, knowing how to install WordPress from your cPanel will save you tons of time.
Inside your cPanel dashboard, look for the “Softaculous Apps Installer” icon or simply search for “Softaculous” in the search bar.
Click on the “WordPress” icon or search for “WordPress” within the Softaculous interface.
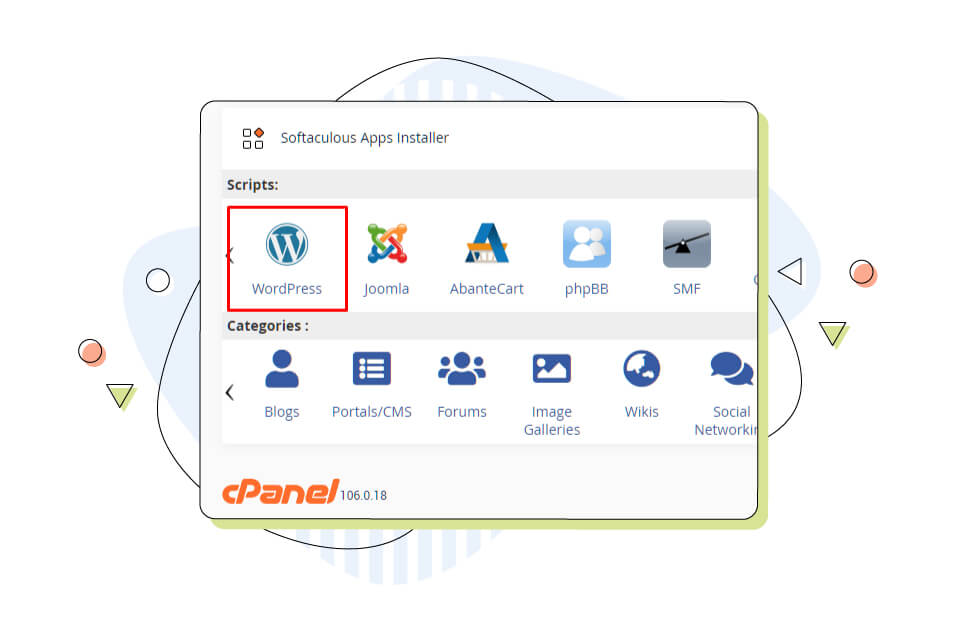
Now, you’ll see an overview of WordPress, along with an “Install Now” button. Click on it to start the installation process.
Creating Email Accounts in cPanel
Setting up email accounts associated with your domain is a fundamental step in website management, as it allows you to communicate with your audience professionally. Here’s a step-by-step guide on creating email accounts in cPanel:
In the “Email Accounts” section, select the domain for which you want to create the custom email address.
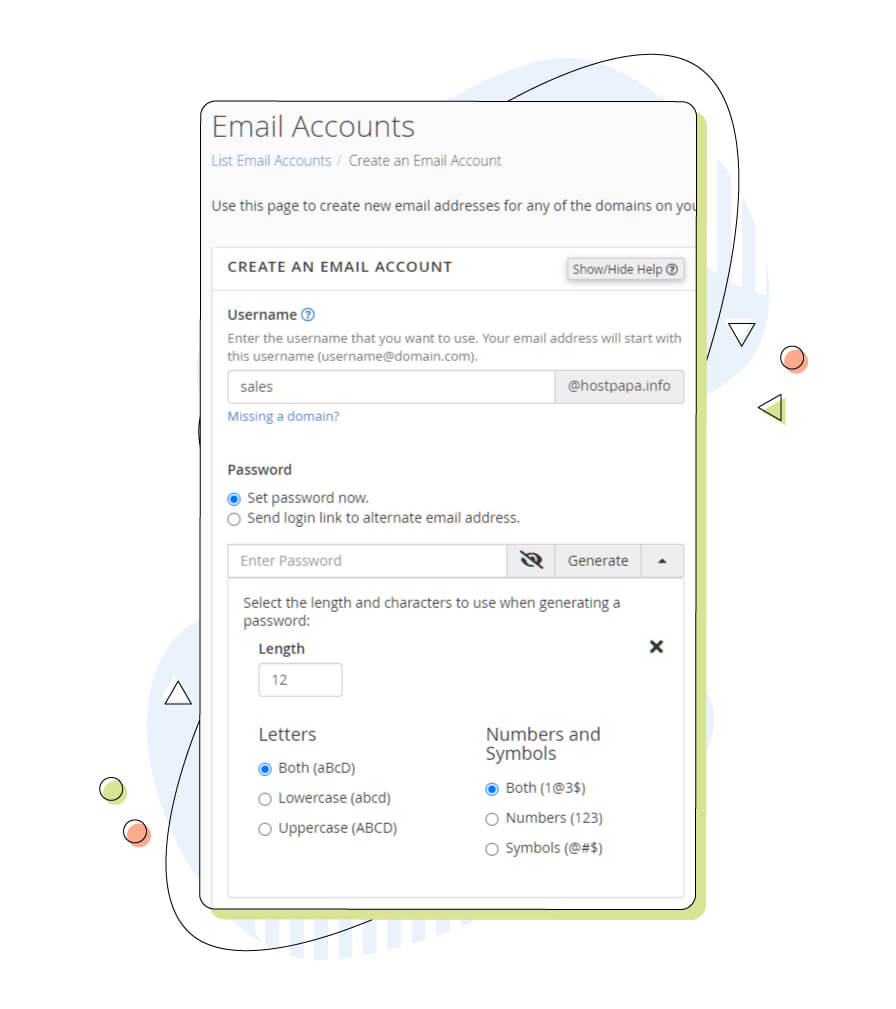
Now, pick a username for your email account that represents you or your website. In this step, we chose “sales” for sales@yourwebsite.com.
Set a strong password for added security, or use the built-in “Password Generator” for a secure suggestion.
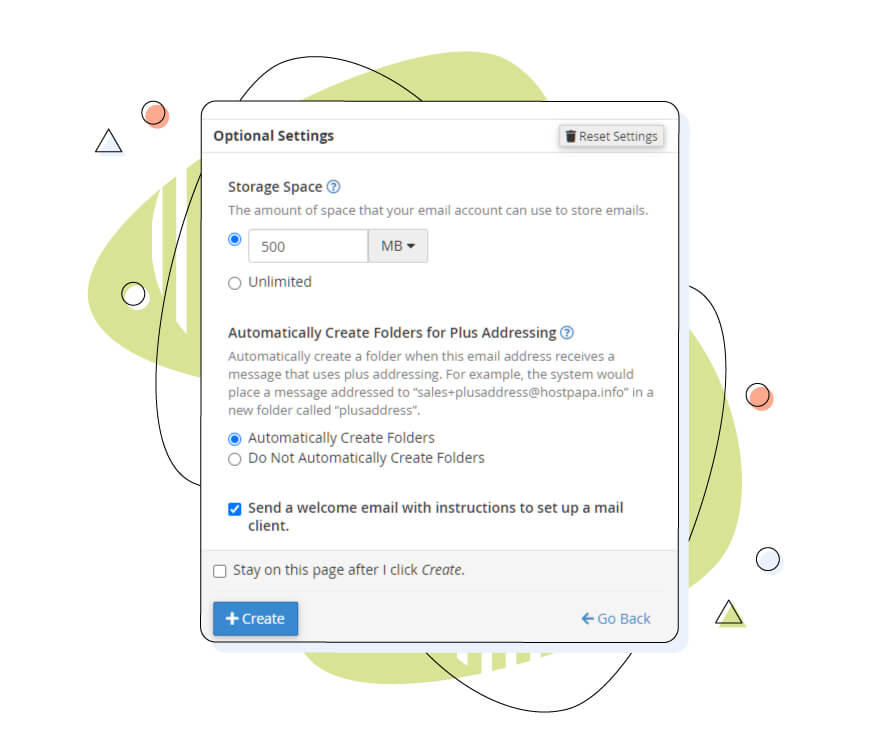
Choose the mailbox’s storage quota (how much space it can use on your server).
Finally, click the “Create” button to bring your custom email address to life.
Customize Email Settings
After creating your email account, you can customize various settings, including:
- Autoresponders: Set up automated responses for your email account.
- Forwarding: Configure email forwarding to redirect messages to another address.
- Spam filters: Adjust spam filter settings to control unwanted emails.
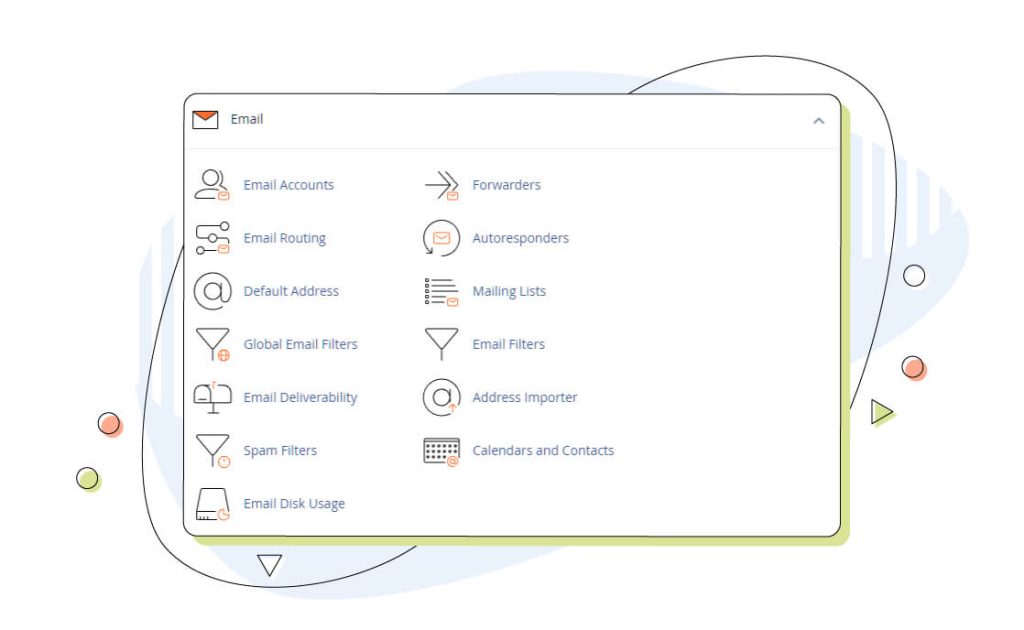
When launching your business online, these settings give you complete control over your email.
Managing Files and Your FTP Account in cPanel
Your website can’t exist if you don’t know your way around cPanel’s file manager. Additionally, understanding File Transfer Protocol (FTP) can give you greater control over your site’s file structure. With FTP, you can directly upload files to your account’s storage from your computer via an FTP client like FileZilla (which is free).
Uploading and managing website files:
- Access the “File Manager” in your cPanel dashboard under the “Files” section.
- Navigate to the directory where you want to upload files (usually the “public_html” folder for your main website).
- Click “Upload” and select the files you want to upload from your local computer.
- Once uploaded, you can move, rename, or delete files as needed using the File Manager’s interface.

This step is usually unnecessary for first-time users since it’s way easier to install WordPress and other CMS platforms via the Softaculous apps installer. More on that later.
Database Management
Databases are the backbone of many websites, especially those powered by content management systems (CMS) like WordPress.
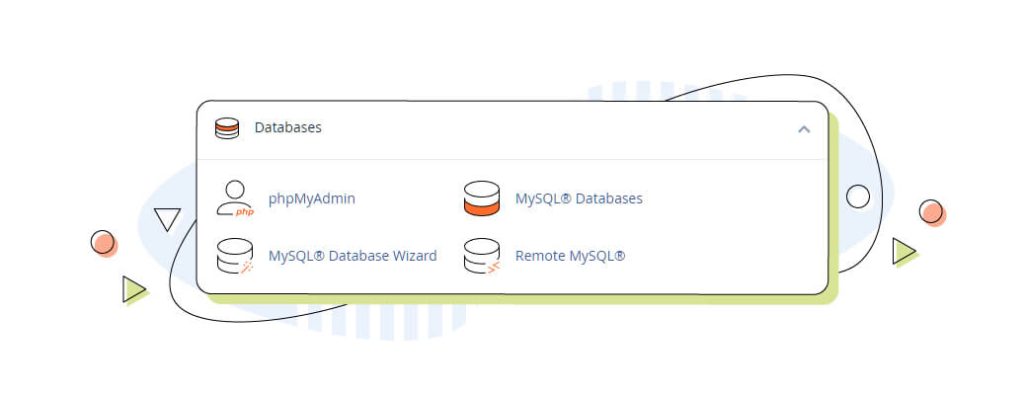
Setting Up and Managing Databases:
- In your cPanel dashboard, navigate to the “Databases” section and click “MySQL Databases.”
- Create a new database by entering a name and clicking “Create Database.”
- Add a user to the database, assigning privileges like “All Privileges” or custom permissions.
- Connect your website to the database using the provided database details. Connecting your WordPress website to the database, for example, can be done via the first install wizard or automatically if you’re using one of our Managed WordPress Hosting solutions.
PhpMyAdmin is your main tool for configuring or creating a MySQL database and accounts. It’s a separate application you can launch from inside cPanel.
Mastering these basic website management tasks in cPanel is crucial for maintaining a functional and well-organized website. In the subsequent sections of this guide, we’ll explore more advanced features and optimization techniques to enhance your website management skills further.
To recap, the three main things you need to know how to configure inside your cPanel are:
- Emails
- File Manager
- Databases
With these three, you can launch whatever you like on your web hosting account easily. To read more in-depth articles about HostPapa’s web hosting services, look for them in the Knowledge Base.
Software Installation via Softaculous
While installing WordPress is straightforward for more advanced users, new website owners who just entered the game might feel overwhelmed by the whole process. This is where the Softaculous installer comes in handy.
With it, installing applications like WordPress, Joomla, and others becomes an easier task:
- Navigate to the “Software” or “Softaculous Apps Installer” section in cPanel.
- Choose the application you want to install, such as WordPress, Joomla, or Drupal.
- Follow the on-screen instructions, including providing essential details like your website’s name and admin credentials.
- Click “Install,” and Softaculous will handle the rest, including database setup.
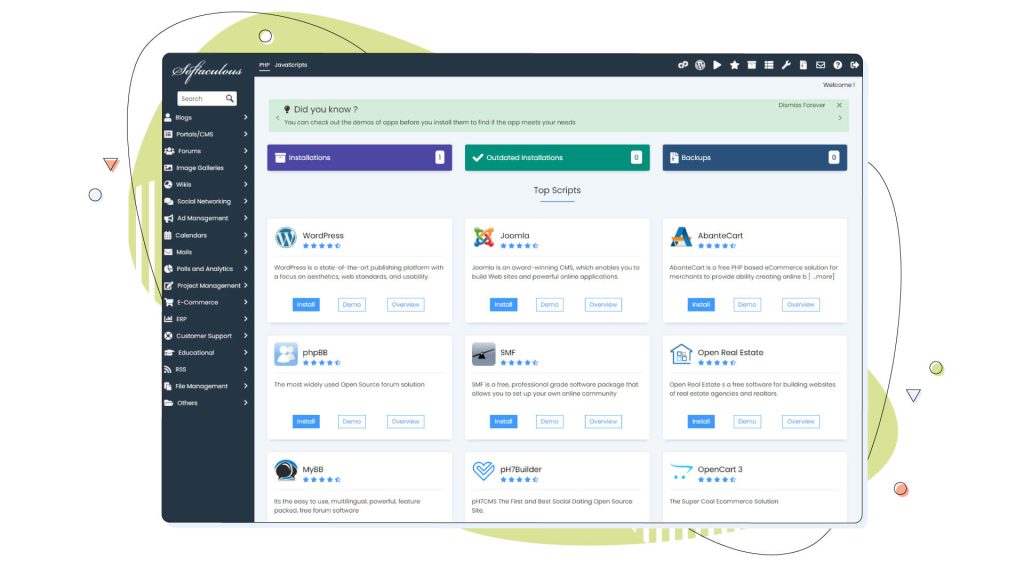
For more detailed guides, be sure to check out our Knowledge Base!
Going Pro: Advanced Website Features via the cPanel
Managing your website is not just about the basics; it’s also about fine-tuning and optimizing every corner of your website. It’s like polishing your store’s front!
In this section, we’ll explore some advanced features of cPanel that can help take your website to the next level.
Security and Backups
Implementing security measures to your account is now easier than ever. Solutions such as Protection Power go all out to prevent harmful content from accessing your website. They come with proactive security measures and run daily scans.
Security is paramount for any website, and cPanel offers a range of tools to help you safeguard your online space. The latest versions of cPanel come with a strong two-factor authentication system that provides fantastic security beyond the usual username and password combinations.
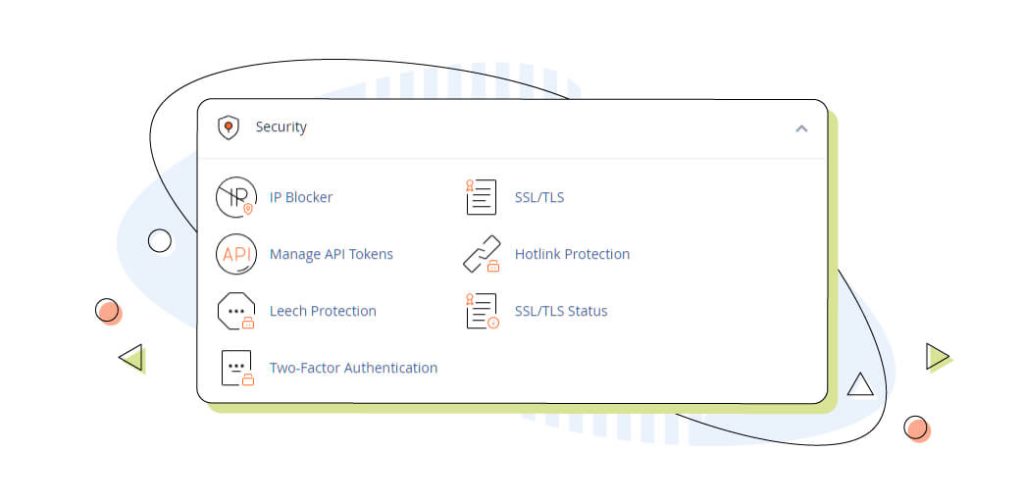
Below, you’ll find a few other essential security measures in cPanel:
- Password strength: Ensure that all your accounts, including cPanel and email, have strong, unique passwords. This can prevent unauthorized access.
- Hotlink protection: Prevents other websites from directly linking to your files. Otherwise, they might use your account’s bandwidth to their advantage. While it’s a big problem for website owners, hotlinking can be prevented.
- Two-factor authentication (2FA): Enable 2FA for an additional layer of security. It requires a secondary authentication method, such as a code sent to your mobile device, to access your cPanel account.
- SSL Certificates: SSL certificates secure data sent between your website and your visitors. It enhances security and boosts your site’s credibility in the process.
- Firewalls and IP blocking: Use cPanel’s built-in firewalls to block malicious IP addresses and protect against DDoS attacks.
Backups are your safety net in case of unexpected data loss or errors. With cPanel, you can easily schedule automated backups:
- Navigate to the “Backup” or “Backup Wizard” section in cPanel.
- Choose between a full backup or partial backup.
- Click “Generate Backup” to download the selected backup copy. This ensures that your website’s data is always safe and recoverable.
HostPapa automatically backs up your website files on some shared hosting and all Managed WordPress hosting plans.
Performance Optimization
To optimize your website’s performance, cPanel provides a few options, but generally, it’s best to follow the existing best practices for Gzip compression, image compression, and various other optimization tasks.
cPanel’s Optimization option compresses all content on your website for better performance.
Conclusion: Know Your Tools, Including cPanel
So, if you’re new to website creation or an experienced web administrator or freelancer looking at web hosting providers, learning how to use cPanel is essential. Whether it’s your first time or you’re a pro, cPanel is a must-have tool.
From domain management to file management and database creation, cPanel is an all-in-one tool comparable to a Swiss army knife. There’s a menu for any action regarding your website.
Perhaps you’re just reading to get an idea before you choose your web hosting plan. In that case, exploring our web hosting solutions seems like a smart choice.


