This Knowledge Base article explains how to create a new WordPress site with your Managed WordPress Dashboard, an easy-to-use tool for HostPapa’s customers. Just follow these steps:
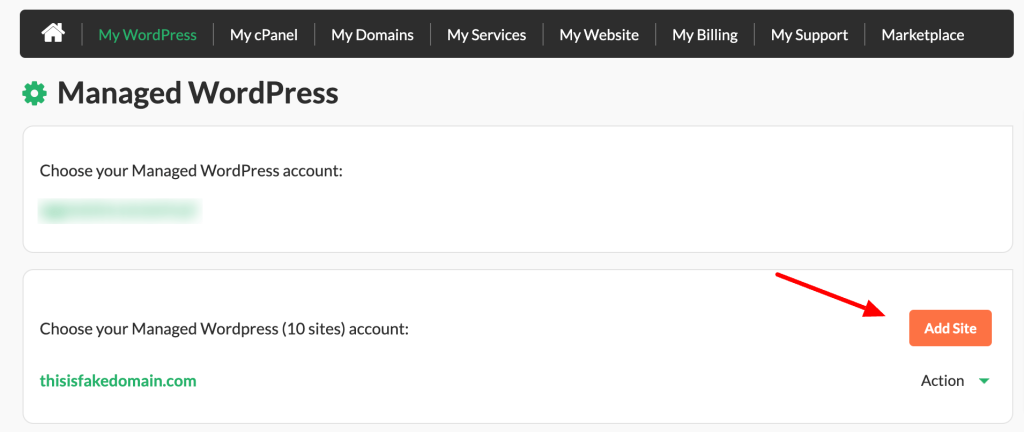
- Log in to your HostPapa Dashboard.
- Click on My WordPress.

- Click Add Site.

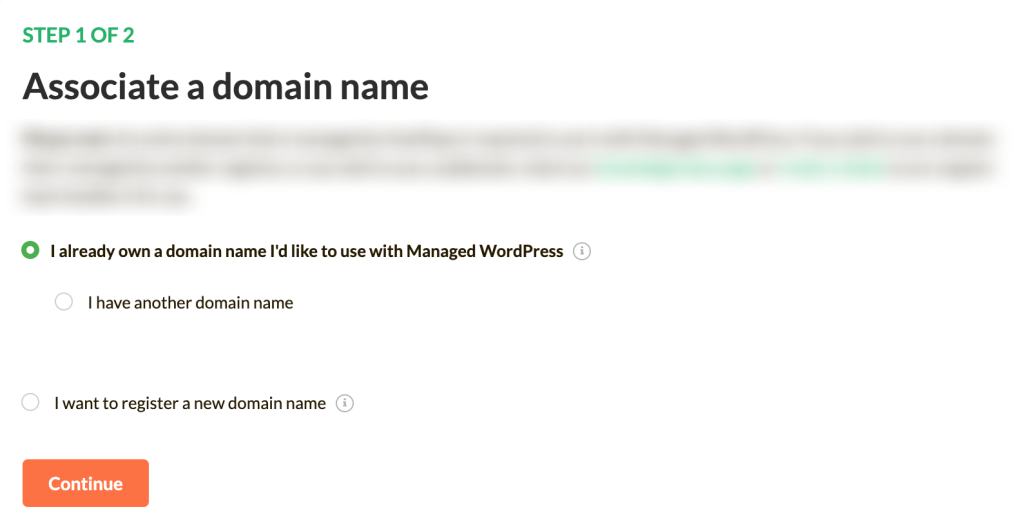
- To create a new Managed WordPress site, choose one of the following options:
- I already own a domain name I’d like to use with Managed WordPress – Choose this if you have an existing domain registered with HostPapa. In this article you can learn how to point your HostPapa domain to Managed WordPress.
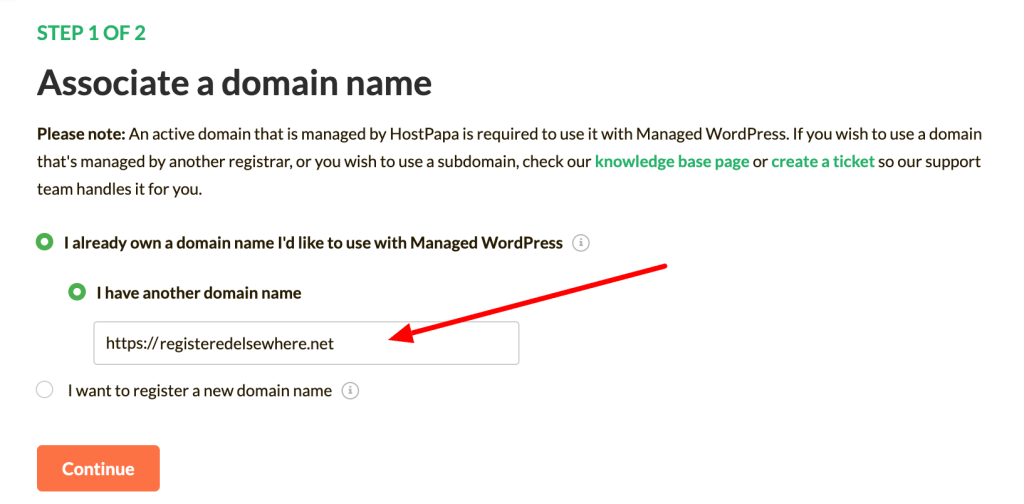
- I have another domain name – If you don’t have a domain registered with HostPapa, this option will activate. Choose this option if you have an existing domain registered with a 3rd-party registrar. In this article you can learn how to point a domain registered by a third party to Managed WordPress.
- I want to register a new domain name – Choose this option if you wish to register a new domain with HostPapa.

- If required, add your domain name and click Continue.

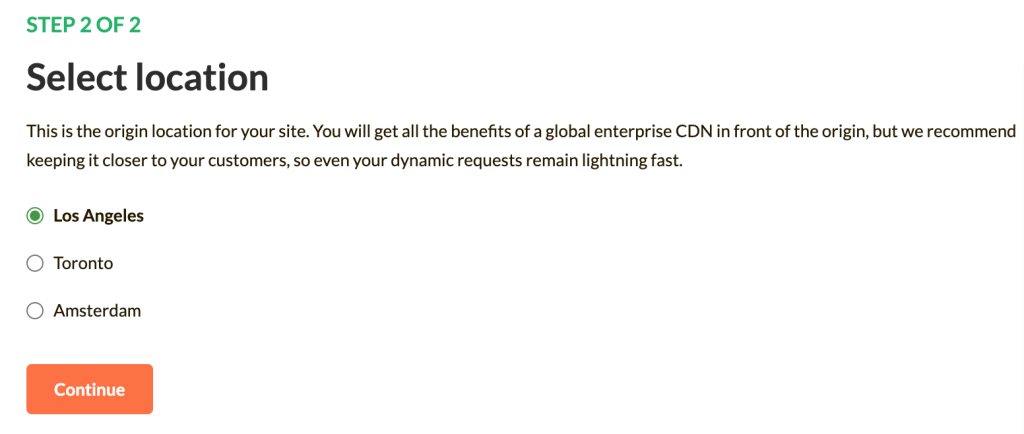
- Select your website location and click Continue.

- Finally, you will be redirected to your HostPapa Dashboard. Your new site will appear with the label “Installation in progress”.

- After a few minutes, this label will disappear and your site will be ready to use.
Now you know how to create a new WordPress site with your Managed WordPress Dashboard! Here are more related articles for you:
More Managed WordPress Resources
- How to delete a site in your Managed WordPress Dashboard
- How to create a staging site on Managed WordPress service
- How to clear your cache on Managed WordPress service
If you need help with your HostPapa account, please open a support ticket from your dashboard.
