In this article, we’ll show you how to connect to enable WordPress SSH access through your Managed WordPress Dashboard. Just follow these steps:
Note: SSH and SFTP will only work with SSH key-based authentication. Password authentication is not supported.
To enable SSH access on your MWP account, you will need to have a few things ready:
- SSH public key
- Terminal app (PuTTy, Terminal, etc.)
- Log in to your HostPapa Dashboard.
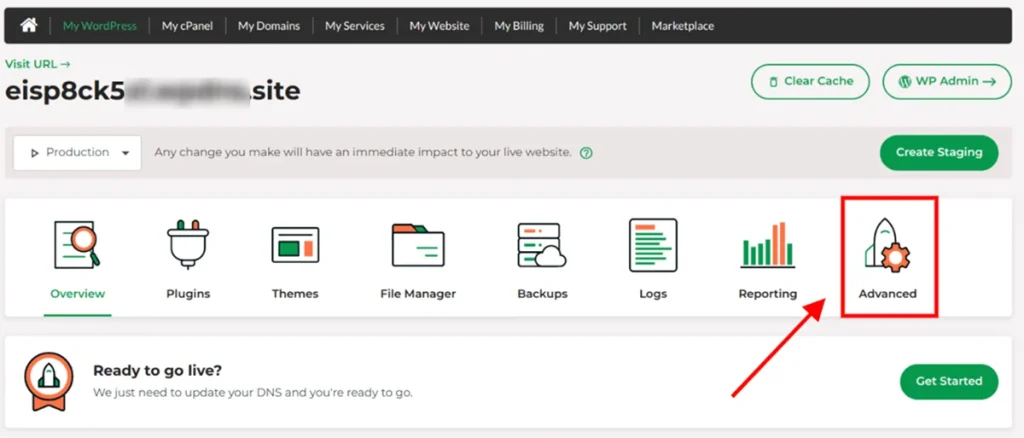
- Click on My WordPress tab.

- Select the name of the website you would like to manage.

- Your Managed WordPress Dashboard will open. Click the Advanced tab.
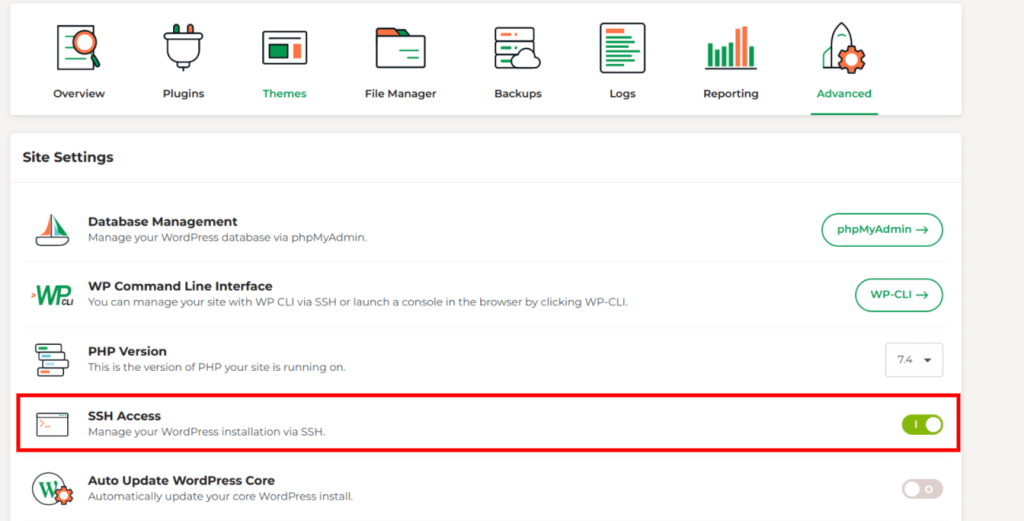
- Enable SSH access by clicking on the toggle switch.
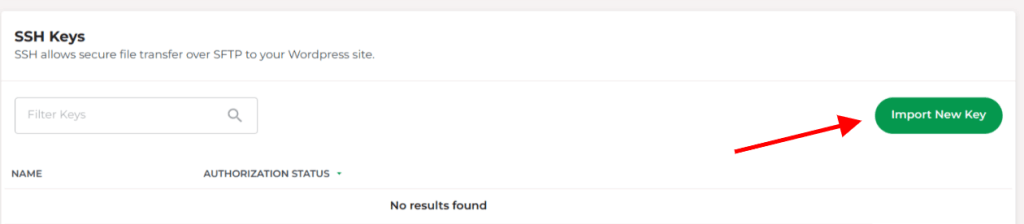
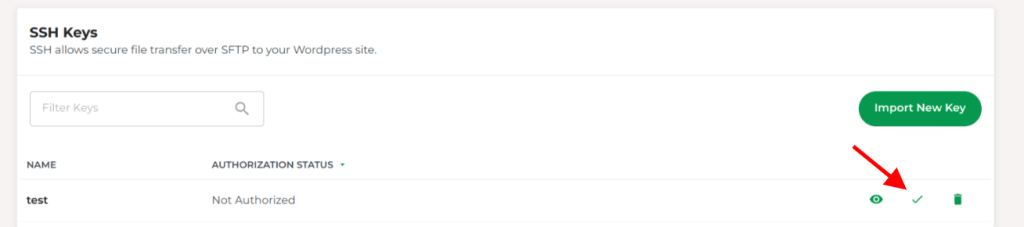
- Import your SSH public key on the same page in the SSH Keys section. Note: if you do not have a public key, you can generate an SSH key pair using a tool like PuTTyGen.
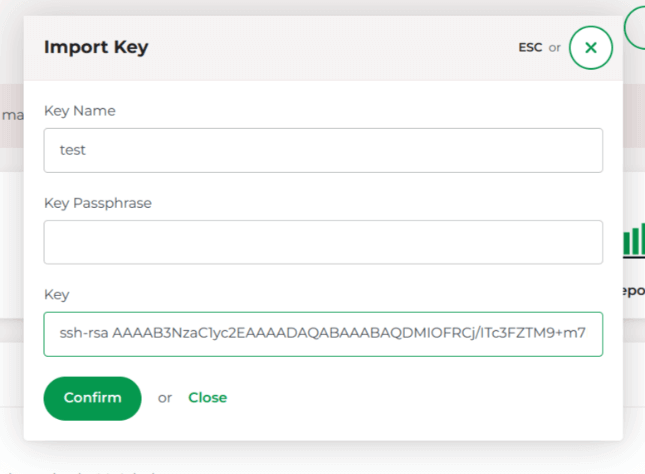
- Once your key is imported, you will need to activate/authorize the key by clicking the checkmark next to it to allow it access SSH on your MWP account.
SSH is now enabled on your site and you can connect with your SSH key.
To connect to SSH, you will need to use your private SSH key along with the SFTP username and IP address listed under the Site Information section of your MWP Dashboard.
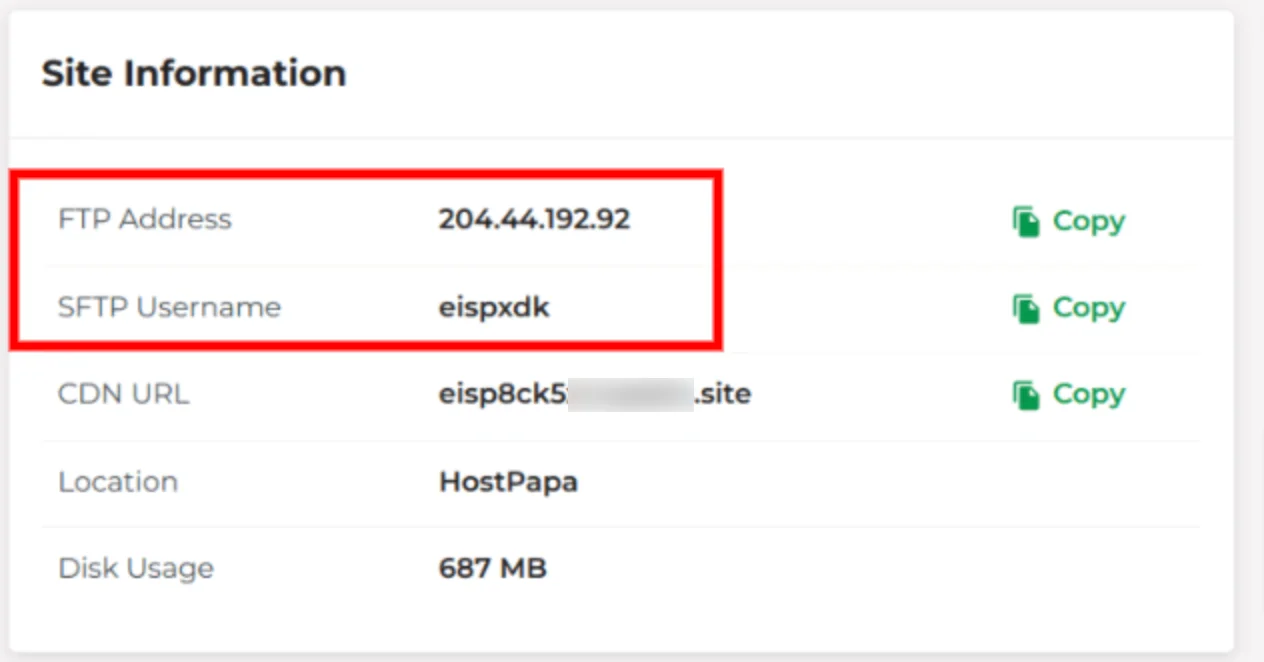
The SSH command will look like this:
ssh eispxdk@204.44.192.92
That’s it! You have enabled WordPress SSH access.
If you need help with your HostPapa account, please open a support ticket from your dashboard.
