Digital advertising is all around us, but achieving success in that field isn’t just catchy slogans or eye-popping visuals. Sometimes, you must understand what your audience craves and how to navigate this intricate space.
Conversions are the most important metric you can measure, and it’s one of the core metrics you need to track in your campaigns.
In this blog, we’ll go through what conversion pixels are and show you some creative ways to incorporate them into your marketing strategy.
- The Power of Tracking Your Campaigns
- What Is a Conversion Pixel?
- Creating Your Own Conversion Pixels for Ad Campaigns
- Elevate Your Conversions with Fast-Loading Websites
The Power of Tracking Your Campaigns
Each click, hover, and interaction leaves a digital breadcrumb trail – and deciphering that trail unveils what most of your visitors prefer on your website.

This is extremely helpful for eCommerce stores constantly testing product placements, landing pages and everything in between. Still, it can also shed light on every organization, business and freelancers.
Why does it matter, you ask?
Simple – understanding how users groove with your content is like having a superpower. You tweak, adjust, and optimize based on real, hard data. So, no more shooting in the dark.
While we have talked about the most important website metrics to track before, it’s good to show you a few of these so you get the complete picture:
- Conversion Rate
- Average Time on Page
- Bounce Rate
- Top Traffic Sources
- Device Source
Now, it’s time to talk about conversion pixels, which is the central theme of this article.
What Is a Conversion Pixel?
A conversion pixel is a small, invisible image or code snippet placed on a web page. They’re used as a supplementary service and typically consist of JavaScript code.
Its job?
To track specific user actions, such as clicks, sign-ups, or purchases. These tracking pixels act as silent observers, capturing valuable information about how users interact with your website and ads.
How does it work?
Let’s say you’re running an ad campaign to promote your latest product. You place a conversion pixel on the “Thank You” page that users see after making their purchase.
When someone completes a purchase, the pixel sends a signal back to the advertiser (in that case, you), letting them know that a conversion has been completed.
With that kind of data in hand, you can follow the customer’s path and better understand where the customer journey started and whether they had any problems in their way.
Creating Your Own Conversion Pixels for Ad Campaigns
Creating your own conversion pixels for your digital marketing campaigns isn’t that hard, and you can track conversions by following each tool’s guidelines.
First things first, you need to choose where the magic happens. Are you on Facebook, Google Ads, or another platform? Each has its own set of rules, but worry not; they all play nice with conversion pixels. Let’s take Facebook, for example.
Facebook Magic: A How-To Guide
According to Facebook’s useful online manual, here’s a quick rundown of the things you need to do to get your conversion pixel code:
- Go to Business Settings in Business Manager
- Select your business
- Click Data Sources
- Select Pixels
- Click Add by the search bar at the top of the page
- Type in a name for your pixel
- Optional: Enter your website URL
- Click Continue
Bear in mind that popular social media platforms are constantly introducing changes to how they track such data, so it’s best to visit their help centres to get the most up-to-date information.
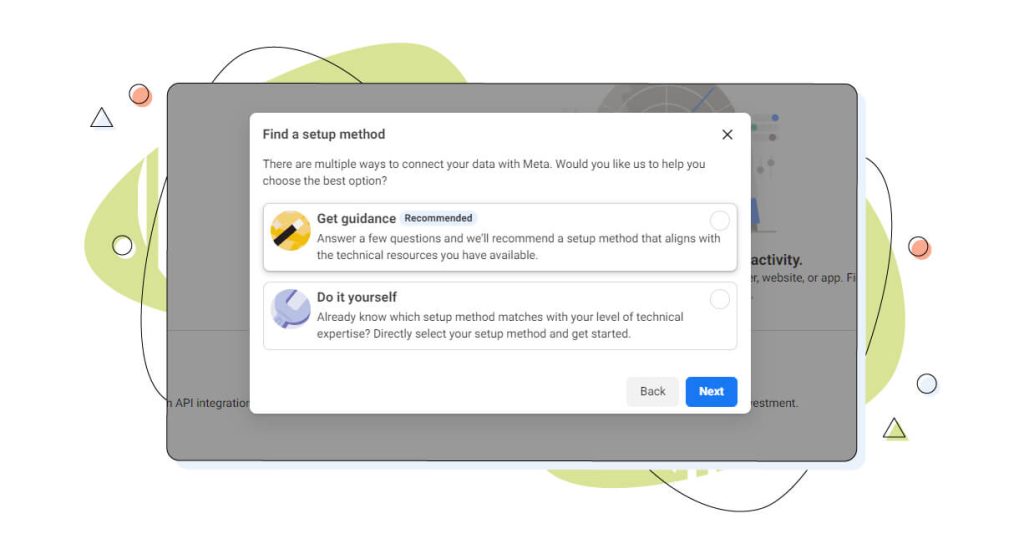
Also, most social media platforms will guide you through the process of creating your own conversion tracking pixel, as shown in this screenshot.
Pasting that Pixel to Your Website’s Code
So, you’ve got your conversion pixel, so now, it’s ready to be inserted into your website.
How do you do it?
The answer is simpler than you might think.
Copy that pixel code from your chosen platform. Most will have a field with the code ready to be inserted into your content.
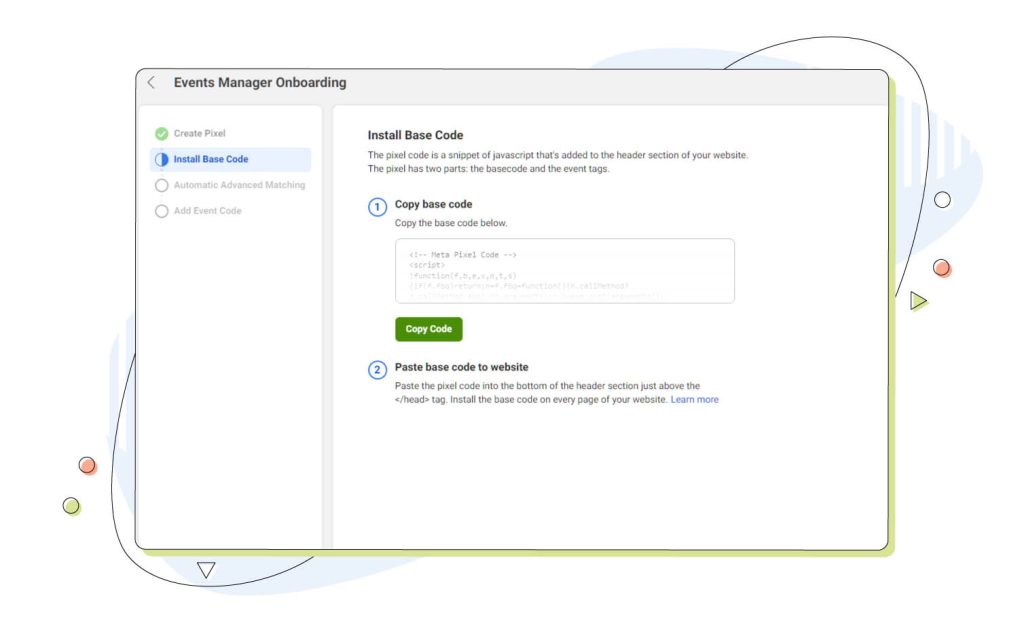
That code needs to get above your website’s </head> tag.
In WordPress, that’s under Appearance > Theme File Editor. From the right-hand side, select your theme from the dropdown menu and click the header.php file.
This file is an isolated view of your WordPress site’s header, making editing a lot easier, especially for newcomers to the website world.
Next, find the </head> tag with Ctrl (or Command) + F, and paste the Meta Pixel. Lastly, click Update file from the bottom of the page to finish the process.
Elevate Your Conversions with Fast-Loading Websites
Ever heard the saying, “Time is money”? Well, in the online space, it’s more like “Time is Conversions!”
Let’s delve into the need for speed regarding your website, how it can make your conversions soar and how to make the most of your marketing efforts.
The Need for Speed: A Game-Changer for Conversions
Imagine this: you stumble upon a website that takes forever to load. Frustrating, right? Now, flip the script.
A lightning-fast website might impress users, but it can significantly boost your conversion rates. Why? Because in the fast-paced world of the internet, every second counts.
For example, Walmart once saw that with every one-second improvement in page load times, they measured a 2% increase in conversion rates.
Speed = Satisfaction
Here’s the secret sauce – users love speed. A fast-loading page equals a satisfied user. It’s like a well-tuned engine; everything just clicks.
When your website loads like a breeze, users stick around longer, explore more, and guess what? They’re more likely to convert. The kind of digital hospitality keeps them coming back for more of what you’re offering.
This kind of satisfaction, though, isn’t always easy to reach. So, let’s talk about turbocharging your online presence.
Investing in a reliable web hosting solution is like giving your website a much-needed bump to the fast lane of the online world. HostPapa’s web hosting plans are simply just that.
Imagine the impact on your conversions when your site looks sharp and loads faster than a pizza delivery on a Friday night.
So, here’s a nudge – consider upgrading your hosting.
Conclusion
Conversion pixels, like those described in this article, offer a unique chance to track your conversion funnel and find out how your sales conversions work. By using them, you can make necessary adjustments and optimize your strategies to better align with your brand and target audience so you can use them in future campaigns.
Given the need for speedy website loading from website visitors, upgrading to a superior web hosting option is a wise choice.
With support for up to unlimited websites, fast SSD storage and additional services for maximum safety, the web solutions can cover beginners and demanding users who need the best of the best.
So be sure to hop at HostPapa.com and make your pick.
Remember, we’re not only talking about speed but about an investment in your success. A reliable hosting solution ensures your website is always ready to impress, making those conversions happen in the blink of an eye.
Are you a freelancer seeking a reliable web hosting service? We’ve got you covered! Try our HostPapa shared web hosting at a surprise price, and we have a no-risk, 30-day guarantee!
Enjoyed this post? Head to our HostPapa blog to read more exciting topics like this one!
