In this article, we will show you how to transfer your WordPress site to HostPapa without affecting your website content.This involves backing up your old site and uploading it to the new site. You can either do this manually or use the BackUpWordPress plugin to do so. The following sections describe how to do both.
Transfer your site manually
To transfer your site manually:
- Open phpMyAdmin from your site’s control panel (cPanel or other).
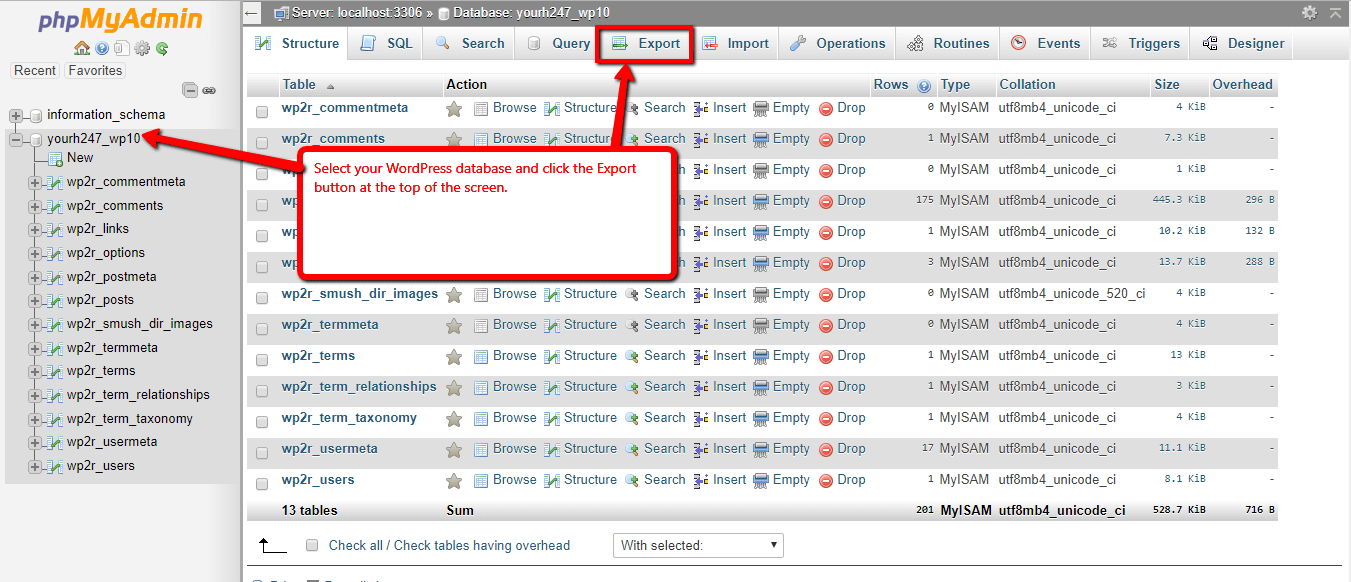
- Select the WordPress database.

- Click the Export button at the top of the page.
- On the Export page, select the Quick option and set the format to SQL.

- Click the GO button.
- When prompted, save the file to your local computer.
- Use an FTP client to download the entire WordPress installation directory to your local computer. Make sure you set your FTP client to view hidden files, as you also need to download the .htaccess file associated with your WordPress directory.
- Once you’ve downloaded both your database backup and your WordPress installation directory, go to your HostPapa account and create a new database for your WordPress installation.
- On your local computer, locate the folder where you stored the files from your old WordPress installation and edit the wp-config.php file as follows:
- Locate the line containing
define('DB_NAME', 'db_name');and change the'db_name'to the name of the database you created in step 8 above. - Locate the line containing
define('DB_USER', 'db_user');(just below the DB_NAME line) and change'db_user'to the username for the database you created in step 8 above. - Locate the line containing
define('DB_PASSWORD', 'db_pass');(just below the DB_USER line) and change'db_pass'to the password you set for the database you created in step 8 above. - Save and close the wp-config.php file.
- Locate the line containing
- Open up phpMyAdmin in your new HostPapa account and import the database backup you created earlier:
- Go to the Import tab.
- Click the Choose File button in the File to Import section of the Import tab and select the backup SQL file.
- Uncheck the Partial Import checkbox.
- Set the format to SQL.
- Click Go. Your database file imports.
- Use your FTP client to upload the WordPress files from your computer to the public_html directory on your HostPapa site. If your old WordPress install was in a subdirectory of your former site, create that directory and upload your files there.
- Follow the Edit your wp-config.php file instructions, Update SiteURL and home options, Update URLs that refer to the old site, and Change your domain DNS settings sections below.
Use the BackUpWordPress plugin to transfer your site
The BackUpWordPress plugin simplifies this entire process.
- Backup your files and database using BackUpWordPress.
- Download the BackUpWordPress zip archive.
- Unzip the archive on your local system.
- Use Softaculous to install WordPress on your HostPapa account.
- Upload the unzipped files to the WordPress directory on your HostPapa account, overwriting all existing files and subdirectories.
- Use phpMyAdmin to import the sql file from your former installation.
- Edit your wp-config.php file as described below.
Edit your wp-config.php file
Use the File Manager in your cPanel to open and edit the wp-config.php file as follows:
- Change DB_NAME to the name of the new WordPress database. Example:define(‘DB_NAME’,’user_wrdp’);
- Change DB_USER to the administrator username. Example:define(‘DB_USER’, ‘username’’);
- Change DB_PASSWORD to the administrator password. Example:define(‘DB_PASSWORD’, ‘password’);
- Change DB_HOST (if necessary – the default is usually okay). Example:define(‘DB_HOST’, ‘localhost’);
- Save your changes.
Update SiteURL and home options
You now need to change the WordPress siteURL and home options to reflect the new installation:
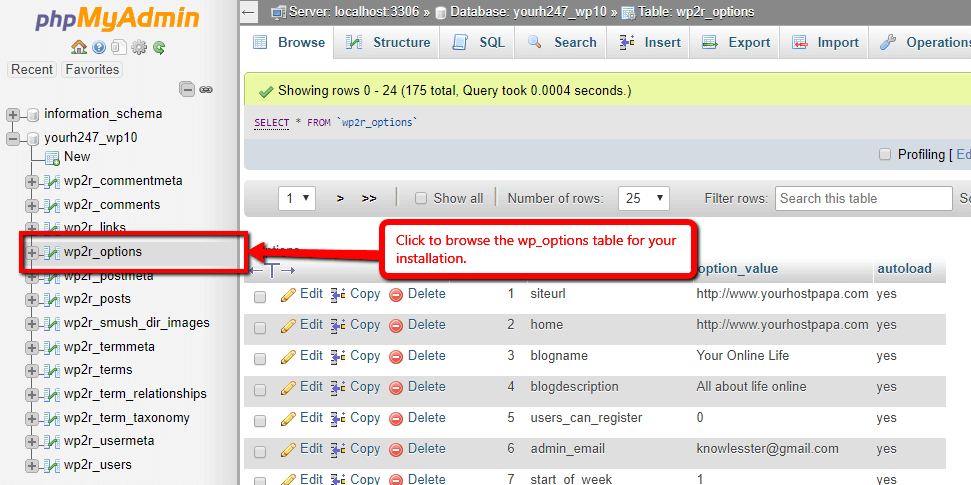
- Open phpMyAdmin and browse the wp_options table.

- Find the siteURL and home entries and change their values to the new URL.

Update URLs that refer to the old site
After you’ve updated the SiteURL and home options, you need to replace references to any URLs from the old site so they point to the new site URL. To do so:
- Open phpMyAdmin.
- Go to the SQL tab and run the following SQL commands:
UPDATE wp_posts SET guid = replace(guid, 'https://old-site-url','https://new-site-url');
UPDATE wp_posts SET post_content = replace(post_content, 'https://old-site-url', 'https://new-site-url');
UPDATE wp_postmeta SET meta_value = replace(meta_value,'https://old-site-url','https://new-site-url');
UPDATE wp_options SET option_value = replace(option_value, 'https://www.old-site-url', 'https://new-site-url') WHERE option_name = 'home' OR option_name = 'siteurl';
UPDATE wp_posts SET guid = replace(guid, 'https://www.old-site-url','https://new-site-url');
UPDATE wp_posts SET post_content = replace(post_content, 'https://www.old-site-url', 'https://new-site-url');
UPDATE wp_postmeta SET meta_value = replace(meta_value,'https://www.old-site-url','https://new-site-url'); - Exit phpMyAdmin.
Change your domain DNS settings
Last, you must log in to your domain registrar account and update your DNS settings to point to the new HostPapa server. DNS propagation can take up to 48 hours, although most HostPapa customers find that it happens within an hour.
If you need help with your HostPapa account, please open a support ticket from your dashboard.
