In this article, we’ll show you how to edit the Read More button in WordPress and create post excerpts. As with most customizations, the way you customize the Read More link depends on your WordPress version and theme. The examples in this article are using WordPress version 4.8 with the Twenty Seventeen theme.
Note: Some of the customizations explained in this article require you to edit WordPress configuration files. Always make backup copies of files before editing.
It’s also best practice to only make one change before each test of your site, so if an error occurs, you’ll know the most recent change likely caused it. There are three methods you can use to edit files:
- Some files can be edited directly in WordPress. Log in to WordPress via the HostPapa Dashboard. Go to Appearance > Editor. Locate the file, then click the file name to open it in the editor.
- If the file you need to edit isn’t available in the WordPress dashboard, you can download it using an FTP client, then edit it with your preferred text editor. When you’ve made the changes in the file, save and upload it.
- You can also edit the file in the
cPanel File Manager .
About WordPress excerpts
A WordPress excerpt is a post summary or teaser displayed on your site’s home page, archives, categories, and site search results. The excerpt should let your reader know what the post is about and entice them to read the full text. A Read More link is displayed at the bottom of the excerpt, and when clicked, the entire post is opened on its own page.
Creating excerpts
There are three ways to create post excerpts:
- Manually inserting a Read More tag in the post
- Automatically creating an excerpt from the first 55 words of the post
- Manually adding a custom excerpt in the WordPress editor
The first method, inserting a Read More tag, is the simplest and most common, so let’s start there.
1. Insert a Read More tag
When you’re writing or editing a post in the editor, you can insert a Read More tag at any point in the post. This method allows you to choose which posts have excerpts, and you can make the excerpt any length you want.
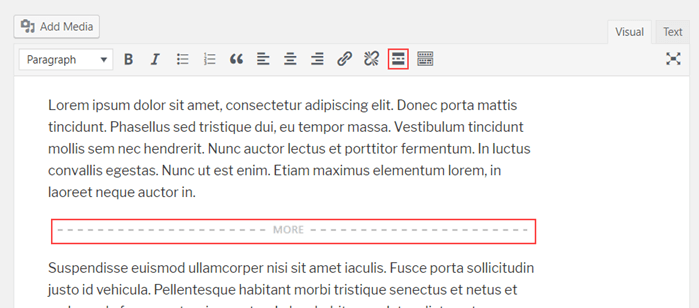
- If you’re using the Visual editor, place your cursor at the end of the text that you want to be the excerpt.
- Click Insert Read More tag in the toolbar. A dashed line and ‘MORE’ is displayed at the end of the excerpt.
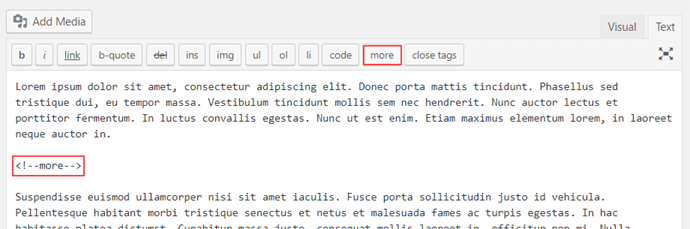
3. If you’re using the Text editor, place your cursor at the end of the text you want to be the excerpt and click more. The more tag is inserted at the end of the excerpt.
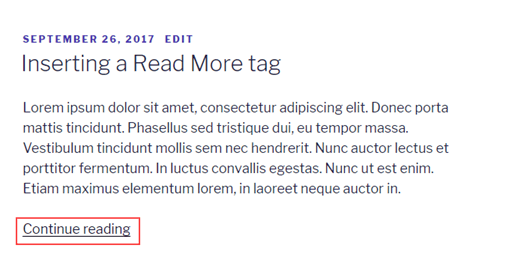
The published post displays only the excerpt on your home page, with a link to view the full post. In this example, the link text is Continue reading.
2. Automatically create excerpts
The second method automatically creates and displays excerpts from the first 55 words of all posts. This method requires editing configuration files and an understanding of template tags, so make sure you have backup copies of the files before you begin. For more information, see the_content and the_excerpt in the WordPress Code Reference.
To automatically create excerpts, you need to replace the the_content template tag with the the_excerpt template tag in your theme template files. The files you need to edit depends on the theme you’re using, but it’s often index.php, archives.php, and category.php. Check your theme’s help documentation for more information.
3. Manually add a custom excerpt
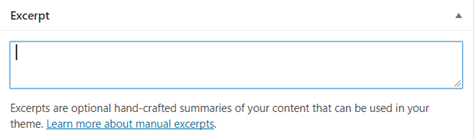
This method displays an excerpt manually added in the Excerpt field in the post editor.
- To use this method, you first need to replace the the_content template tag with the the_excerpt template tag in your theme template files, as described in the Automatically create excerpts method above.
- Then, write your excerpts in the Excerpt field below your post in the WordPress post editor. If the Excerpt field is empty, an excerpt is automatically created using the first 55 words of the post.
Changing the Read More link text
The default Read More link text depends on the theme you’re using on your site. In our example, it’s ‘Continue reading.’ If you want to change the default text, there are a few ways to do it, depending on how you create excerpts and whether you want the same link text for all excerpts.
Change the default Read More text for excerpts
You can change the default Read More link text by adding the following lines of code to app/themes/[your_theme]/functions.php:
function modify_read_more_link() {
 return '<a class="more-link" href="' . get_permalink() . '">Your Read More Link Text</a>';
}
add_filter( 'the_content_more_link', 'modify_read_more_link' );
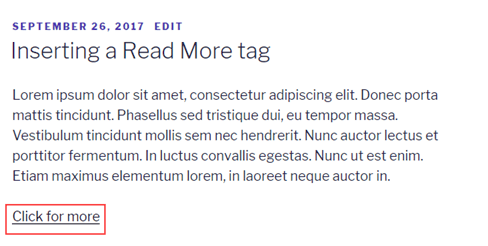
Change Your Read More Link Text to the text you want to display. In our example, we changed it to Click for more, and our excerpt now looks like this:
Note: This code will not work if you’re using a child theme and the parent theme has its own ‘read more link’ filters. In that case, you’ll need to add a remove_filter() function to remove the parent filter. For more information, see Modify the Read More text when using the the_excerpt()
Change the Read More text for automatically created excerpts
If you automatically create excerpts using the the_excerpt tag, add the following lines of code to app/themes/[your_theme]/functions.php and change Your Read More Link Text to the text you want to display.
function new_excerpt_more($more) {
 global $post;
 return '<a class="moretag"
 href="'. get_permalink($post->ID) . '">Your Read More Link Text</a>';
}
add_filter('excerpt_more', 'new_excerpt_more');
Note: This code will not work if you’re using a child theme and the parent theme has its own ‘read more link’ filters. In that case, you’ll need to add a remove_filter() function to remove the parent filter. For more information, see Modify the Read More text when using the the_excerpt().
Use custom Read More text for individual excerpts
Instead of having the same Read More link text on every excerpt, you can add custom link text directly from the WordPress editor.
Note: Use this method only if you didn’t add code to functions.php as described in the previous two methods.
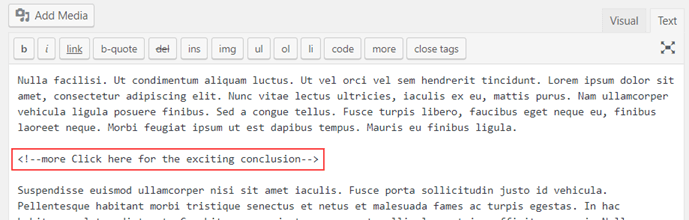
- When you’re writing or updating your post, open the Text editor.
- Locate the <!–more–> tag.
- Add your link text after <!–more. In our example, we added Click here for the exciting conclusion.
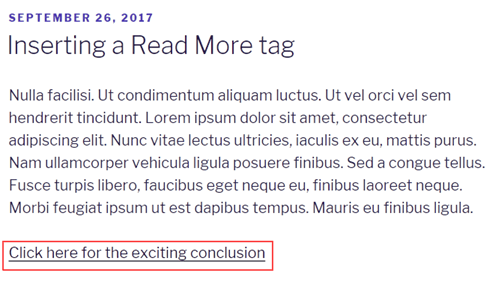
The published excerpt now looks like this:
Disabling scrolling past the excerpt in the full post
By default, when you click the Read More link in an excerpt, the full post, including the excerpt, is displayed, with the web browser automatically scrolling to the beginning of the text immediately after the excerpt.
To prevent this scrolling, add the following lines of code to app/themes/[your_theme]/functions.php.
function remove_more_link_scroll( $link ) {
 $link = preg_replace( '|#more-[0-9]+|', '', $link );
 return $link;
}
add_filter( 'the_content_more_link', 'remove_more_link_scroll' );
Removing the excerpt from the full post
When you click the Read More link in an excerpt, the full post is displayed including the excerpt. However, if you don’t want excerpts to be displayed with the full posts, there are two ways of removing them:
- Add a <!–noteaser–> tag to the post.
- Edit post templates to remove all excerpts from posts.
Add a <!–noteaser–> tag to the post
Use this method if you create excerpts in the WordPress editor and you want to remove excerpts from some full posts.
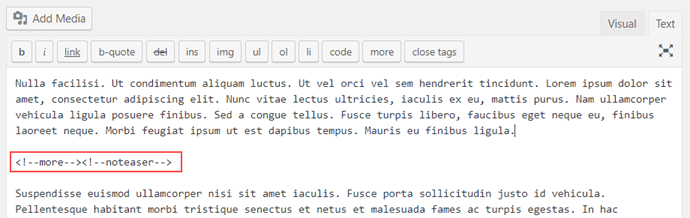
- When you’re writing or updating your post, open the Text editor.
- Locate the <!–more–> tag.
- Immediately following it, add <!–noteaser–>. It should look like this:
When you publish or update the post, the excerpt won’t be displayed with the full post.
Edit post templates to remove all excerpts from posts
Use this method to remove all excerpts from all full posts automatically.
- Open your post template file. The file’s name depends on the theme you’re using but could be post.php, index.php, or similar. In our example, it’s post-template.php.
- Locate this line:
function the_content( $more_link_text = null, $strip_teaser = false) {
3. Change false to true.
function the_content( $more_link_text = null, $strip_teaser = true) {
Excerpts will no longer be displayed with full posts.
More information
For more information about template tags and customizing how dates and times are displayed, see the following WordPress documentation topics:
If you need help with your HostPapa account, please open a support ticket from your dashboard.
