When you install WordPress for the first time, you can choose a root domain (https://www.yoursite.com) or a subdomain (https://blog.yoursite.com) to host the platform. If you decide to make a change, follow these steps to move WordPress from a subdomain to a domain.
1.Because you’ll be making significant changes, you should back up your WordPress site. You can use various plugins to back up your WordPress files and database, including the cPanel Backup Tool, which is available from your HostPapa dashboard. To learn more about backing up your WordPress site, read this Knowledge Base article.
2. Once your site is backed up, open My cPanel in the HostPapa Dashboard.
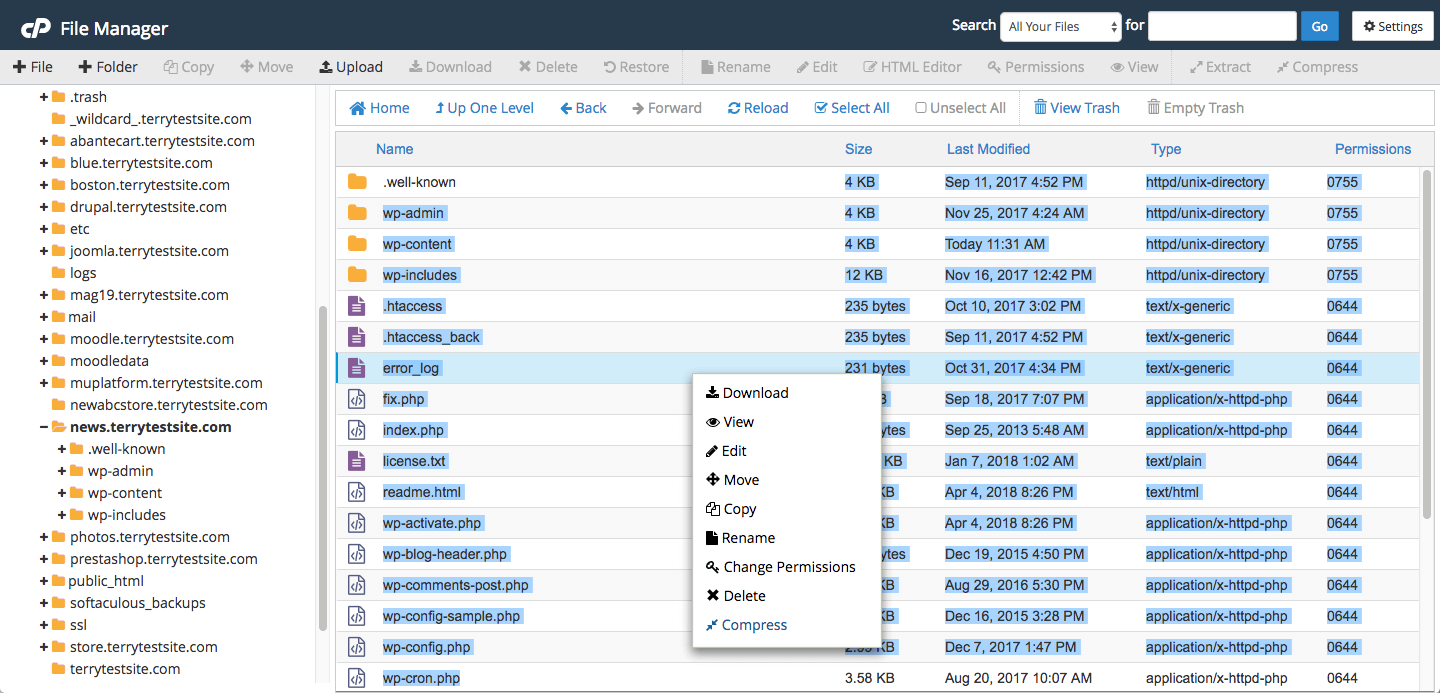
3. Select Files > cPanel File Manager.

4. Navigate to your WordPress root folder and download all files and folders to your local computer. A convenient way to do this is to highlight all files and folders, then select Compress from the cPanel File Manager command bar. Then download the compressed archive file that is created. Alternatively, you can highlight your files and use the Download command.
5. Now, navigate to your domain root folder – this will be called public_html. Upload your WordPress site files from your local PC to this folder.
6. With the site files relocated, you can now amend your WordPress site configuration. Highlight wp-config.php and select Edit from the command bar.
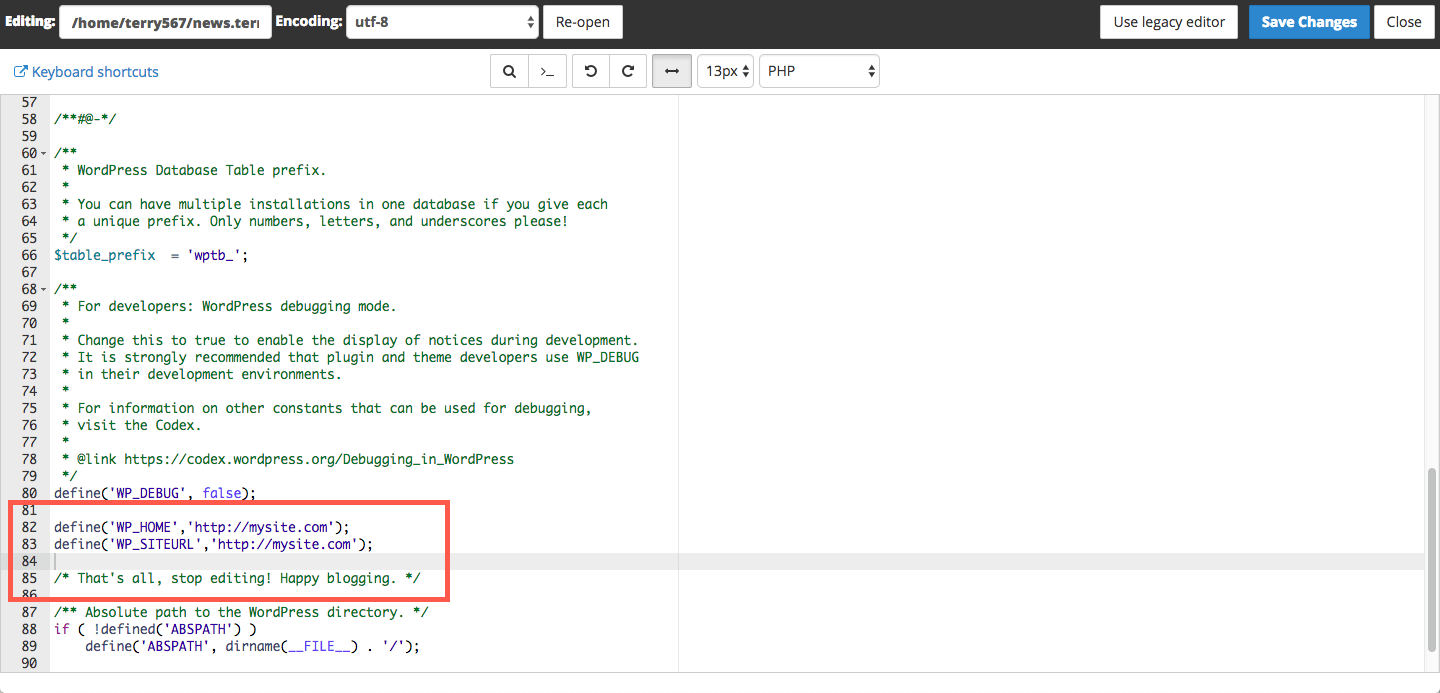
7. Add the following lines to wp-config.php just before the line that reads /* That’s all, stop editing! Happy blogging. */
define('WP_HOME','https://mysite.com');
define('WP_SITEURL','https://mysite.com');
8. Change mysite.com to your root domain.
9. Save the file and close the cPanel File Manager editor. You should now be able to access the WordPress administration dashboard via your root domain.
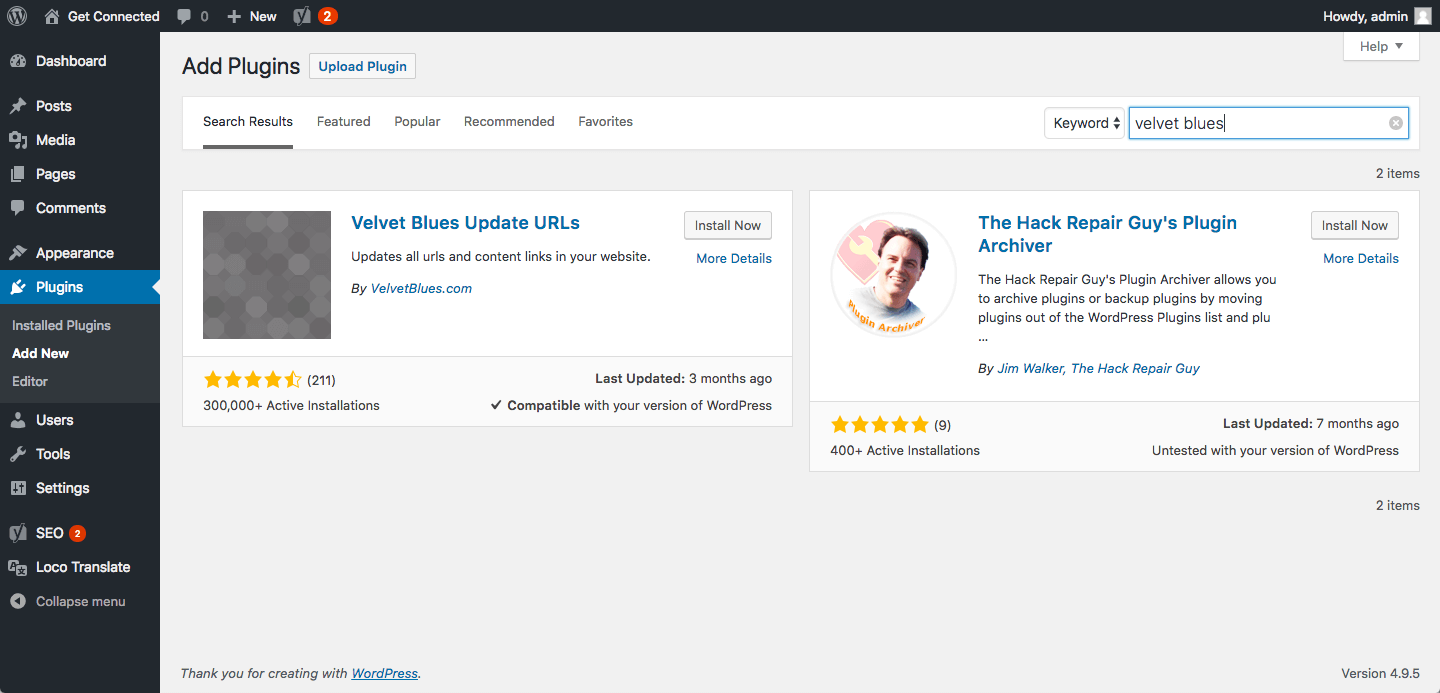
10. The next step is to update any links pointing to your subdomain so that they now point to the root domain. The simplest way to update your URLs is with a plugin called Velvet Blues Update URLs. In the WordPress admin dashboard, head to Plugins > Add New, then search for Velvet Blues Update URLs.
11. Install, then activate the plugin.
12. Select Tools > Update URLs from the WordPress sidebar. Enter your old (subdomain) and new (root domain) URLs.
13. Check all options except Update All GUIDs.
14. Click the Update URLs Now button to proceed.
15. The final step is to route all traffic that visits your subdomain to your root domain by editing your site’s .htaccess file. Head back to cPanel File Manager and, at the top right of the screen, click the Settings button.
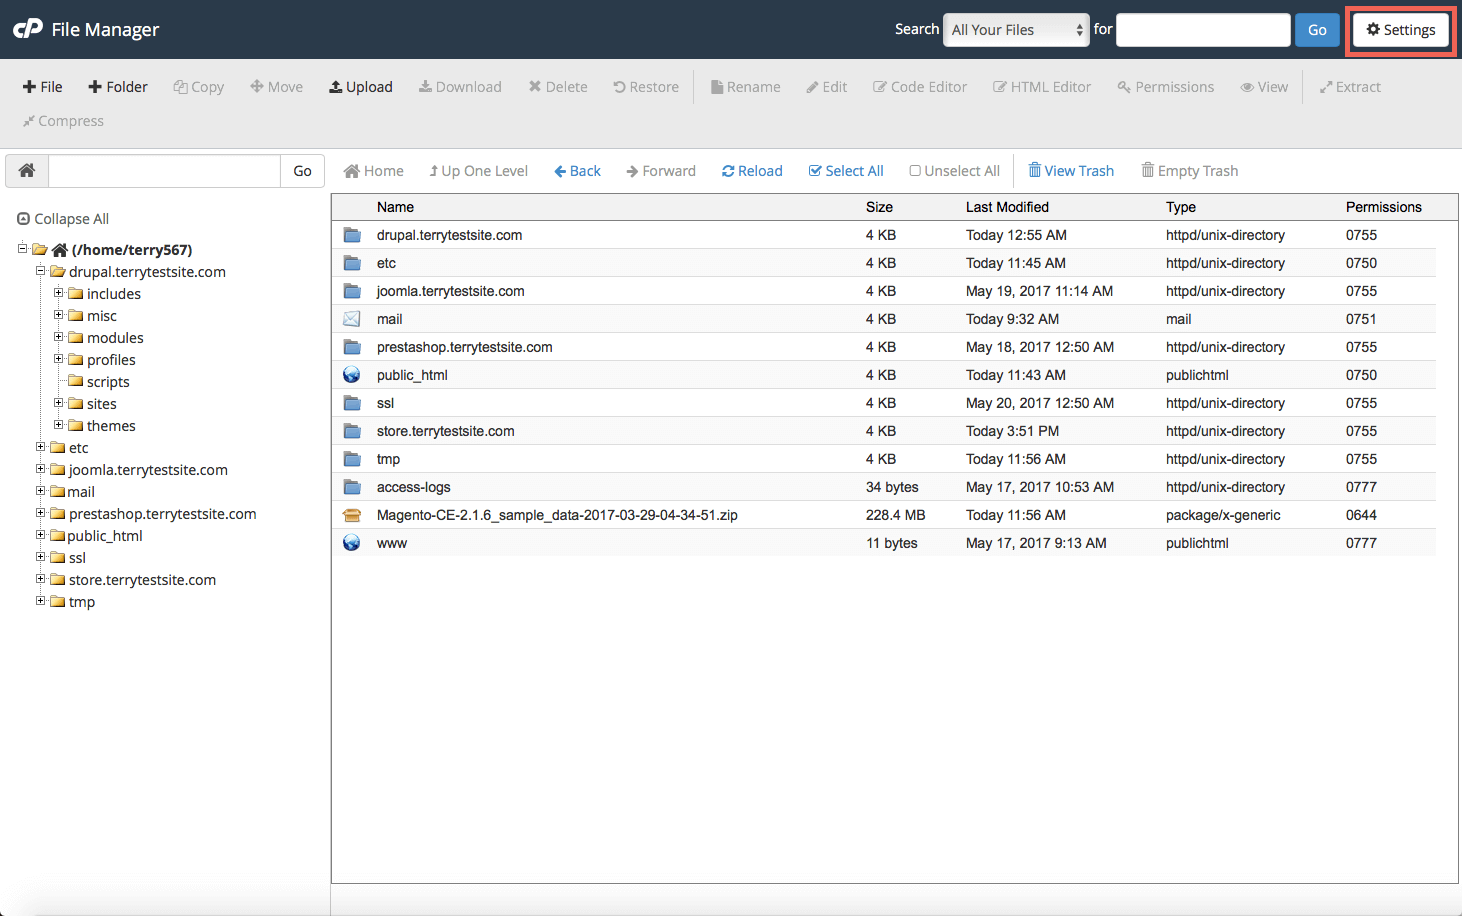
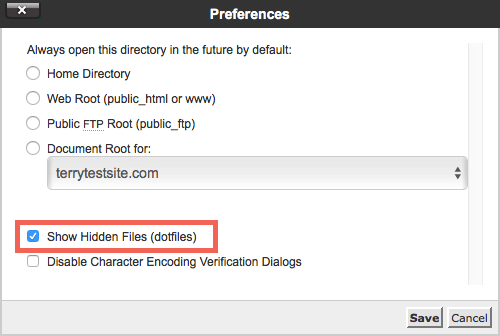
16. .htaccess files are hidden from view by default. To expose them, ensure Show Hidden Files (dotfiles) is checked in the Preferences panel, then click Save.
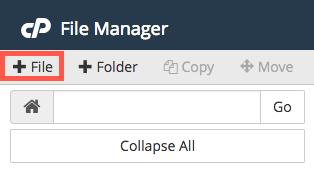
17. Navigate to your subdomain folder. If you see an existing .htaccess file, delete it, then create a new .htaccess file by selecting + File.
18. Select the new file and click Edit in the command bar.
19. Enter the following code:
<IfModule mod_rewrite.c>
RewriteEngine On
RewriteBase /
RewriteCond %{HTTP_HOST}
 ^yoursubdomain\.yoursite\.com$ [NC]
RewriteRule ^(.*)$ "https://www.yoursite.com/$1" [R=301,L]
</IfModule>
20. Remember to use your own subdomain and domain names in the code. Save the .htaccess file and close cPanel File Manager to complete the changeover.
If you need help with your HostPapa account, please open a support ticket from your dashboard.
