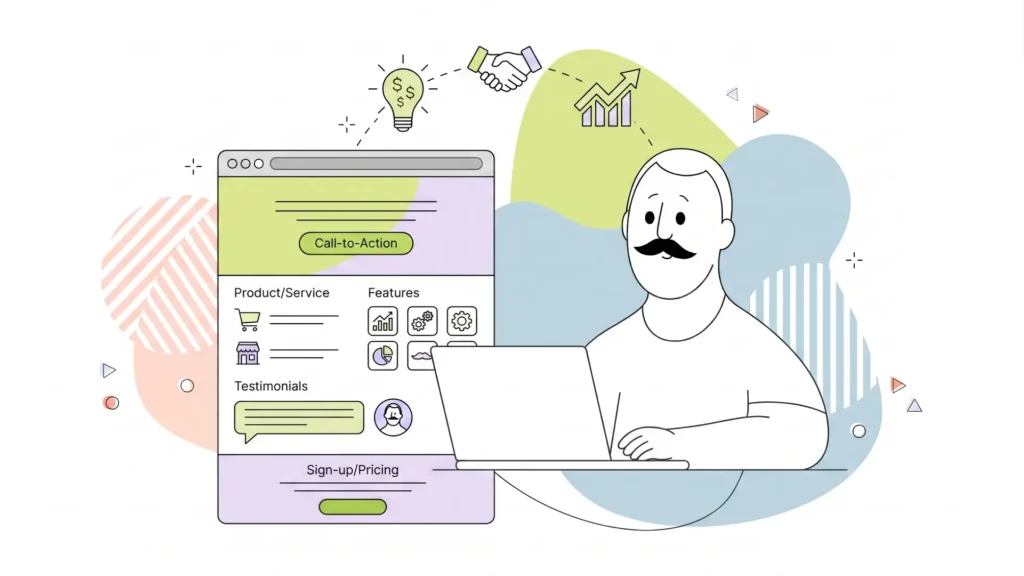
If you’ve been thinking about creating a website, there’s a good chance you’ve come across WordPress. That’s because it powers more than 43% of all websites on the internet, making it the world’s most popular Content Management System (CMS). From personal blogs and small business websites to online stores and large company portals, WordPress gives millions of people an easy way to build and manage a professional website.
The best part? You don’t need to know how to code.
If you’re launching a business, starting a blog, building a portfolio, or creating an online store, WordPress gives you the flexibility to create the website you want without hiring a developer. Combined with reliable hosting and the right tools, you can have your website online in just a few hours.
In this guide, we’ll show you how to build a WordPress website in 10 simple steps. Along the way, you’ll learn how to choose a domain name, pick the right hosting plan, install WordPress, customize your design, add the features you need, and prepare your site for search engines and visitors. By the time you’ve finished reading, you’ll have everything you need to launch your first WordPress website with confidence.
- WordPress.com vs. WordPress.org: Which One Should You Choose?
- Step 1: Define Your Website Goal
- Step 2: Choose a Domain Name
- Step 3: Choose WordPress Hosting
- Step 4: Install WordPress
- Step 5: Understand the WordPress Dashboard
- Step 6: Choose & Install a WordPress Theme
- Step 7: Install Essential WordPress Plugins
- Step 8: Create Your Core Pages
- Step 9: Set Up Your WordPress Site for SEO
- Step 10: Launch, Secure & Back Up Your Site
- Ready to Build Your Website?
WordPress.com vs. WordPress.org: Which One Should You Choose?
One of the first things new website owners notice is that there are two versions of WordPress: WordPress.com and WordPress.org. Although they share the same name, they’re designed for different needs.
Understanding the difference now can save you time, money, and frustration later.
| Feature | WordPress.com | WordPress.org |
| Hosting | Included | Choose your own hosting provider |
| Cost | Free plan available with paid upgrades | WordPress software is free; hosting is required |
| Customization | Limited on lower-tier plans | Full control over themes, plugins, and files |
| Plugins | Available only on higher plans | Install any compatible plugin |
| Themes | Limited selection on free plans | Thousands of free and premium themes |
| Best For | Personal blogs and hobby websites | Businesses, online stores, portfolios, and professional websites |
WordPress.com is a hosted service. You create an account, choose a plan, and your website is hosted for you. It’s a simple option for personal projects, but you’ll run into restrictions as your website expands. Some themes, plugins, and customization features require premium subscriptions.
WordPress.org, often called self-hosted WordPress, gives you complete ownership of your website. You download the WordPress software for free and install it on your web hosting account. This gives you full access to thousands of themes, plugins, and customization options.
For anyone building a business website, online shop, or long-term project, WordPress.org is the better choice. It lets your website expand alongside your goals without limiting the features you can add later.
If you’re using HostPapa’s WordPress Hosting, installing and managing WordPress is straightforward thanks to one-click installation, automatic updates, free SSL certificates, and expert support whenever you need help.

Step 1: Define Your Website Goal
Before registering a domain name or choosing a theme, spend a few minutes deciding what you want your website to accomplish. This may seem like a small step, but it influences almost every decision you’ll make afterwards.
For example, an online store needs different features than a photography portfolio. A business website will organize information differently than a personal blog. Knowing your primary goal helps you choose the right design, plugins, navigation, and content from the beginning.
Ask yourself questions like:
- What do I want visitors to do?
- Who is my audience?
- Will I publish articles regularly?
- Do I need to sell products or services?
- Will people contact me through the website?
Here’s a quick guide to the most common types of WordPress websites.
| Website Type | Primary Goal | Key Features |
| Business website | Generate leads and build credibility | Service pages, contact forms, testimonials |
| Blog | Publish articles and build an audience | Categories, posts, comments |
| Online store | Sell products online | Shopping cart, payment gateway, inventory |
| Portfolio | Showcase your work | Image galleries, project pages |
| Membership website | Offer exclusive content | User accounts, subscriptions |
Once you’ve identified your website’s purpose, the rest of the setup process becomes much easier.
Step 2: Choose a Domain Name
Your domain name is your online address. It’s what visitors type into their browser to find your website, such as yourbusiness.[com]. A good domain name is memorable, easy to spell, and reflects your brand.
Here are a few practical tips:
- Keep it short and easy to pronounce.
- Avoid numbers and hyphens whenever possible.
- Choose something easy to remember.
- Use keywords only if they sound natural.
- Register a .com domain if it’s available, since it’s still the most widely recognized extension.
If your preferred name has already been registered, don’t rush into choosing something complicated. Try a slight variation, add your location if you’re serving a local market, or consider another relevant domain extension if it fits your brand. It’s also worth thinking about your plans. A domain name that works for your business today should still make sense if you expand your products or services later.
With HostPapa’s domain registration, you can quickly search for available names, compare domain extensions, and register your ideal web address in just a few minutes. Registering your domain and hosting together also makes managing your website much simpler since everything stays in one account.
Step 3: Choose WordPress Hosting
Every website needs hosting. Think of web hosting as the home where all of your website’s files, images, databases, and content are stored. When someone visits your site, your hosting provider delivers those files to their browser. Choosing the right hosting from the beginning gives your website a strong foundation for speed, security, and reliability. For most beginners, shared WordPress hosting is the best place to start.
Shared hosting is affordable, easy to manage, and includes everything needed to launch a new website. As your traffic increases, you can always upgrade to a more powerful hosting solution later.
Here’s a simple comparison.
| Hosting Type | Best For | Advantages |
| Shared Hosting | New websites and blogs | Affordable, beginner-friendly, easy to manage |
| VPS Hosting | Growing businesses | More resources, better performance, greater control |
| Managed WordPress Hosting | Busy website owners | WordPress-specific management, automatic updates, enhanced security |
HostPapa’s WordPress Hosting includes features that help beginners get online faster, including:
- One-click WordPress installation
- Free SSL certificate
- Fast, performance-tuned servers
- cPanel for easy website management
- Automatic WordPress updates
- 24/7 PapaSquad support from real hosting experts
If you’re launching your first website, shared hosting gives you everything you need without adding unnecessary complexity. As your audience broadens, upgrading your hosting is straightforward, and your website can continue expanding without starting over.
If you’d like to understand when it makes sense to move beyond shared hosting, our guide to WordPress hosting benefits explains how upgrading can improve your website’s speed, security, and overall performance.
Step 4: Install WordPress
One reason WordPress is so popular is how easy it is to install. Years ago, installing WordPress required uploading files manually and creating databases yourself. Today, most hosting providers offer one-click installers that handle the setup automatically.
With HostPapa, WordPress can be installed through Softaculous, an application installer available inside cPanel.
The process only takes a few minutes.
Log In to Your Hosting Account
Sign in to your HostPapa Dashboard and open cPanel.
Open Softaculous Apps Installer
Inside cPanel, locate Softaculous Apps Installer and choose WordPress from the available applications.
Configure Your Website
Before installation, you’ll be asked to enter a few details, including:
- Website name
- Website description
- Administrator username
- Strong administrator password
- Administrator email address
- Database name (generated automatically unless you prefer a custom one)
Choose a secure password since this account controls your entire website.
Complete The Installation
Click Install, and Softaculous will create your WordPress website automatically.
Once the installation finishes, you’ll receive two important web addresses:
- Your website URL
- Your WordPress administrator login page, often:
[yourdomain].com/wp-admin
Bookmark the login page because you’ll use it every time you want to update your website.
The first time you log in, you’ll see the WordPress Dashboard, which is where you’ll manage your pages, posts, themes, plugins, settings, and everything else related to your website.
Step 5: Understand the WordPress Dashboard
Once you’ve installed WordPress, you’ll spend most of your time in the WordPress Dashboard, also called the admin panel or backend. This is your website’s control centre, where you create content, change your design, install new features, and manage your site’s settings.
The Dashboard may look overwhelming at first, but you only need to become familiar with a handful of menu items to get started.
Here are the sections you’ll use most often.
| Dashboard Menu | What It Does |
| Posts | Create and manage blog articles |
| Pages | Build static pages like Home, About, and Contact |
| Media | Upload and organize images, videos, and documents |
| Appearance | Change themes, menus, widgets, and site styling |
| Plugins | Add new features and functionality |
| Users | Manage administrator and contributor accounts |
| Settings | Control your site’s general settings, URLs, reading preferences, and more |
Posts vs. Pages
Many beginners aren’t sure when to use a post instead of a page.
Posts are designed for content that’s published regularly, such as blog articles, news updates, tutorials, or announcements. They’re organized by date and can be grouped into categories and tags.
Pages are permanent parts of your website. Examples include:
- Home
- About Us
- Contact
- Services
- Privacy Policy
These pages don’t change often and aren’t displayed in chronological order like blog posts.
Change Your Permalink Structure Right Away
Before publishing any content, there’s one setting you should change.
Go to:
Settings → Permalinks
Select Post name.
Instead of URLs that look like: [yourdomain].com/?p=123
Your pages will use cleaner addresses such as: [yourdomain].com/about-us
This structure is easier for visitors to understand and helps search engines interpret your pages. Taking a few minutes to learn the Dashboard now will make every future update much easier.
Step 6: Choose & Install a WordPress Theme
Your WordPress theme controls how your website looks. It determines your site’s layout, colours, typography, menus, page templates, and many design elements. Changing themes can completely transform your website’s appearance without affecting your content. Fortunately, WordPress offers thousands of themes, many of which are completely free.
For beginners, choose a theme that’s:
- Mobile responsive
- Fast-loading
- Regularly updated
- Compatible with popular plugins
- Easy to customize
Some of the most popular beginner-friendly themes include:
- Astra
- GeneratePress
- Neve
These themes are lightweight, flexible, and work well for business websites, blogs, portfolios, and online stores.
How to Install a Free Theme
Installing a free theme only takes a few clicks.
- Log in to your WordPress Dashboard.
- Select Appearance → Themes.
- Click Add New.
- Search for the theme you want.
- Select Install.
- Click Activate.
Your new design will appear immediately.
Installing a Premium Theme
If you’ve purchased a premium theme, the process is just as simple.
Instead of searching the WordPress directory:
- Select Upload Theme.
- Upload the ZIP file provided by the theme developer.
- Install and activate it.
Customize Your Website
After activating your theme, visit:
Appearance → Customize
Or, if your theme supports Full Site Editing:
Appearance → Editor
From there, you can adjust:
- Colours
- Fonts
- Navigation menus
- Header images
- Logo
- Homepage layout
- Footer information
Should You Use a Page Builder?
Many beginners also use page builders to design pages without writing code.
Some popular options include:
- Elementor
- Gutenberg (built into WordPress)
Gutenberg uses drag-and-drop blocks that make it easy to add headings, images, galleries, buttons, videos, and columns. For many websites, Gutenberg provides everything you need while keeping your site lightweight and fast.
Elementor offers even more design flexibility and includes visual editing, making it popular with users who want complete creative control.
Step 7: Install Essential WordPress Plugins
One of WordPress’s biggest strengths is its plugin library. Plugins add new features to your website without requiring any coding. Think of them as apps for your website. There are more than 60,000 WordPress plugins available, but that doesn’t mean you should install dozens of them. A small collection of high-quality plugins is often all you need.
| Category | Recommended Plugins | Purpose |
| SEO | Yoast SEO or Rank Math | Improve search visibility and create meta titles. |
| Security | Wordfence Security | Protect against malware and attacks. |
| Backups | UpdraftPlus | Create automatic backups. |
| Contact Forms | WPForms | Let visitors contact you easily. |
| Performance | LiteSpeed Cache or WP Super Cache | Speed up your website. |
| Analytics | Site Kit by Google | Connect Google Analytics and Search Console. |
How to Install a Plugin
Installing plugins is very similar to installing themes.
- Open Plugins → Add New.
- Search for the plugin.
- Click Install Now.
- Select Activate.
That’s it.
Keep Your Website Lean
It can be tempting to install lots of plugins, but every plugin adds extra code to your website. Only install plugins you actually need.
If you stop using one:
- Deactivate it.
- Delete it.
Keeping your plugin list tidy helps improve security, reduces compatibility issues, and can make your website load faster. It’s also a good idea to update your plugins regularly. Most developers release updates that fix bugs, improve performance, and address security vulnerabilities.
Step 8: Create Your Core Pages
Before publishing your website, create the pages visitors expect to find. Even a simple website should include a few essential pages that explain who you are, what you offer, and how people can contact you.
Start with these four.
Home
Your homepage introduces your business and helps visitors understand what you do within seconds.
Include:
- A clear headline
- A short description
- Your main services or products
- A call-to-action
- Links to important pages
About
People like doing business with people. Use your About page to tell your story, explain your experience, and build trust with your audience.
Contact
Make it easy for visitors to reach you.
Include:
- Contact form
- Email address
- Phone number
- Business hours (if applicable)
- Map or location information
Privacy Policy
Many countries require websites to explain how they collect and use visitor information. WordPress can generate a basic Privacy Policy template, which you can customize for your business. Having a Privacy Policy also builds trust, especially if you collect contact form submissions, newsletter sign-ups, or customer information.
Set a Static Homepage
By default, WordPress displays your latest blog posts on the homepage. If you’re creating a business website, you’ll probably want a custom homepage instead.
To change this:
- Go to Settings → Reading.
- Under Your homepage displays, select A static page.
- Choose the homepage you’ve created.
- Select your blog page if you plan to publish articles.
This gives your website a more professional appearance and lets visitors quickly find the information they’re looking for.
Step 9: Set Up Your WordPress Site for SEO
Building a beautiful website is only half the job. People also need to be able to find it.
Search Engine Optimization (SEO) helps search engines understand your content so they can show it to people searching for topics related to your business. The good news is that WordPress is already SEO-friendly, and a few simple settings can make a big difference before your site goes live.
Install an SEO Plugin
A dedicated SEO plugin helps you control how your pages appear in search results.
Two of the most popular choices are:
- Yoast SEO
- Rank Math
Both plugins let you:
- Write custom SEO titles.
- Create meta descriptions.
- Generate XML sitemaps.
- Preview how your pages appear in Google.
- Check basic on-page SEO recommendations.
Whenever you publish a new page or blog post, take a few extra minutes to write a unique title and description. These small details can improve click-through rates from search results.
Submit Your Sitemap
An XML sitemap acts like a roadmap for search engines. It lists the important pages on your website and helps Google discover new content more quickly.
Most SEO plugins generate a sitemap automatically.
Once your site is live:
- Create a free Google Search Console account.
- Verify ownership of your website.
- Submit your sitemap.
This is one of the first things we recommend after launching any new website.
Think About Your Visitors First
Good SEO isn’t about adding keywords everywhere. Instead, focus on creating useful pages that answer your visitors’ questions. Organize your content with clear headings, use descriptive page titles, and make your navigation easy to follow.
If your website provides a good experience for visitors, search engines are much more likely to reward it over time. As your website grows, choosing quality hosting also helps your SEO efforts. Faster loading speeds, reliable uptime, and built-in performance features all contribute to a better user experience. Our WordPress Hosting plans are designed to help keep your website running smoothly as you publish more content and attract more visitors.
Step 10: Launch, Secure & Back Up Your Site
You’re almost ready to publish. Before announcing your new website to the world, spend a few minutes running through a simple launch checklist. These final steps help protect your website and make sure visitors can access it without problems.
Confirm Search Engines Can Find Your Site
During development, many people choose to hide their website from search engines.
Before launching, visit:
Settings → Reading
Make sure Discourage search engines from indexing this site is unchecked.
Otherwise, Google may ignore your website after it goes live.
Enable Automatic Backups
Even well-maintained websites can experience unexpected problems. A backup allows you to restore your website if something goes wrong after an update, plugin conflict, or accidental deletion. Plugins like UpdraftPlus make it easy to schedule automatic backups every day or every week, depending on how often your content changes.
HostPapa also offers Automated Website Backups on selected hosting plans, giving you another layer of protection without requiring manual work.
Keep Everything Updated
WordPress regularly releases updates that improve security, fix bugs, and add new features.
You’ll also receive updates for:
- Themes
- Plugins
- WordPress itself
Installing updates promptly helps keep your website secure and running smoothly.
Use Strong Login Credentials
Protect your administrator account with:
- A strong, unique password.
- Two-factor authentication if available.
- Limited administrator accounts.
Avoid usernames like admin, which are common targets for automated attacks.
Verify Your SSL Certificate
An SSL certificate encrypts information exchanged between your website and visitors. You’ll know it’s working when your website loads with:
https://
And it will display the padlock icon in the browser.
Every HostPapa hosting plan includes a Free SSL certificate, helping protect visitor information from the moment your site goes live.
Test Your Website
Finally, browse through every page as if you were a visitor.
Check that:
- Navigation menus work.
- Contact forms send messages.
- Images load correctly.
- Links point to the correct pages.
- Your website looks good on desktop and mobile devices.
Fixing small issues before launch creates a much better first impression. If you’re moving an existing WordPress website instead of starting from scratch, our guide on migrating WordPress to HostPapa explains how our migration team can move your site with minimal downtime.
WordPress Website Costs: What Should You Budget?
One reason WordPress remains so popular is that the software itself is completely free. Instead of paying for WordPress, you’ll mainly pay for the services that keep your website online. Here’s a realistic estimate for most new websites.
| Expense | Estimated Cost |
| Domain name | Approximately $12 to $15 per year |
| Shared WordPress hosting | Approximately $2.99 to $9.99 per month |
| Premium theme (optional) | Approximately $30 to $70 one-time purchase |
| Premium plugins (optional) | Varies depending on your needs |
If you’re just getting started, you don’t need to spend much. A shared hosting plan, a free WordPress theme, and a handful of trusted plugins are enough to build a professional-looking website.
As your traffic grows, you can always add premium tools or upgrade your hosting plan. WordPress makes it easy to expand your website without rebuilding everything from scratch. The flexibility to start small and grow over time is one of the biggest reasons businesses continue choosing WordPress.
Ready to Build Your Website?
Building your first website may seem like a big project, but WordPress makes the process much easier than many people expect. By defining your goals, choosing a domain name, selecting reliable hosting, installing WordPress, customizing your design, adding the right plugins, and following a few simple SEO and security best practices, you’ll create a website that’s ready to grow alongside your business.
The best website isn’t the one that’s perfect on day one. It’s the one that gets published, continues improving, and gives your visitors a reason to come back. If you’re ready to get started, HostPapa’s WordPress Hosting gives you everything you need in one place. With one-click WordPress installation, a Free SSL certificate, performance-tuned hosting, reliable backups, and 24/7 support from our PapaSquad team, you can focus on building your website while we take care of the technical details.
Your WordPress site deserves better than generic hosting.
NVMe servers tuned for WordPress, staging, automatic updates, and 24/7 human support from as low as $2.95 per month with 99.9% uptime and a 30-day money-back guarantee.