In this article, we will show you how to log in to your WordPress Dashboard. The WordPress dashboard is the go-to tool for WordPress administrators and contributors, and accessing it is important.
By default, you can add “/wp-admin” at the end of the URL associated with your WordPress website to get to the login prompt for the WordPress dashboard.
For example, if your site’s name is www.yourawesomesite.com, you would browse to www.yourawesomesite.com/wp-admin. Alternatively, if your site has WordPress installed in a subdirectory like www.yourawesomesite.com/wordpress, you would need to browse to www.yourawesomesite.com/wordpress/wp-admin. If the site was at a subdomain like www.blog.yourawesomesite.com, you would need to browse to www.blog.yourawesomesite.com/wp-admin.
Whatever URL structure is required, adding the proper suffix to it will get you to the WordPress login prompt.
The other suffixes that can be added at the end of a WordPress site’s URL in place of “/wp-admin” to log in include:
- /admin
- /login
- /wp-login.php
Note: Some plugins can change the default login process for your WordPress site.
However, you can always access it directly from your HostPapa Dashboard. Follow these steps:
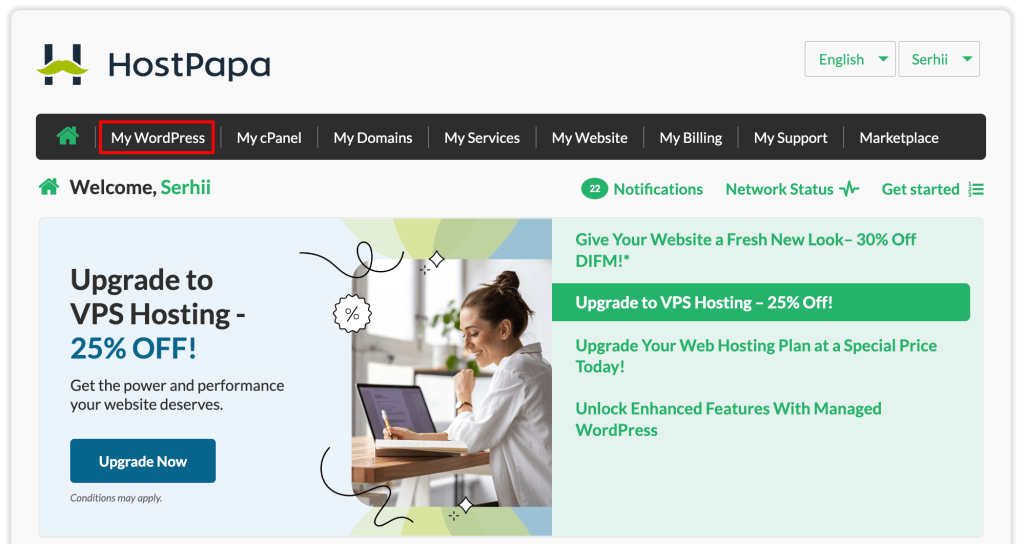
1. Log in to your HostPapa Dashboard.
2. Click My WordPress.

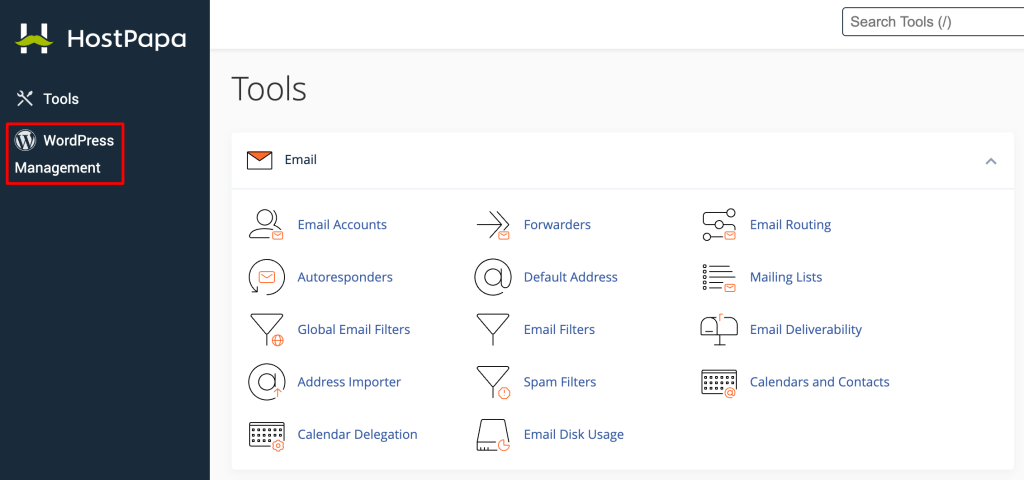
3. In Applications, select WordPress Management.

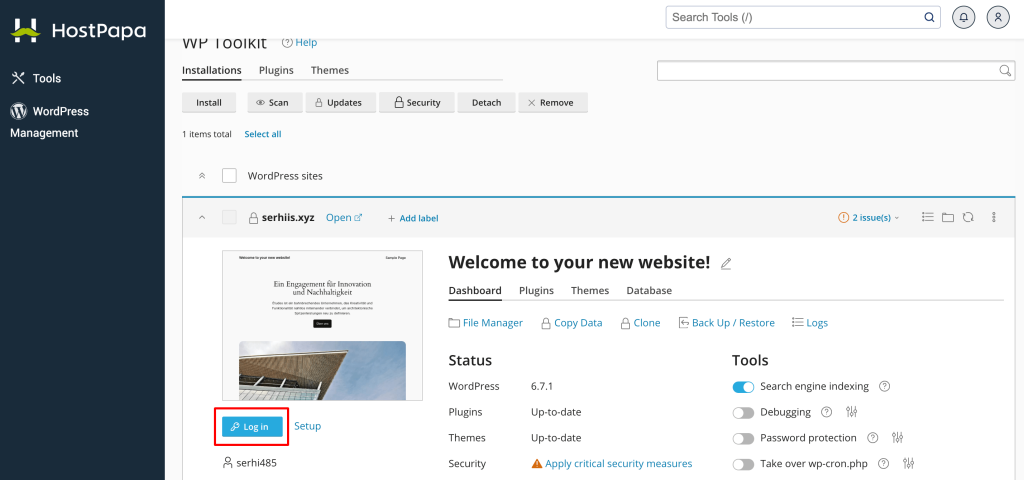
4. The WordPress Manager will open with a list of your domains. Locate the domain you want to edit and click Log in.

7. From the login prompt, enter your username and password.
You will now be logged into the WordPress dashboard.

If you need help with your HostPapa account, please open a support ticket from your dashboard.
