In this article, we’ll show you how to create an MX record in DNS with your HostPapa cPanel. Already have an MX record and need to update it? Please read our tutorial on how to update an existing MX record.
What is an MX record?
A mail exchanger record (MX record) defines how emails will be routed for your domain and sets a preference value to prioritize mail delivery if multiple mail servers are available. You can have many MX records for a domain. The mail server will attempt to contact them in numeric order, starting at the lowest number. This lets you set up multiple values if you need more than one nameserver.
Note: Before making DNS updates, please confirm the provider’s name that currently manages your domain name’s name servers. You may quickly check the current name servers in public WHOIS or HostPapa Dashboard > My Domains > Whois Lookup. The HostPapa name servers are found inside the welcome email received at signup or via Dashboard > My Support > Welcome Emails. The DNS updates should be made at the provider of the name servers for the changes to take effect.
How to create an MX record in DNS
1) Log in to your HostPapa dashboard.

2) Select My cPanel from the navigation bar at the top of the page.

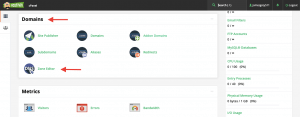
3) In the Domains section, select the Zone Editor option.
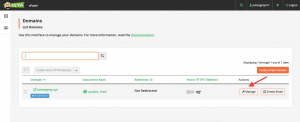
4) Locate the domain name that you want to edit and click Manage.
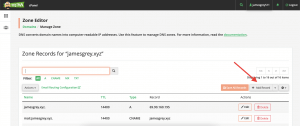
5) In the upper right corner of the chart, click the + Add record button.
6) Ensure that the type is an MX record.
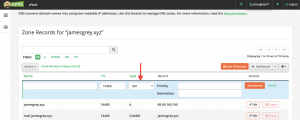
7) Enter the valid zone name, priority, and destination:
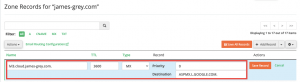
Valid zone name: Your domain name
Priority: A number that will determine which mail exchanger will be prioritized. The lower the number, the higher the priority. The lowest number is 0.
Destination: The destination address/mail exchanger of your email provider.
Example: Using Google Workspace MX record
Valid zone name: lvl3.cloud
TTL: 3600
Priority: 0
Destination: ASPMX.L.GOOGLE.COM.
Note: You can also create multiple MX records with different priorities, depending on the information given to you by your email provider.
- Click Add record.
Important: Please double-check that you have entered the correct information into each field. DNS records are very sensitive, and even a tiny mistake can cause problems that may affect your live website, email, etc.
Please be advised that the propagation may take 1-2 hours to complete.
To learn how to update your new MX record, or to read a complete guide to DNS records, check out these Knowledge Base articles:
If you need help with your HostPapa account, please open a support ticket from your dashboard.
