A Web Application Firewall (WAF) is an important security layer for anyone managing a WordPress website. It helps defend against online threats like brute-force attacks and malware injections. Jetpack’s WAF—included in the Jetpack Premium package—provides a comprehensive solution to guard your site against these vulnerabilities.
This guide walks you through the process of setting up Jetpack’s WAF on your WordPress site. We also explore its advantages and offer tips on maximizing its effectiveness.
Activating the Jetpack Firewall
By default, Jetpack’s Firewall is turned off when you first link Jetpack to your WordPress.com account. You can enable it anytime in the Jetpack settings. Here’s how to turn on Jetpack’s WAF:
- Go to your site’s WP Admin, navigate to Jetpack → Settings → Security → Firewall.
- Toggle on Protect your site with Jetpack’s Web Application Firewall.

This will activate the firewall, adding an extra layer of security to your website.
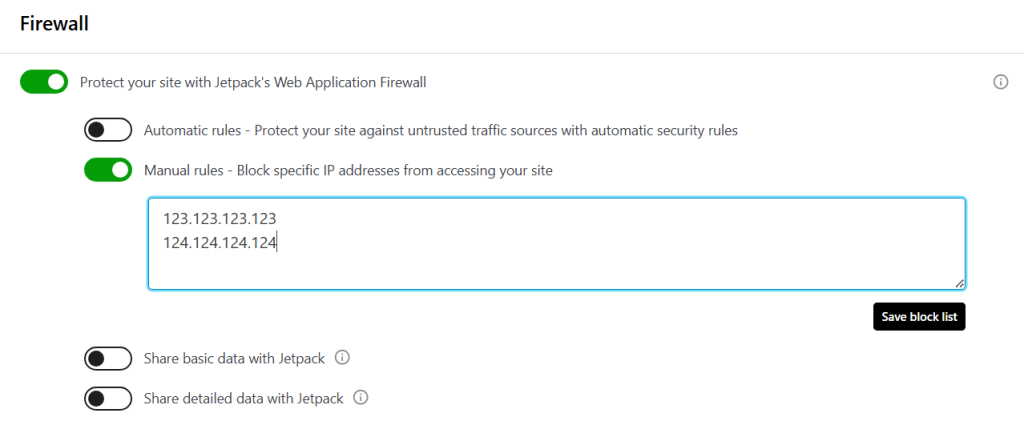
How to block specific IP addresses using Jetpack’s Firewall
To restrict access to your site from certain IP addresses, you can add them to Jetpack’s block list. Here’s how:
- Open Jetpack → Settings → Security → Firewall in WP Admin.
- Turn on Manual rules to enable blocking of specific IP addresses.
- Input the IP addresses you want to block, separating them with commas, spaces, or new lines. Jetpack supports both IPv4 and IPv6 formats. For IP ranges, use CIDR notation (for example, 123.123.123.0/24) or enter the starting and ending IPs with a dash (for example, 123.123.123.0–123.123.123.255).
- Click Save block list to confirm.
This action will prevent access from those IP addresses, adding another layer of security to your website.
Using IP allow and block lists with a reverse proxy (for example, Cloudflare)
At present, Jetpack’s IP allowlists and blocklists are not configured to work with trusted proxies or headers, meaning they are incompatible with setups involving reverse proxies or load balancers.
Site issues after enabling the firewall
If your site becomes inaccessible after activating Jetpack’s Firewall, you can disable the firewall without needing to access Jetpack settings:
- Edit wp-config.php: Add the line
define( ‘DISABLE_JETPACK_WAF’, true );
to your wp-config.php file. - Use WP-CLI: With WP-CLI, you need to run this command: wp jetpack-waf teardown.
This will deactivate the firewall and restore access to your site.
We hope you’ve enjoyed our guide to Jetpack’s Web Application Firewall (WAF) for WordPress Security and that it will keep your site safe.
If you need help with your HostPapa account, please don’t hesitate to open a support ticket from your dashboard.
