This tutorial describes how to add Microsoft 365 email to Android devices.
Open your Android Mail app, then click the hamburger icon to go to the main menu. At the bottom of the screen, choose Settings.

NOTE: For this tutorial, we will use setup@webtraining.cloud as our test email account. You will need to change some of the settings to match your setup.
From inside the settings area, tap the Add Account option.
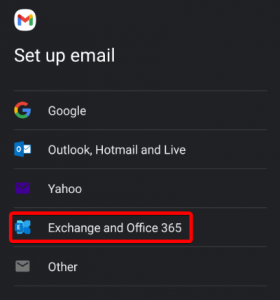
On the Set up email screen, tap the Exchange and Office 365 option from the list.

NOTE: Choosing Exchange and Office 365 will sync your email, calendar and contacts to your Android device.
Choosing Outlook, Hotmail and Live will also work, but it will only sync your email.
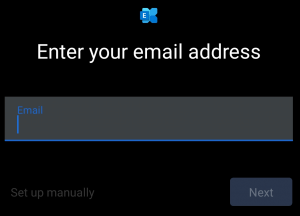
Next you’ll be asked to fill in your email address. Simply fill in the address, then click Next.

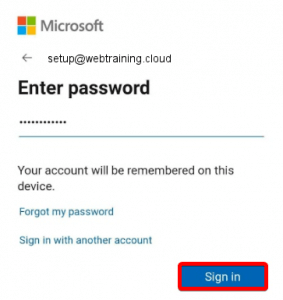
Next, enter the password for your Office 365 email account, then click Sign in.

You should get a notification on your screen that the account has been set up successfully.
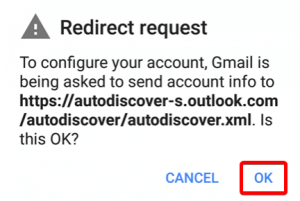
If you are prompted with a redirect request, choose OK. You’ll then be asked to enter the server names directly.

NOTE: If you are prompted at any time during the setup to enter a servername, you can use outlook.office365.com for incoming servers and smtp.office365.com for outgoing servers.
Next, pull down the Android notification bar by swiping down from the top of your screen.
If you see a notification that reads “Unable to sync calendar and contacts,” tap it. Then tap Allow to give access, and you’re done!
![]()
Your Office 365 email account is now set up on your Android device.
Default Email Account Settings (Office 365 Email)
Secure SSL/TLS Settings (Recommended)
| Username: | Use the full email you are setting up. |
| Password: | Use the email account’s password. |
| Incoming Server: | outlook.office365.com
|
| Outgoing Server: | smtp.office365.com
|
| IMAP, POP3, and SMTP require authentication. | |
If you need help with your HostPapa account, please open a support ticket from your dashboard.
