All of your WordPress data, including content, comments, users, links, and metadata is stored in a MySQL database. Duplicating, or cloning the database allows you to easily transfer your site to another host, create a duplicate site for development, or create site backups. In this article, you’ll learn how to use the phpMyAdmin web interface to duplicate your WordPress database.
There are two methods of duplicating your WordPress database in phpMyAdmin:
- Creating a copy of the database
- Exporting the database data and then importing it to a new database
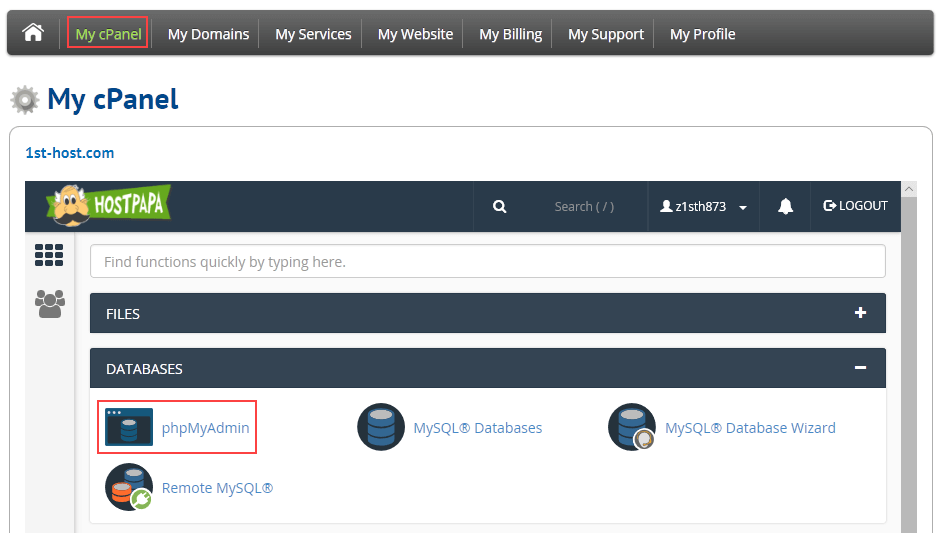
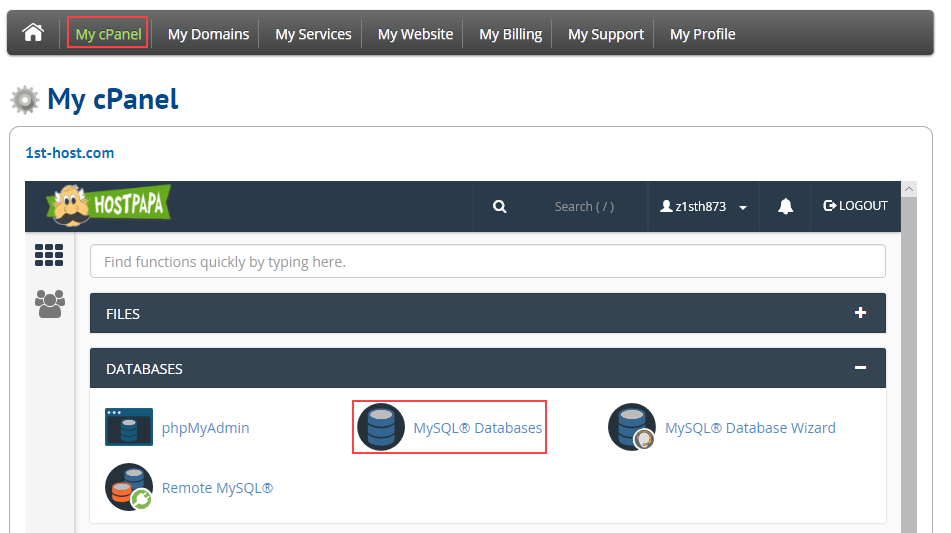
To use either of these methods, log in to your HostPapa Dashboard and click My cPanel. In the Databases section, click phpMyAdmin.
Creating a copy of the database
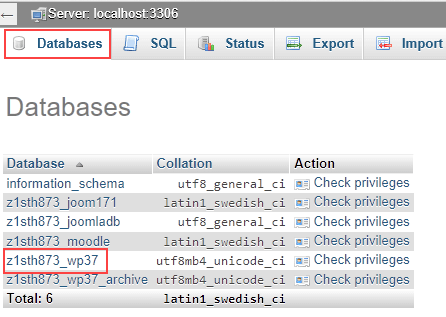
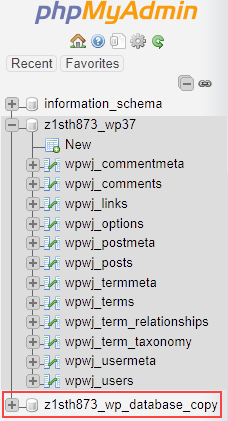
Creating a copy is the quickest way of duplicating the database. In phpMyAdmin, select the Databases tab and click your WordPress database.
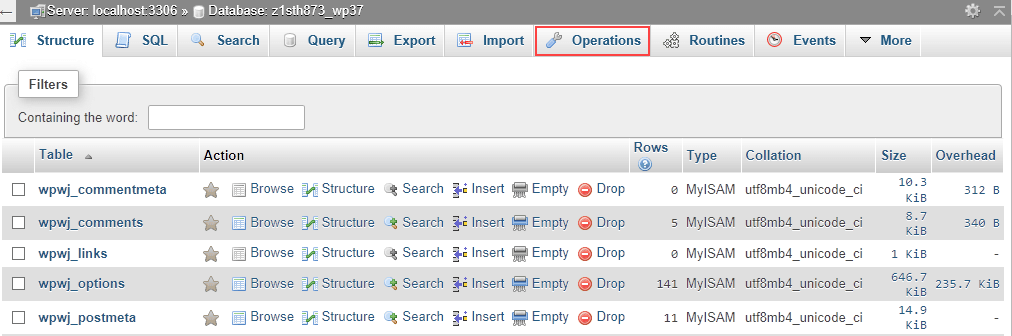
Your WordPress database tables and structure are now displayed. Select the Operations tab.
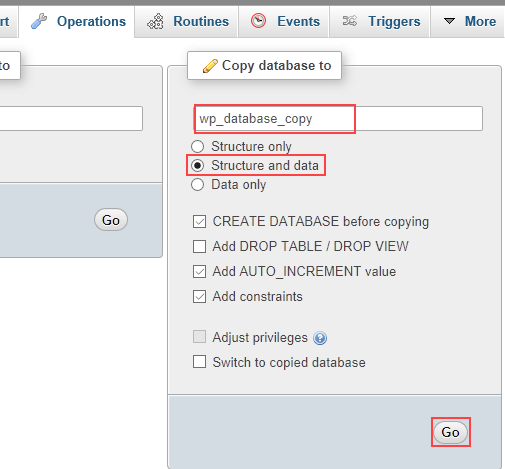
In the Copy database to area, enter a name for the new database and select Structure and data. Click Go.
The new database is created and displayed in the list of databases. Your HostPapa username is automatically added to the beginning of the database name that you chose.
Creating a copy by exporting and importing the database
You can create a copy of your WordPress database by exporting the data and then importing it to a new database.
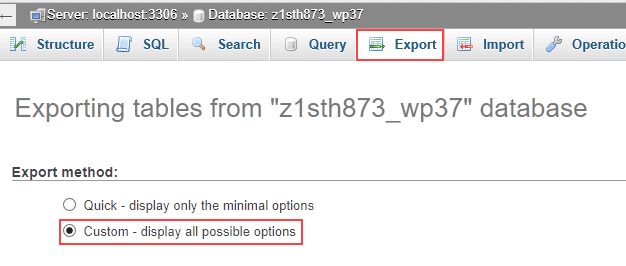
In phpMyAdmin, select the Databases tab and click your WordPress database.
Your WordPress database tables and structure are now displayed. Select the Export tab and select Custom – display all possible options as the Export method.
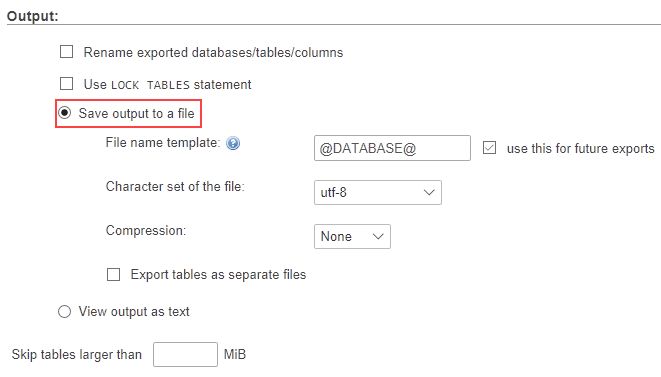
Scroll down to the Output section and select the Save output to a file option, then c
Next, close phpMyAdmin and return to cPanel. In the Databases section, click MySQL Databases.
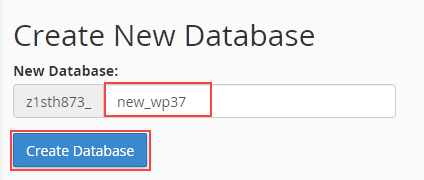
Enter a name for the new database and click Create Database.
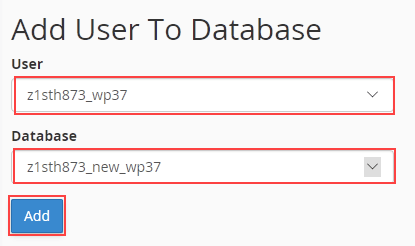
Scroll down to the Add User To Database section. In the User drop-down list, select the database user for the database that you exported. In the Database drop-down list, select the new database that you just created, then click Add.
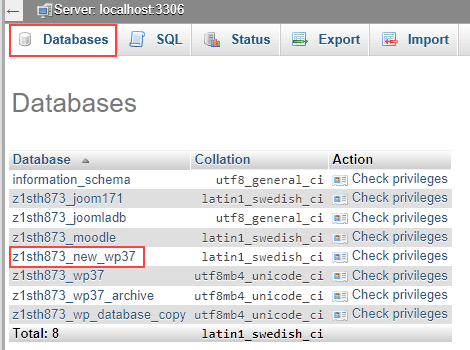
Now return to cPanel and open phpMyAdmin. Select the Databases tab and click the new database.
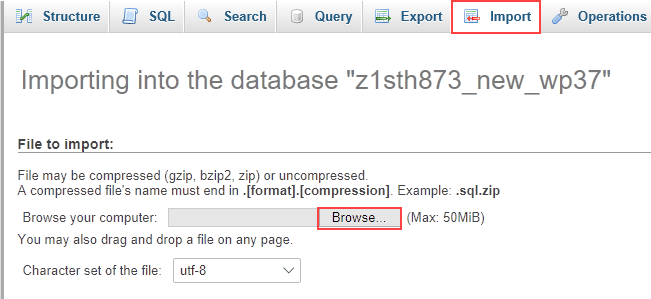
Select the Import tab, then click Browse and select the exported .sql file on your local computer. Click Go at the bottom of the page. Depending on your Internet connection and the size of the file, the import may take several minutes.
When the import is complete, you’ll see a success message.

More information
If you have any questions or need help, you can always contact HostPapa Support by opening a support ticket. Details about how to open a support ticket are here.
