Creating an FTP account for your Managed WordPress hosting allows you to quickly upload large files, edit site code, and manage media without logging into the WordPress admin panel. You can easily set up new FTP credentials directly inside your HostPapa Dashboard under My WordPress > FTP Accounts.
In this Knowledge Base article, you’ll learn the exact steps to generate your FTP login details on your Managed WordPress service. These steps apply to our legacy plans: Start, Plus, Pro, and Ultra. If you’re on Core, Standard, Boost, or Turbo, follow the current-plan steps instead.
With WordPress FTP access, you will allow others to upload, download, and edit your website files. HostPapa’s Managed WordPress customers can easily create an FTP account by following these steps:
- Log in to your HostPapa Dashboard.
- Click on My WordPress.

- Select the name of the website you would like to manage.
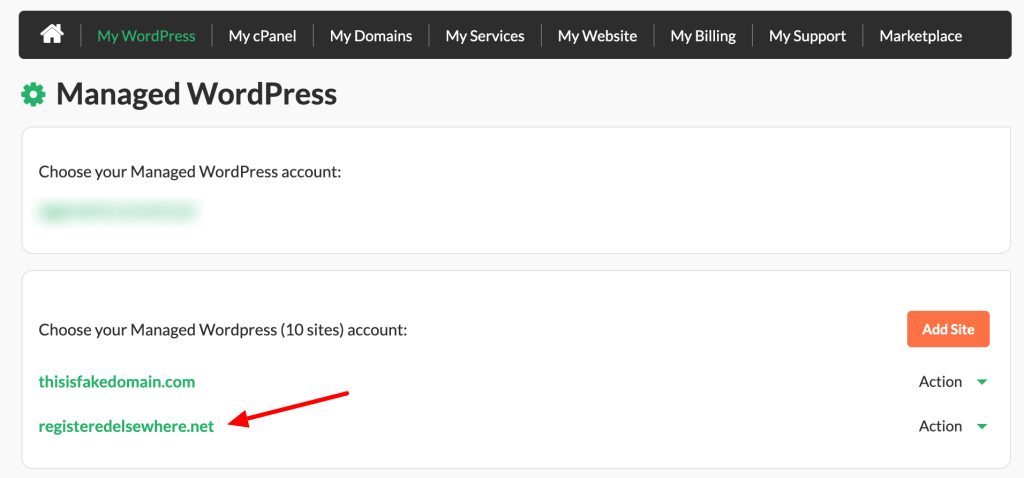
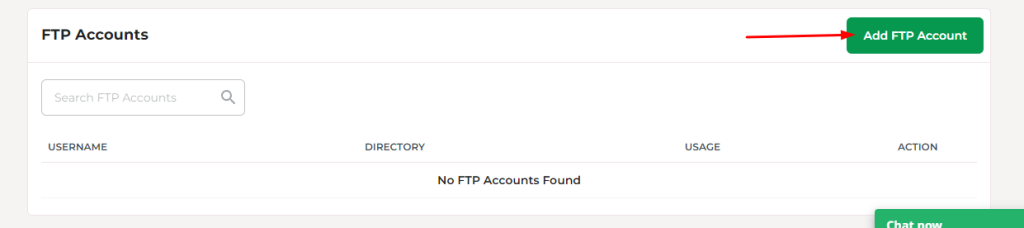
- After your Managed WordPress Dashboard opens, scroll down to FTP Accounts.
- Click Add FTP Account.
- Fill the username, password, and directory for your new FTP account.
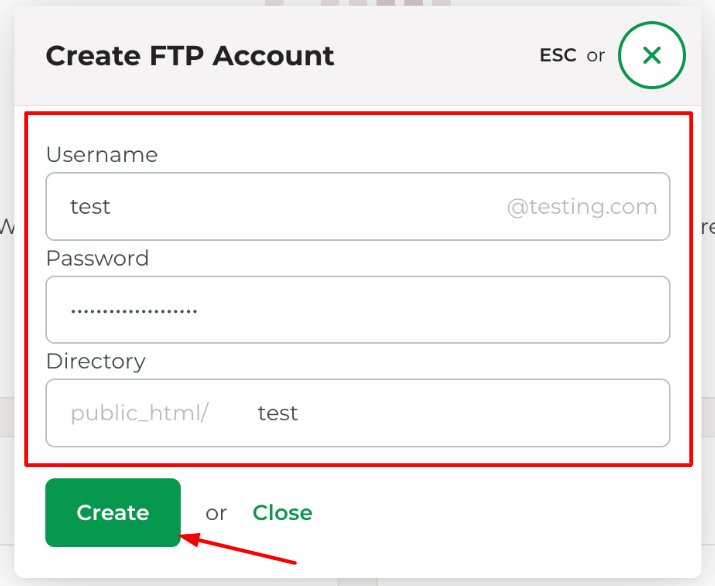
- Click Create.
- You can find your FTP address on the same page within the Site Information section. You must use that IP address to connect to your FTP account.

That’s it! Now you have FTP access for your WordPress site.
If you need help with your HostPapa account, please open a support ticket from your dashboard.