You can log in to your HostPapa VPS server in a couple of ways. You can choose to open a secure shell session in a terminal application, using your root username and password. Find out more about this method in this HostPapa knowledge base document: How to connect to your server via Secure Shell (SSH)
The alternative method is to configure a pair of public/private keys. This is considered to be the more secure method for accessing your server using SSH. Key pairs are created together to use during the login and authentication process. The public key is stored on the server, while the private key resides locally on your computer. When you attempt to log in to your server, the public and private key are compared. If they match, you will be allowed in.
Creating the key pair
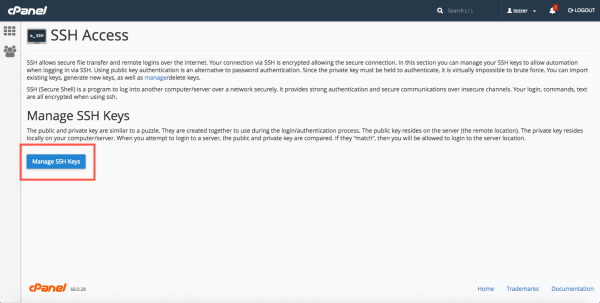
To configure your security keys, log in to cPanel and navigate to Security > SSH Access.
Now click Manage SSH Keys.
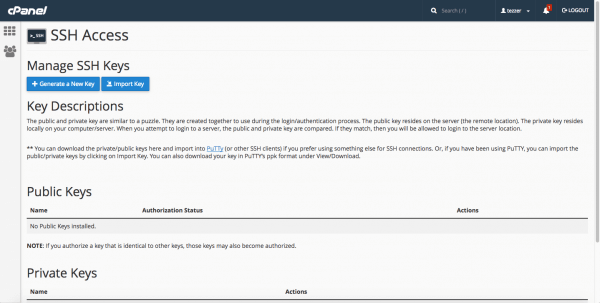
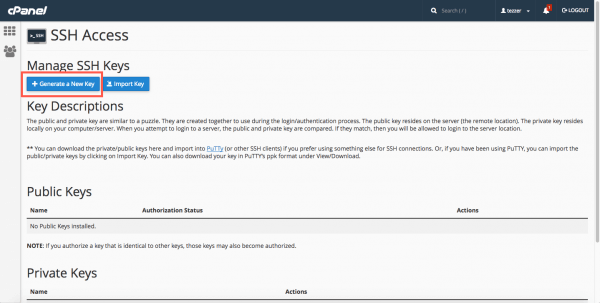
You’ll be presented with options to import a pair of existing security keys or generate a new key.
Click Generate a New Key to proceed.
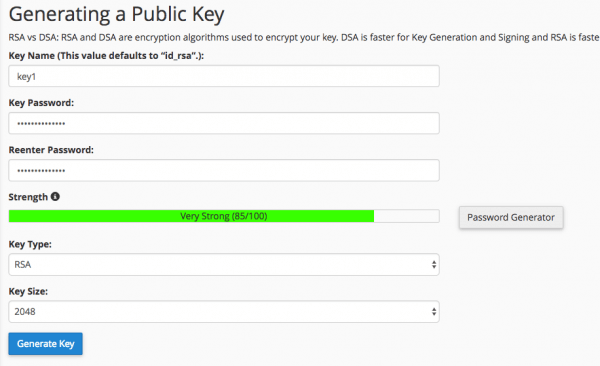
Two SSH key types are available, using the RSA and DSA encryption algorithms. DSA is faster for key generation and signing, while RSA is faster for verification. However, we recommend using RSA key types as they support larger key sizes (2048 bits) and are therefore more secure.
Specify the Key Name, Key Password, Key Type, and Size.
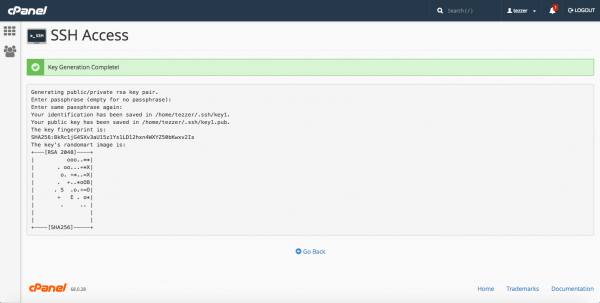
Click Generate Key to create the key pair.
Authorizing the public key
Once the public key has been created, it must be authorized before it can be used. Use the Manage button next to the key to begin the process.
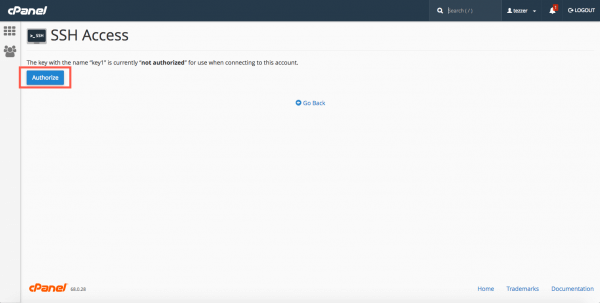
Now click the Authorize button.
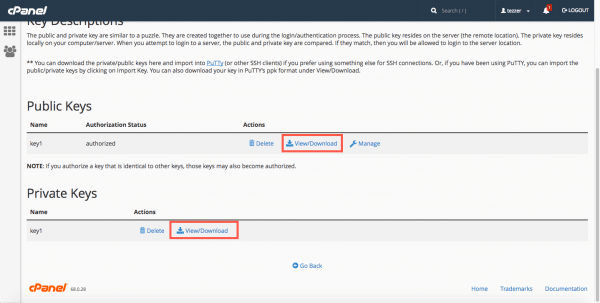
Check that your key is now authorized on the cPanel SSH Access page.
Downloading the key pair
Use the View/Download buttons to download (or view) your keys.
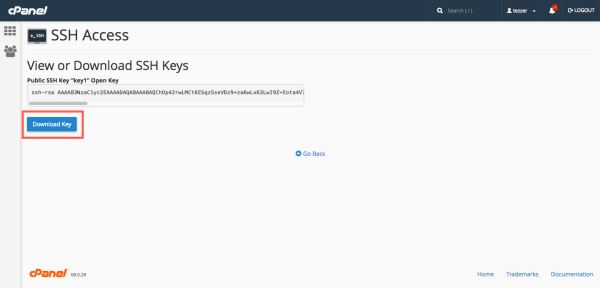
Click Download Key to save in a text document on your computer or copy and paste the key on screen.
Logging in to your server using the key pair
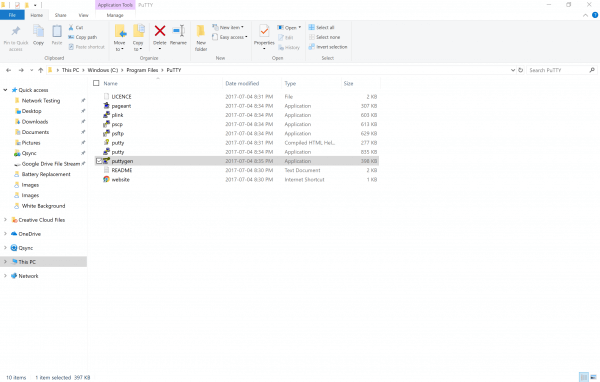
Use your keys with an SSH client application (such as Putty) to access your server. Once downloaded, open the Putty folder and run puttygen.exe.
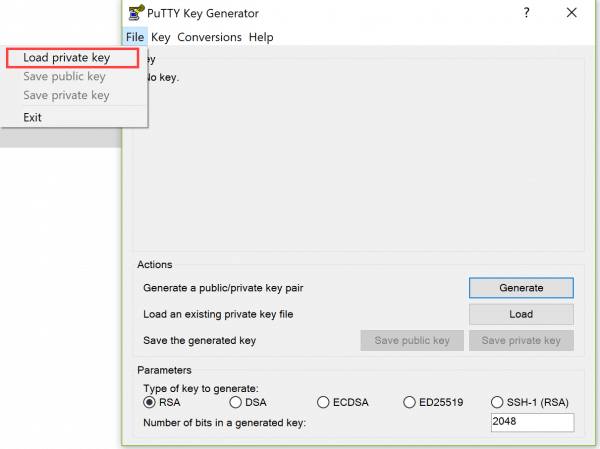
In the top menu, select File > Load private key.
Select your downloaded private key, ensuring the All files (*.*) filter is used.
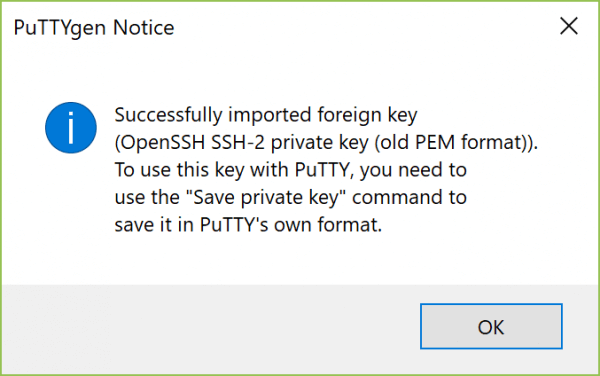
Enter the same passphrase used to create the key pair, when requested. The key will be imported.
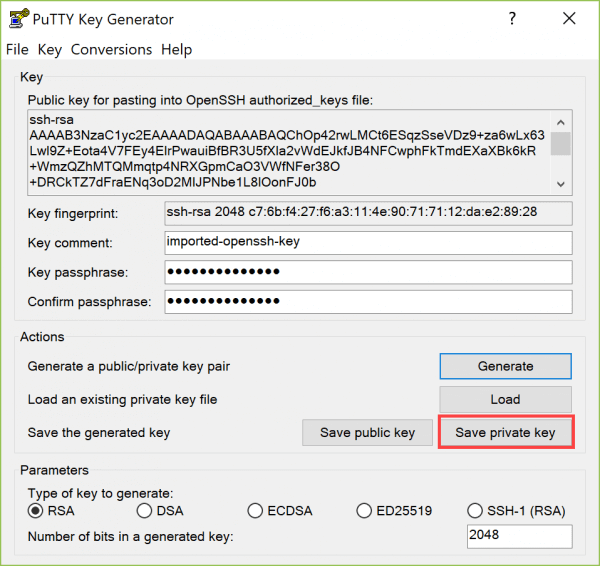
Click Save private key and save your key as a .ppk file (Putty’s native file format).
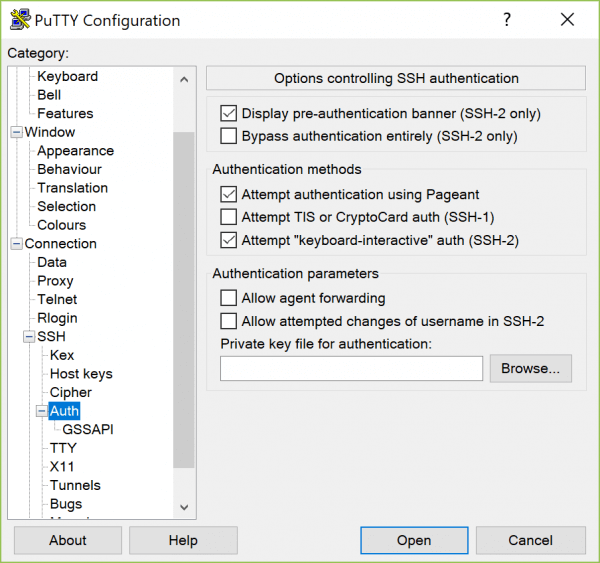
Now run the Putty SSH client (putty.exe). From the sidebar, select Connection > SSH > Auth. In the Authentication parameters section, click Browse, then select your saved .ppk file.
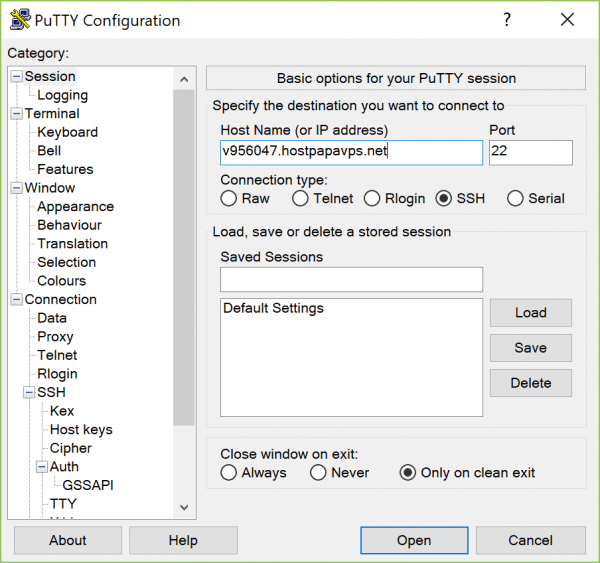
Head back to Session and enter your server name and SSH port. Click Open.
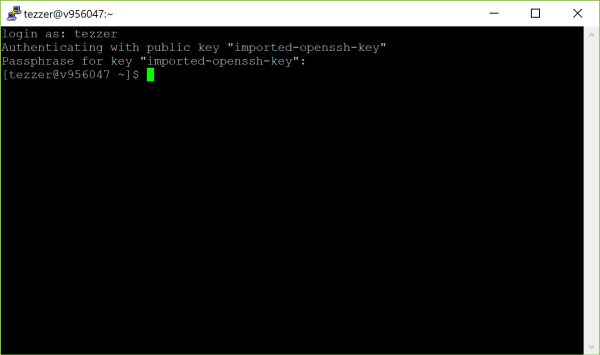
When prompted, enter your cPanel user name and passphrase.
If you notice any problems or if you need any help, please open a new support ticket from your HostPapa Dashboard. More details on how to open a support ticket can be found here.

