While WordPress is equipped with traffic tracking capabilities, many administrators prefer to use Google Analytics to monitor and analyze user statistics. The simplest method for integrating Google Analytics in your WordPress site is via a third-party plugin, but you can also choose to directly edit your site theme to insert the necessary tracking code.
In this guide, we’ll walk through both approaches.
Install a Google Analytics plugin
There are numerous third-party plugins which can be installed to enable traffic monitoring through Google Analytics on your WordPress site. Head over to the WordPress plugin repository to review the selection.
In this guide, we’ll install Google Analytics Dashboard for WP (GADWP) which embeds the necessary tracking code and provides integrated reporting features within the WordPress admin dashboard.
Before you install the plugin, be sure to visit the Google Analytics website and set up an account. With the account set up, first check your Google Analytics Tracking code by visiting Admin (the gear icon in the sidebar). Select an account from the Account dropdown menu and, in the Property column, click Tracking Info > Tracking Code.
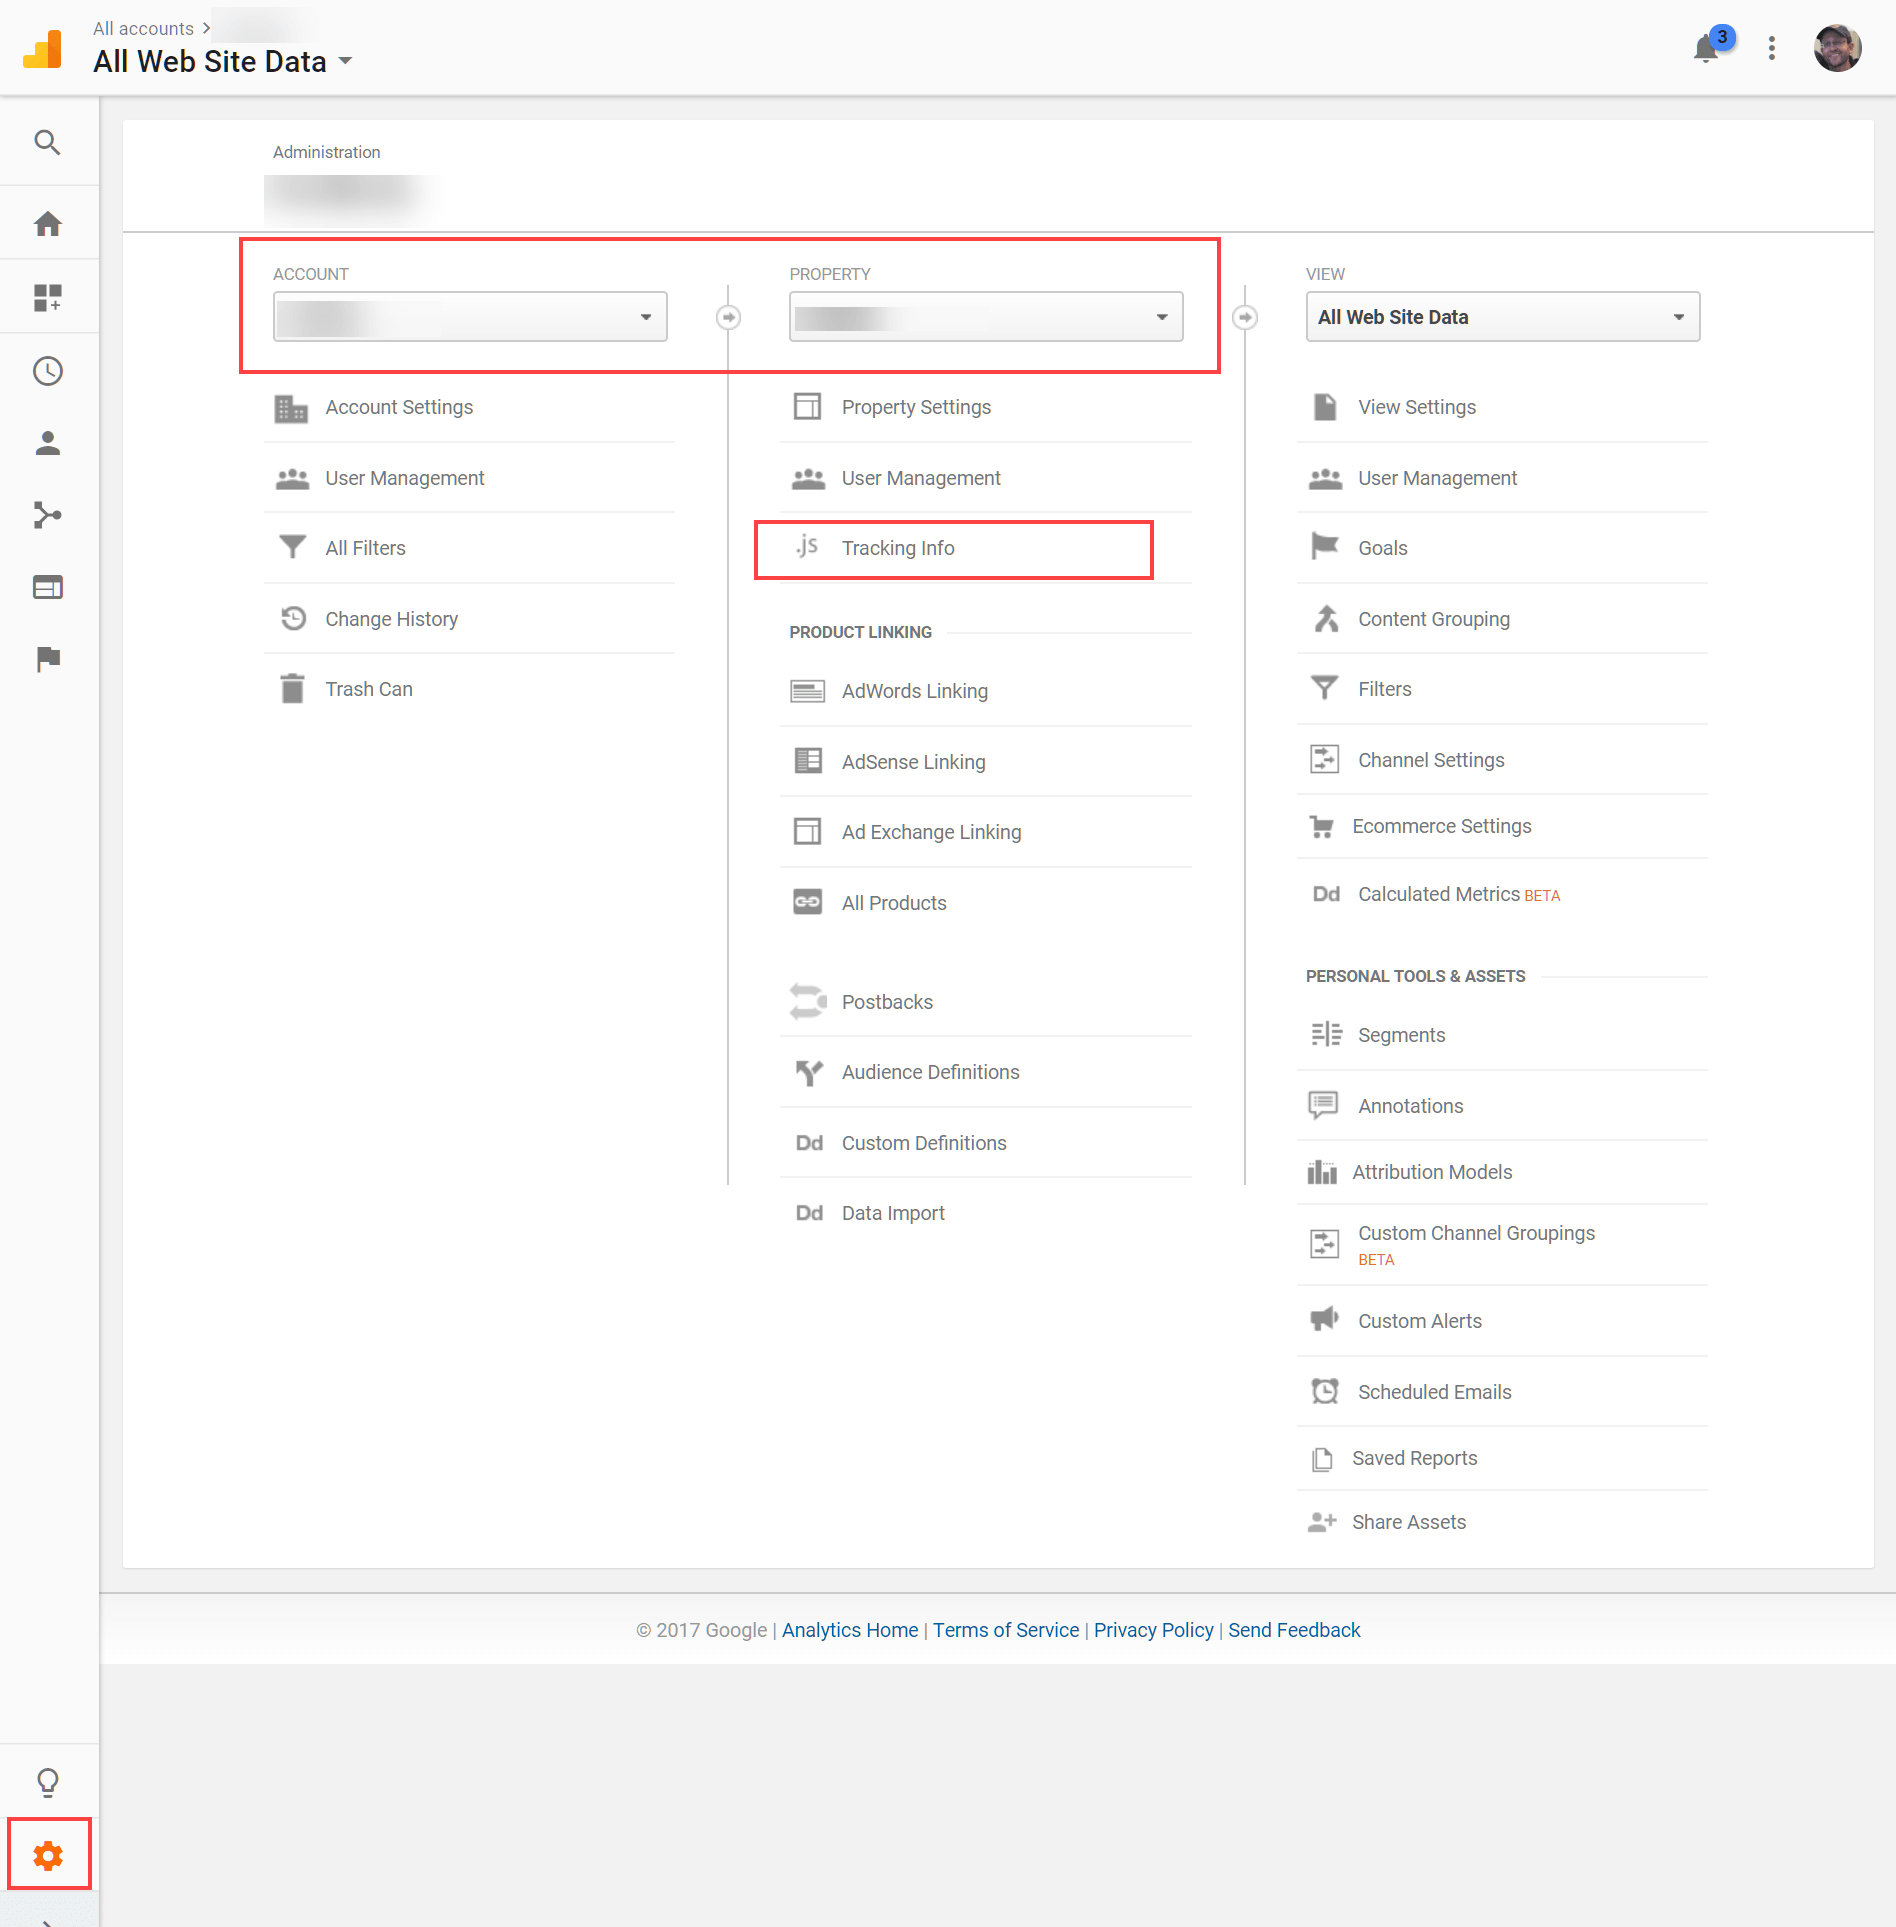
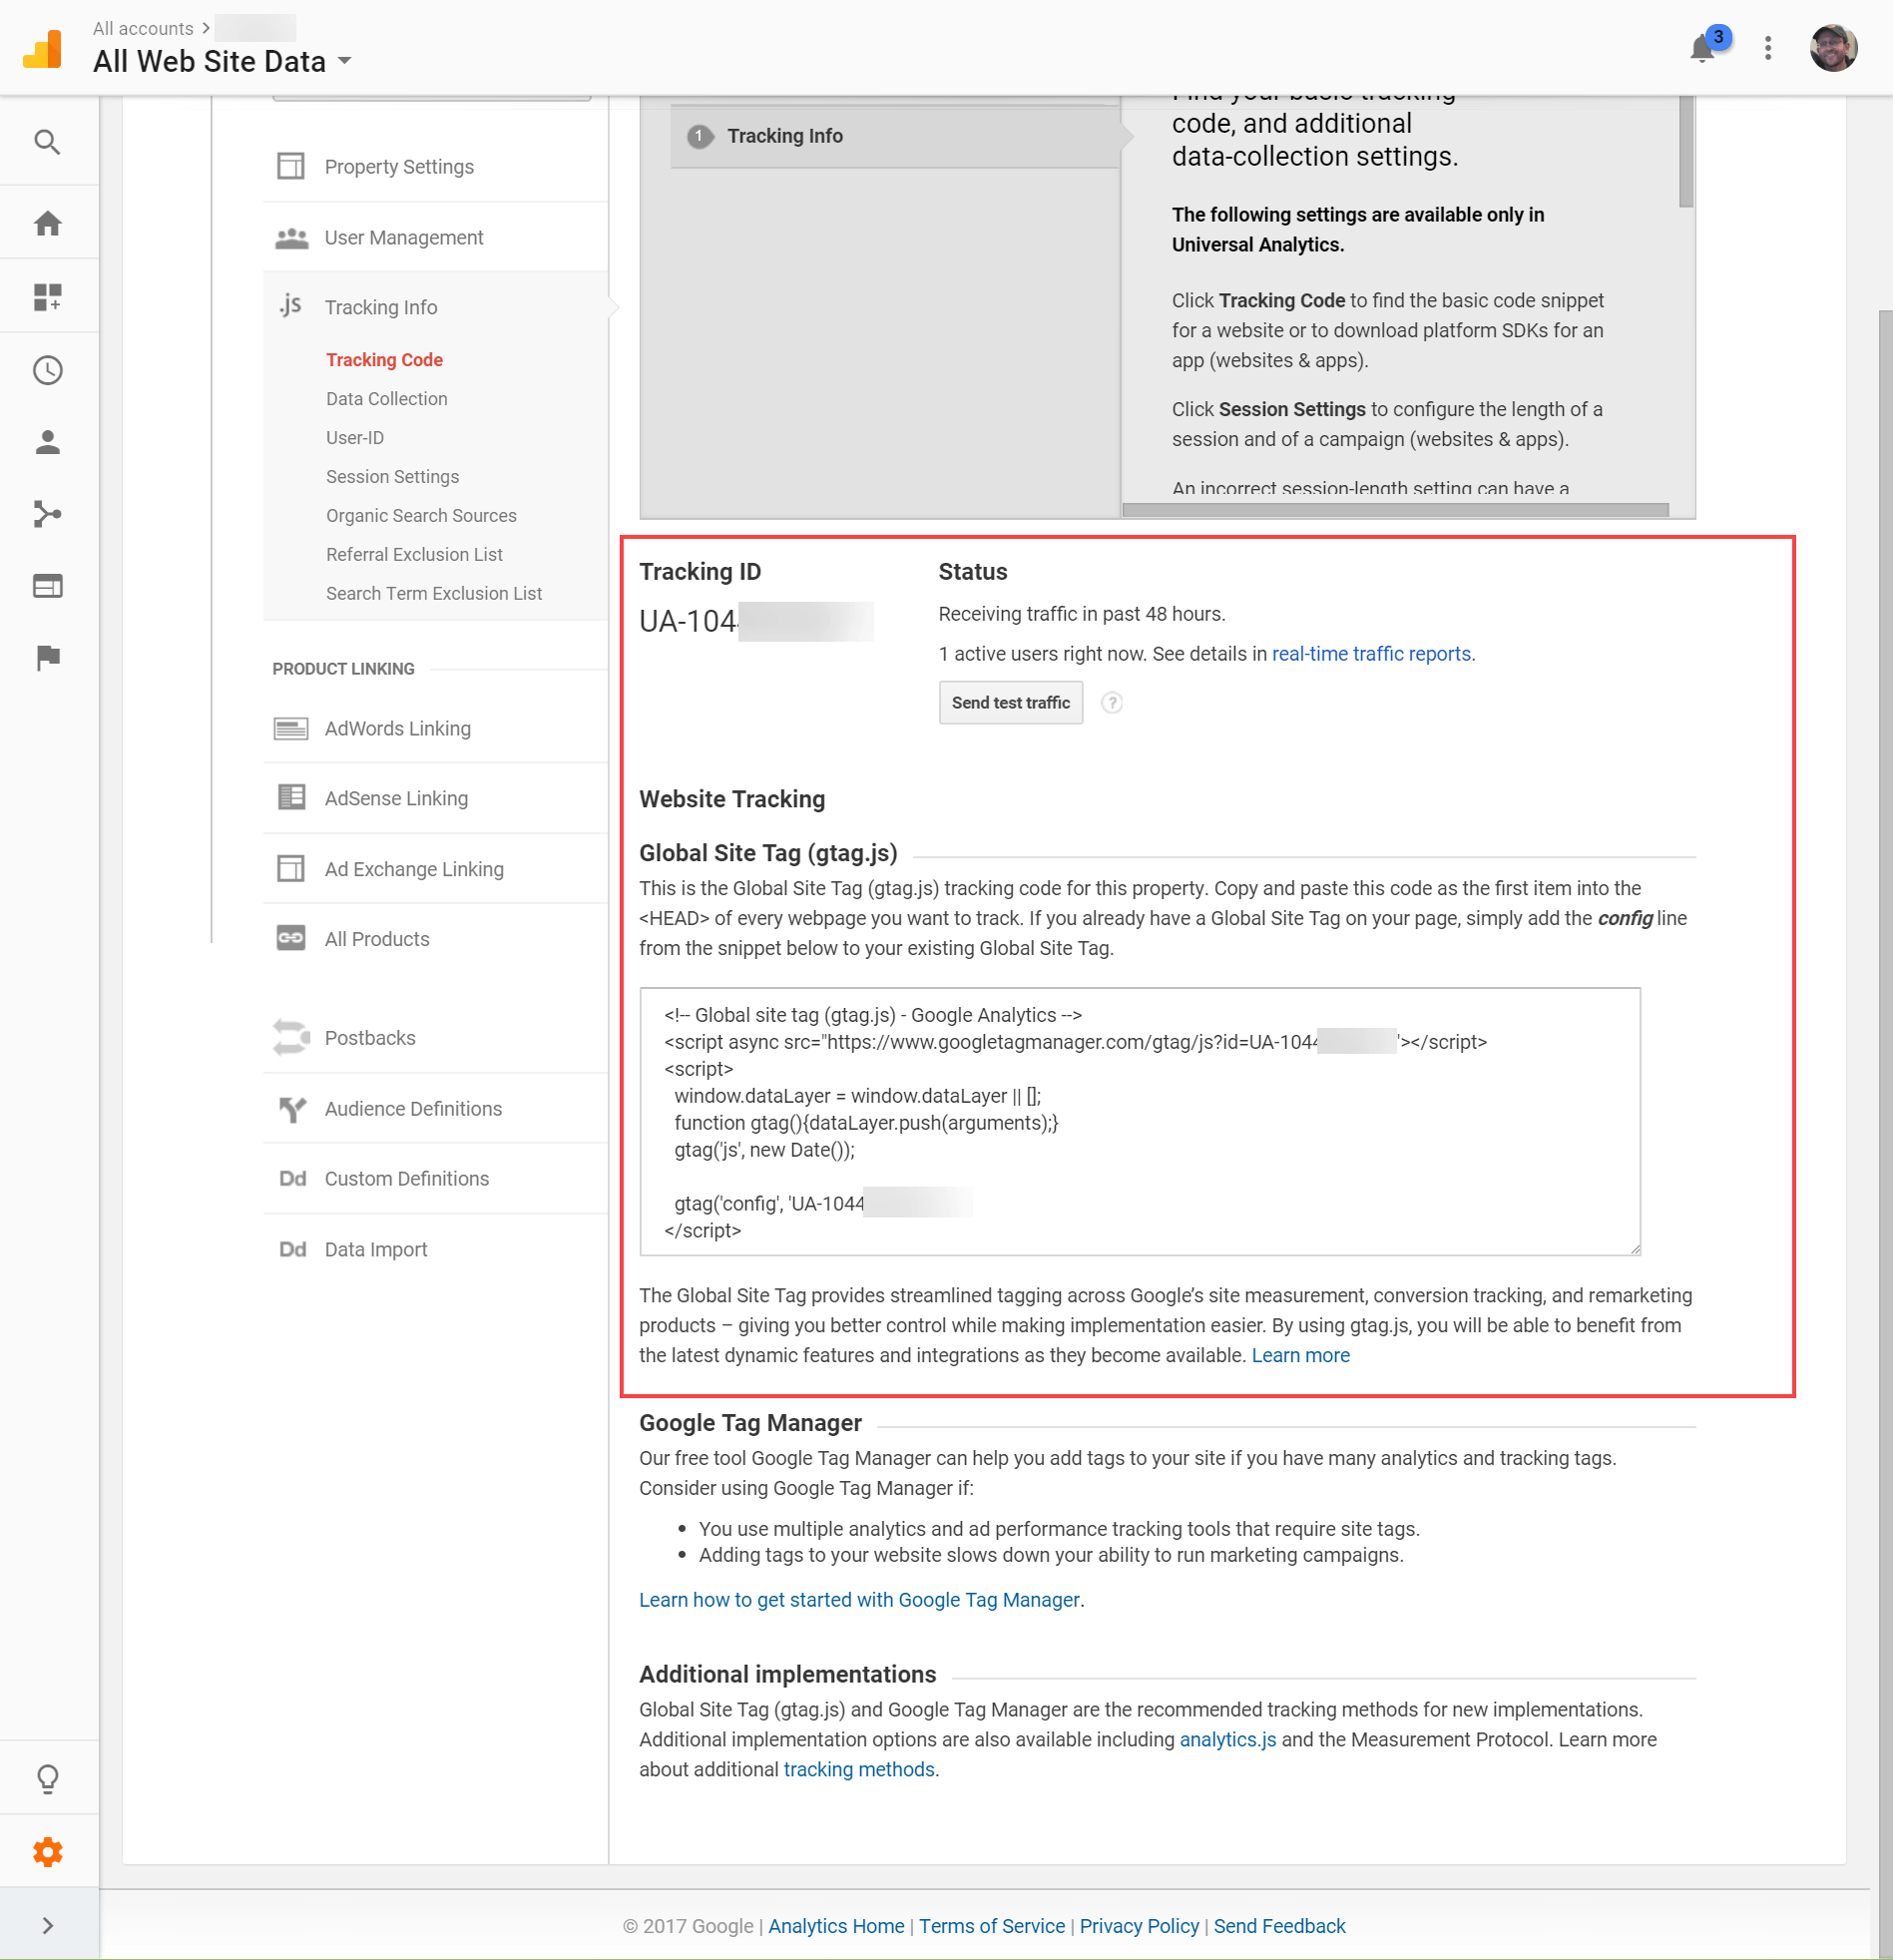
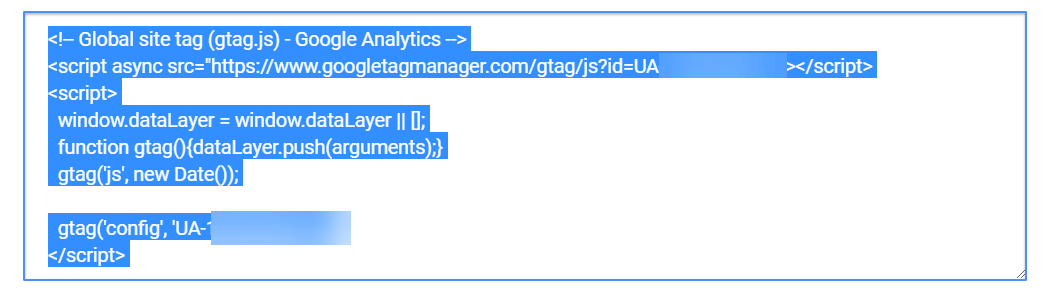
In the Tracking Code page, you’ll see a Tracking ID (a number, prefixed by “UA”) and below, the Global Site Tag. This is the code that is placed on your site to record visits in Google Analytics.
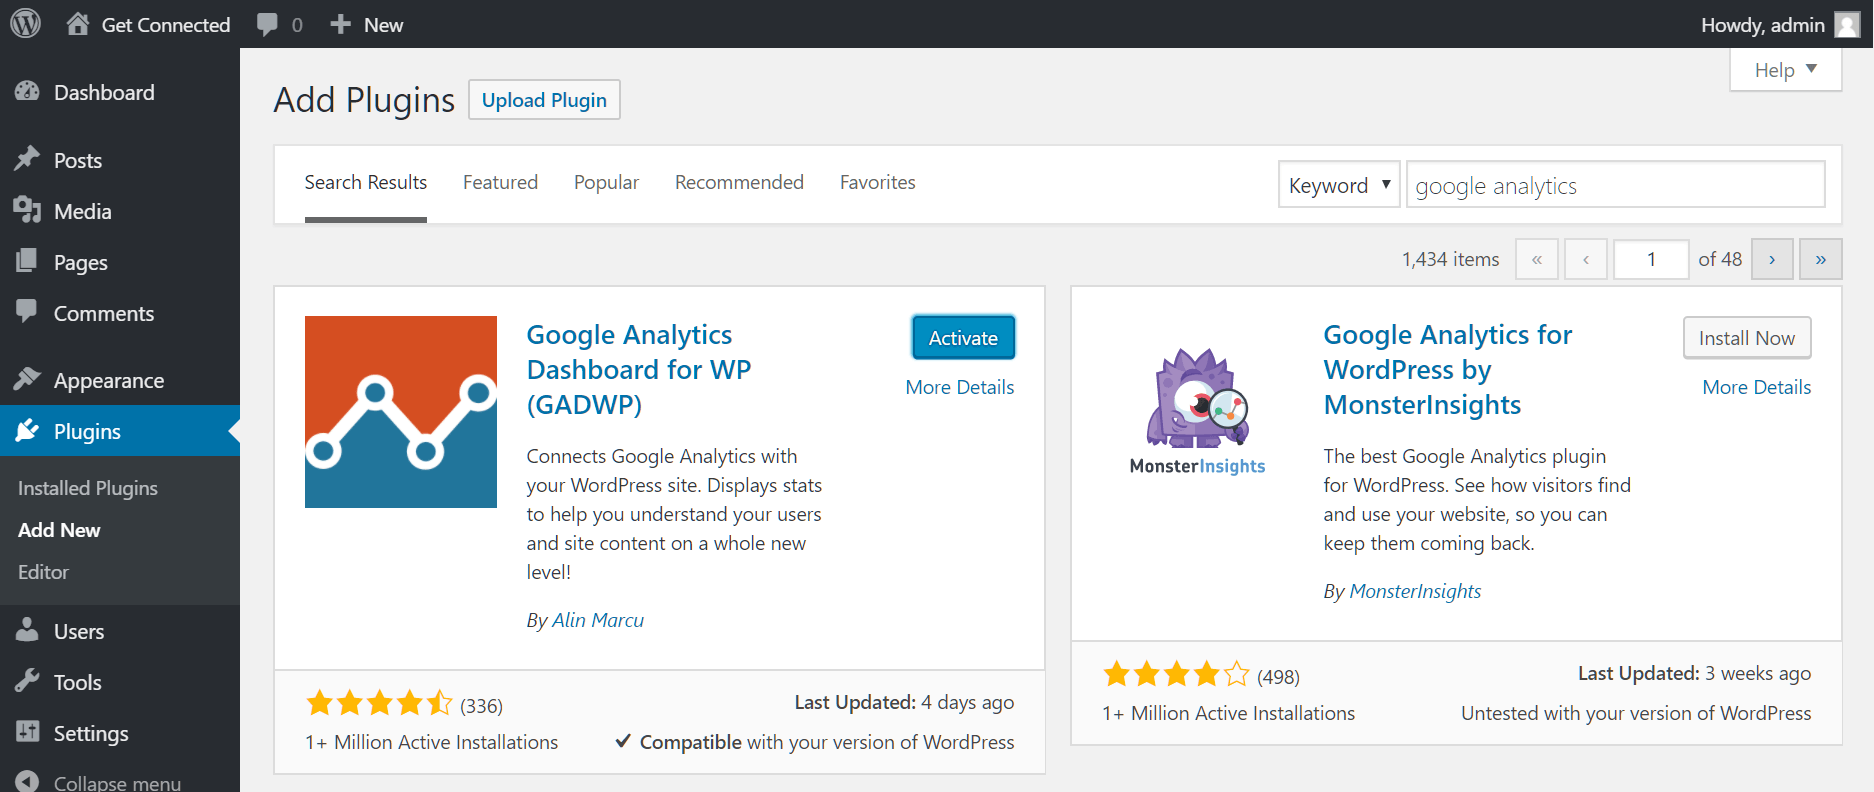
Log in to your WordPress administrator dashboard and select Plugins > Add New from the sidebar. Search for “Google Analytics” then install Google Analytics Dashboard for WP (GADWP). Activate the plugin once installed.
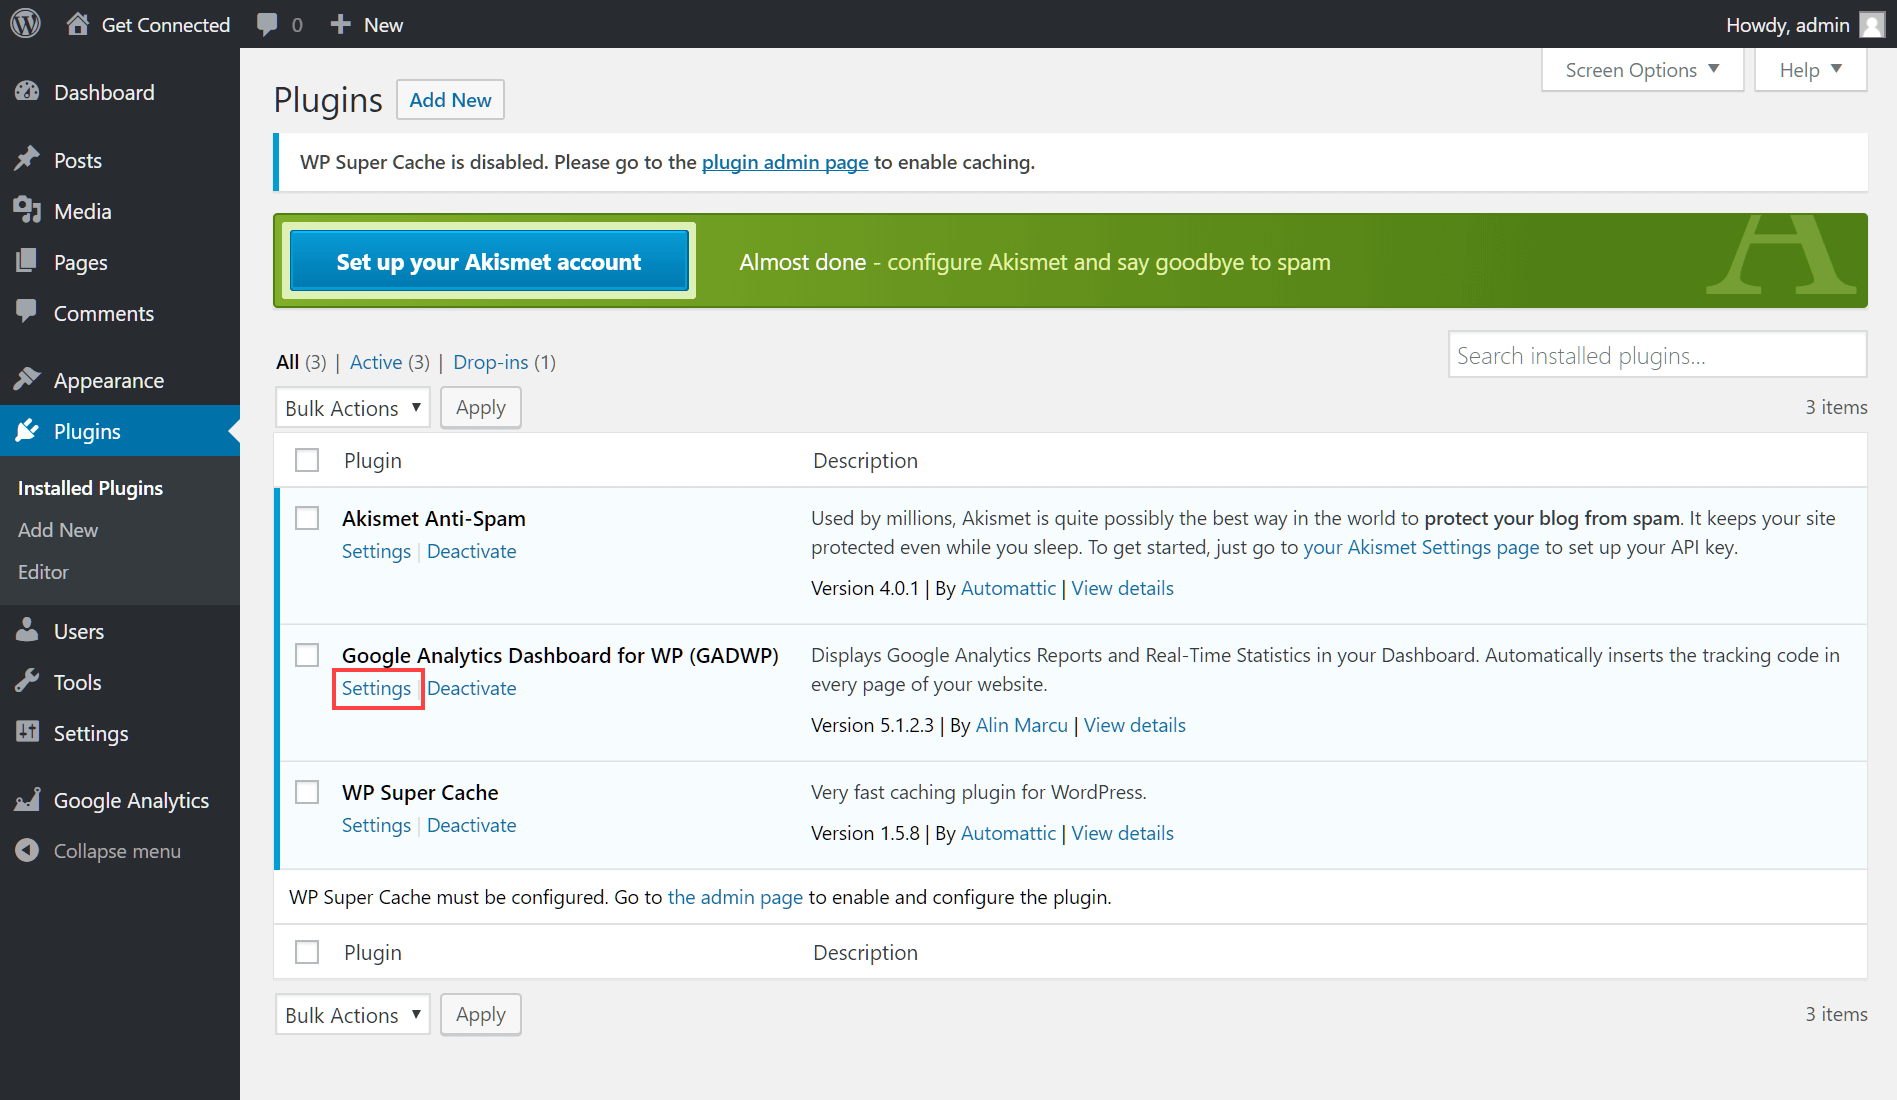
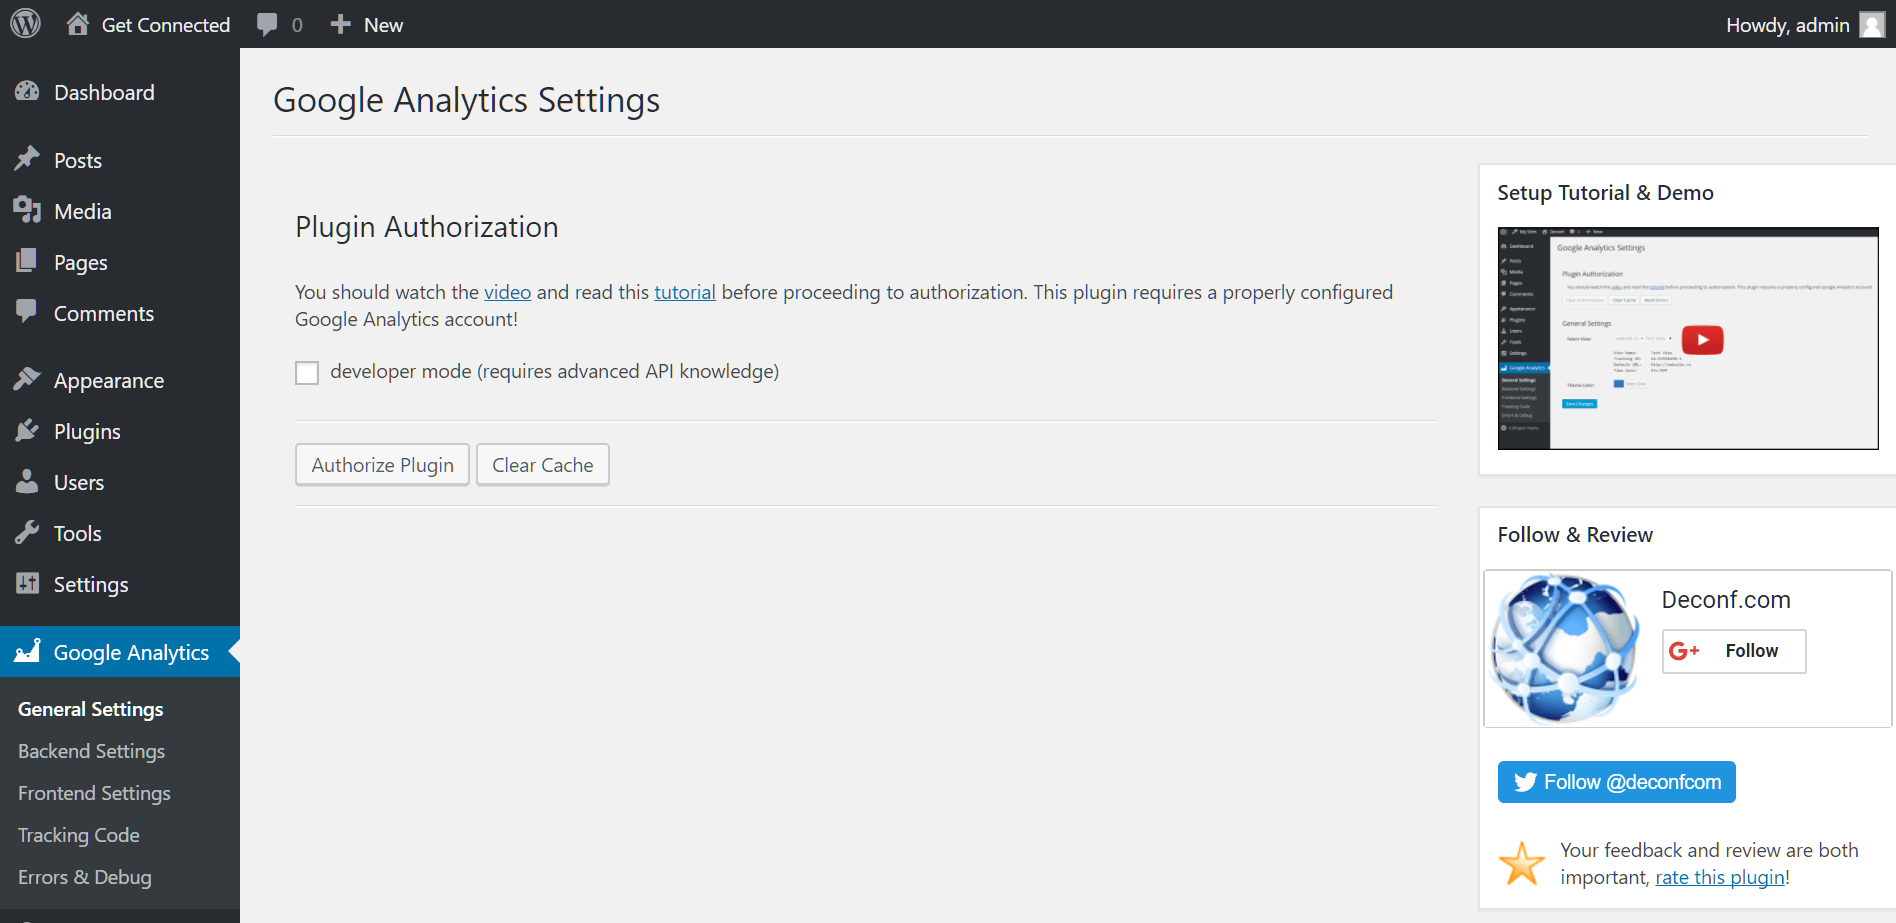
Click the Settings button to configure the plugin with your Google Analytics account details.
A setup video and tutorial is provided, which you can follow to understand the plugin’s capabilities in greater detail. Click the Authorize Plugin button to proceed.
An access code is used to link your WordPress installation with your Google Analytics account. Click the Get Access Code link to proceed.
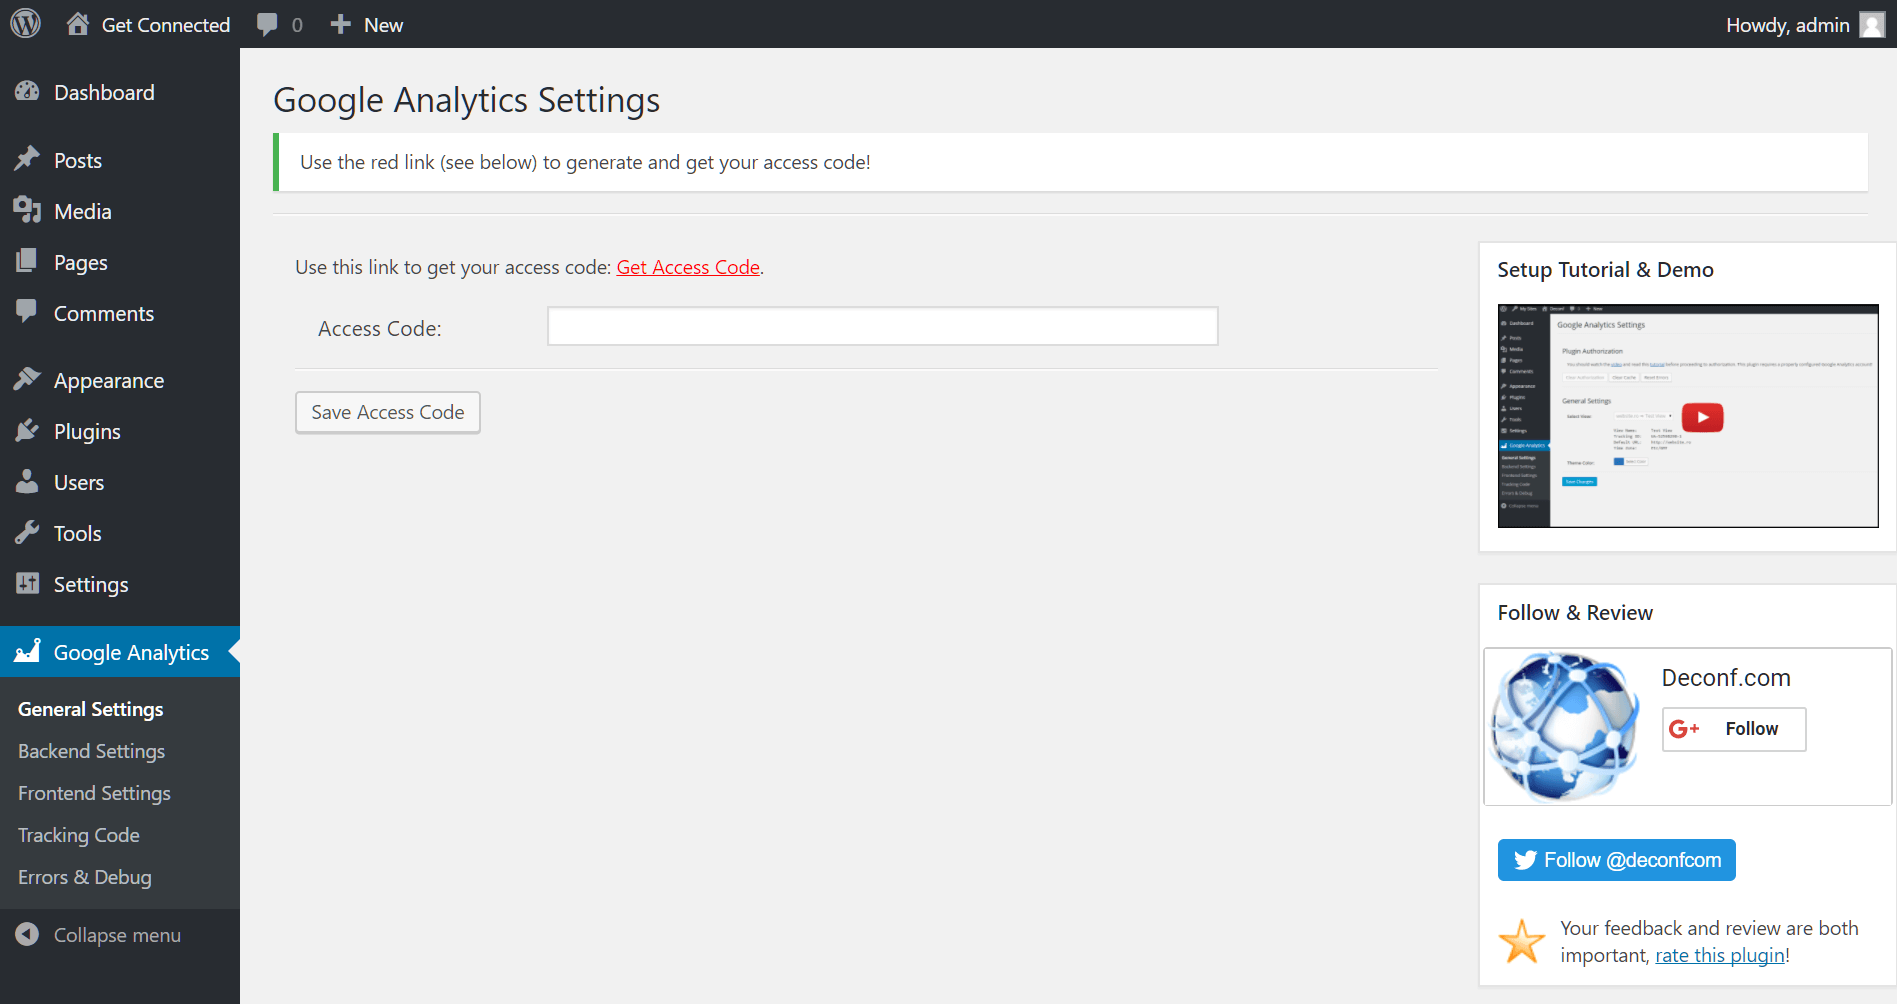
A new tab will open and you’ll be asked to enter the Google Account credentials being used for Google Analytics. Log in and the access code will be displayed on screen. Copy this code into the Access Code text box in the WordPress admin dashboard, then click the Save Access Code button.
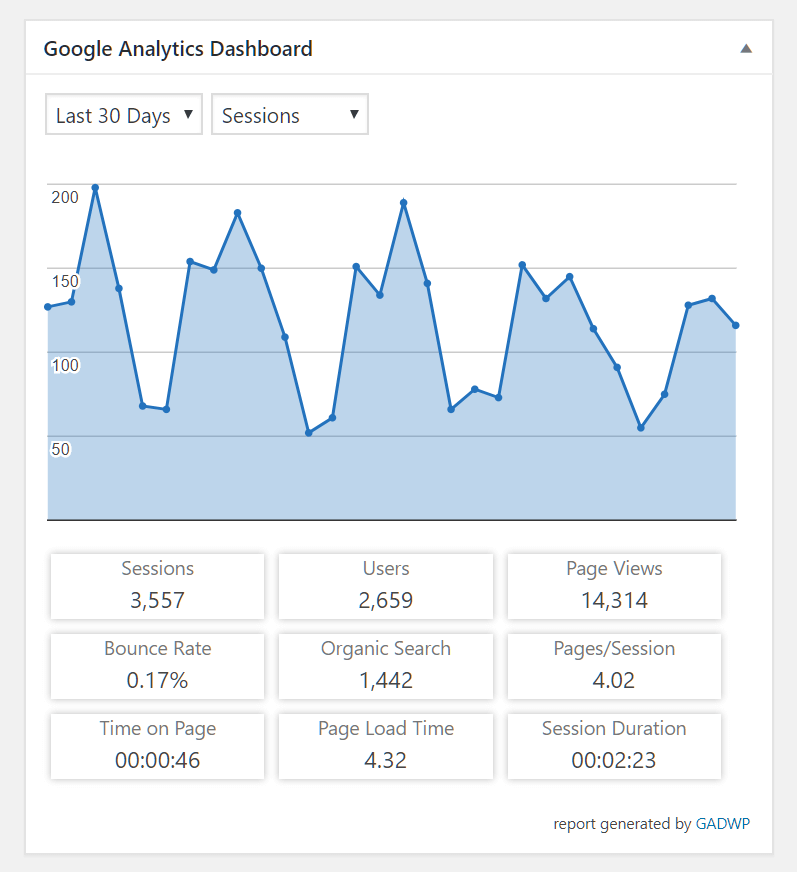
Traffic visiting your WordPress website will now be recorded in Google Analytics. Check the WordPress dashboard home page for a suite of traffic summaries.
Manually edit your site theme
The alternative to using a third-party plugin is to manually insert the Google Analytics Global Site Tag in your WordPress theme’s site header.
Head back to Google Analytics and retrieve the tracking code by visiting Admin (the gear icon in the sidebar). Select an account from the Account dropdown menu and, in the Property column, click Tracking Info > Tracking Code. Copy the entire contents of the Global Site Tag box.
You may find your theme includes a custom setting to allow you to paste in your Google Analytics code. If not, in the WordPress administration dashboard, head to Appearance > Editor.
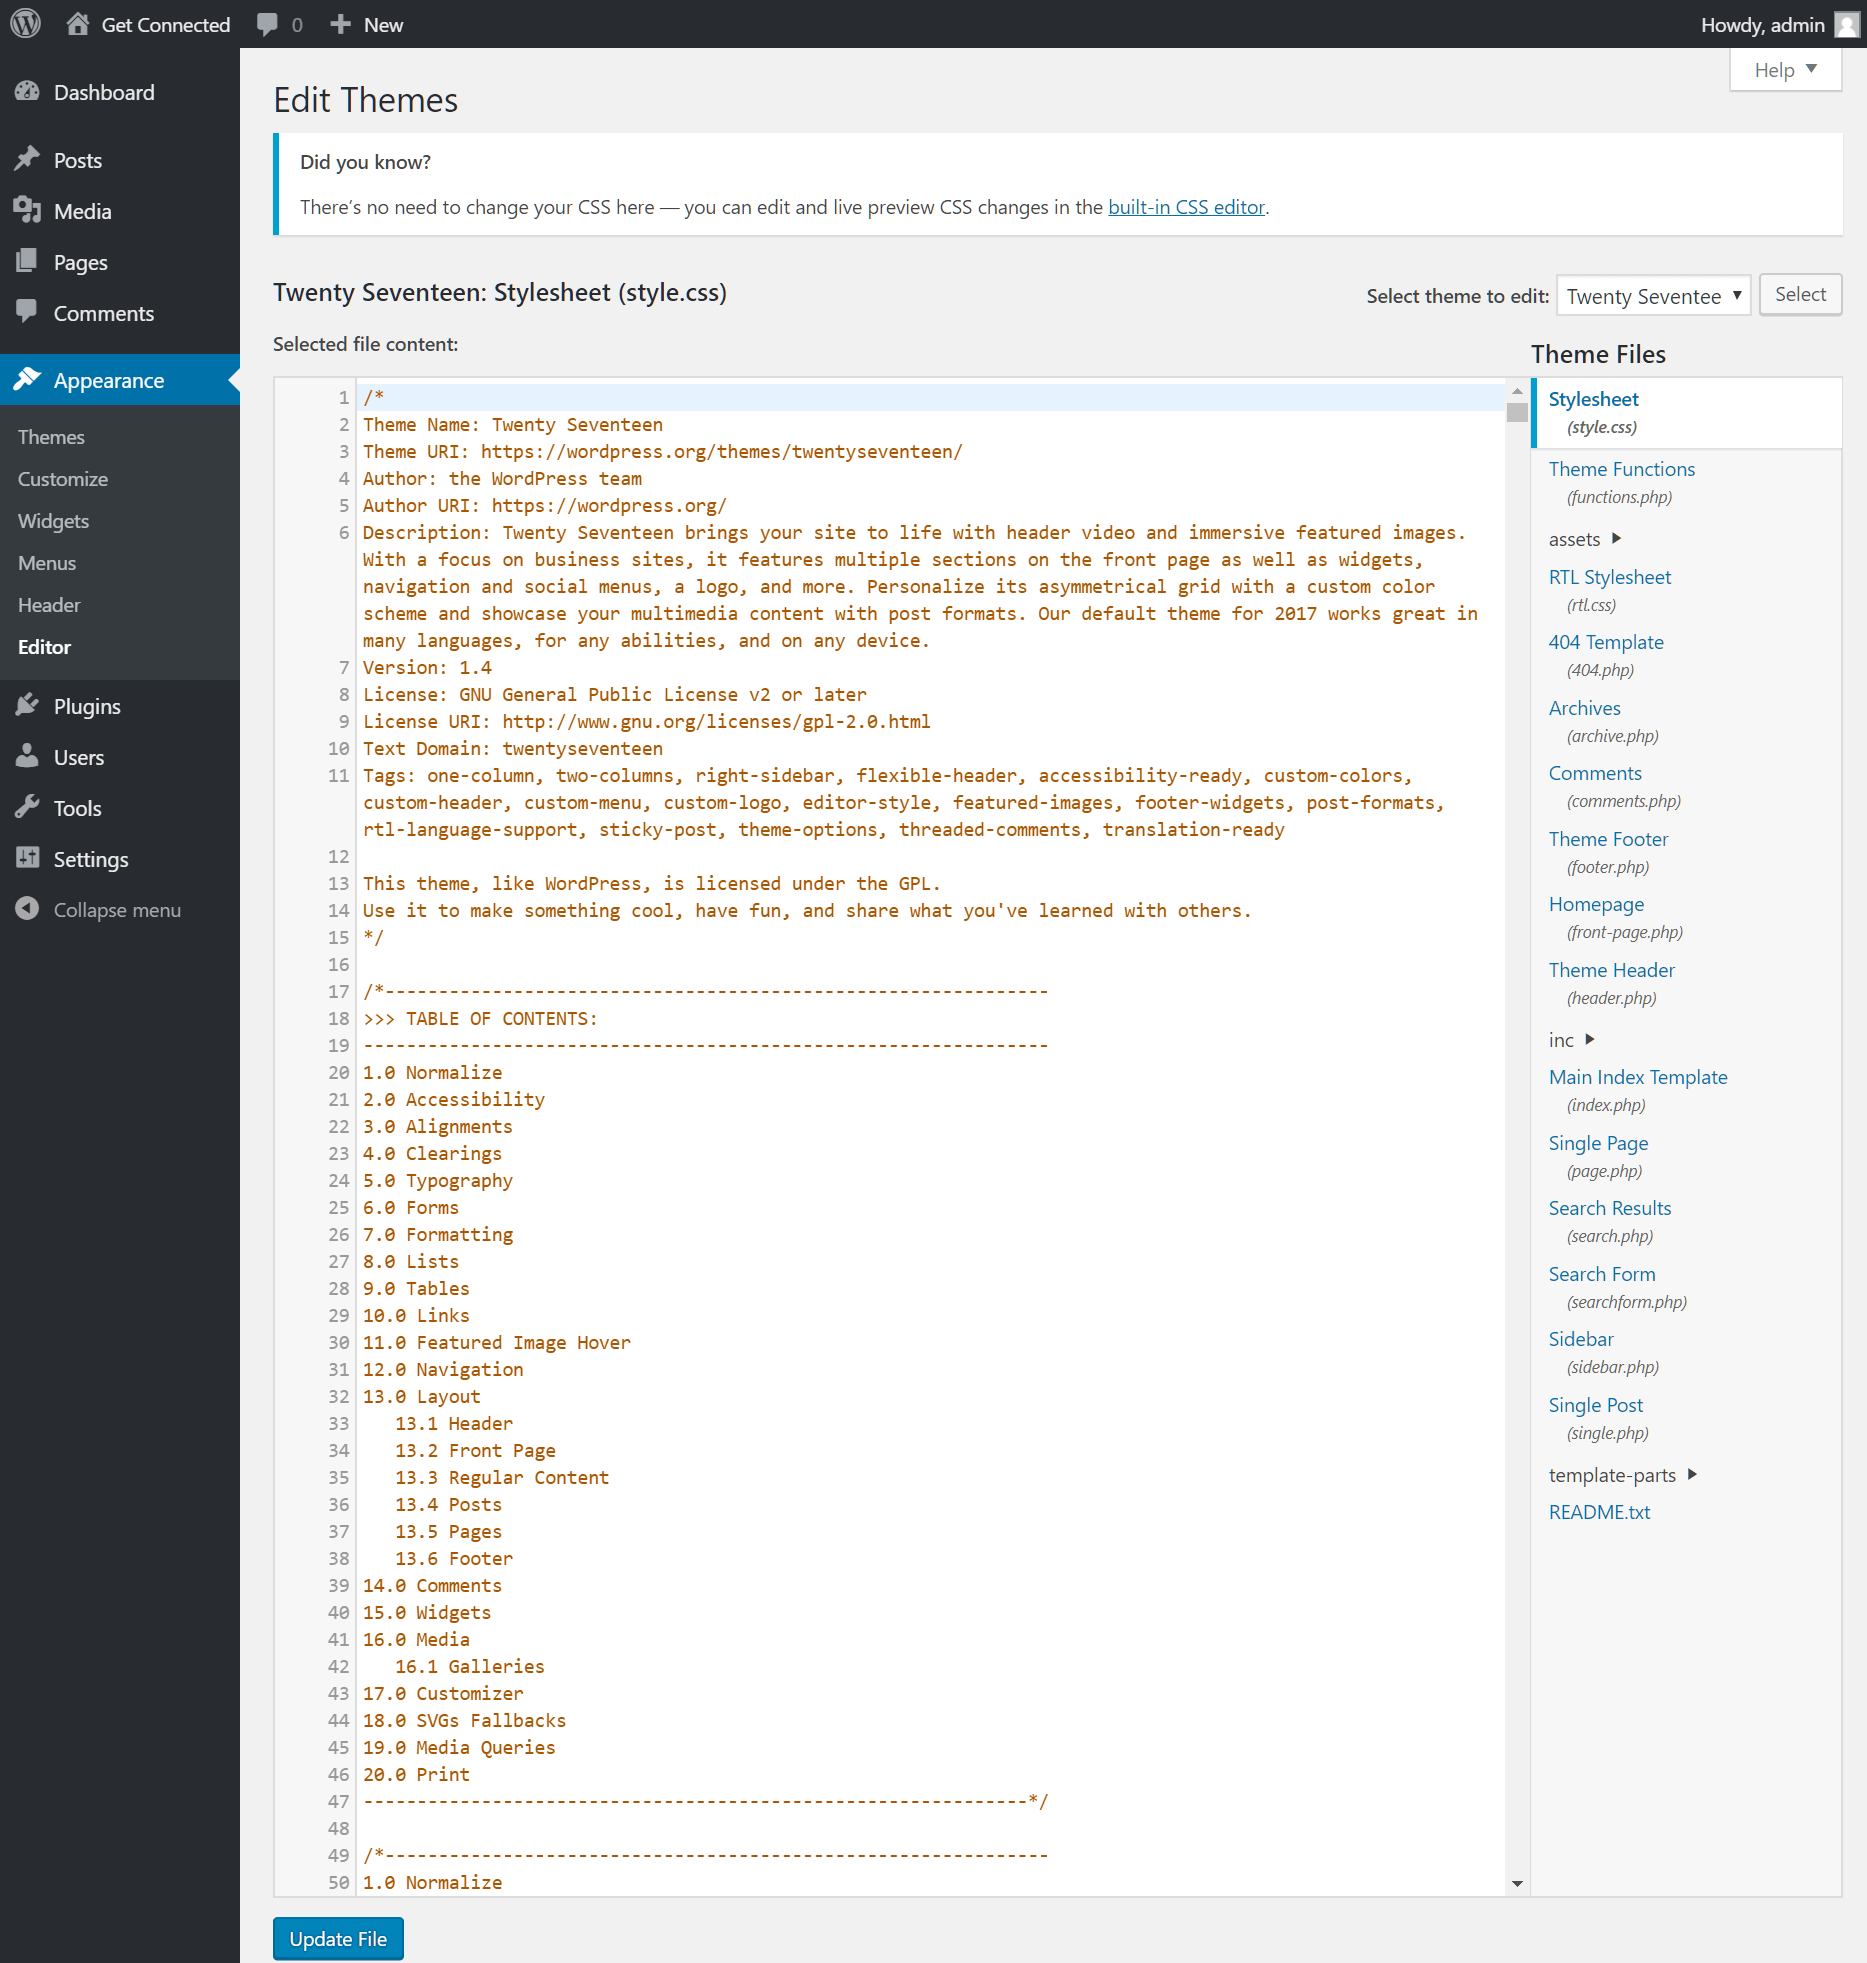
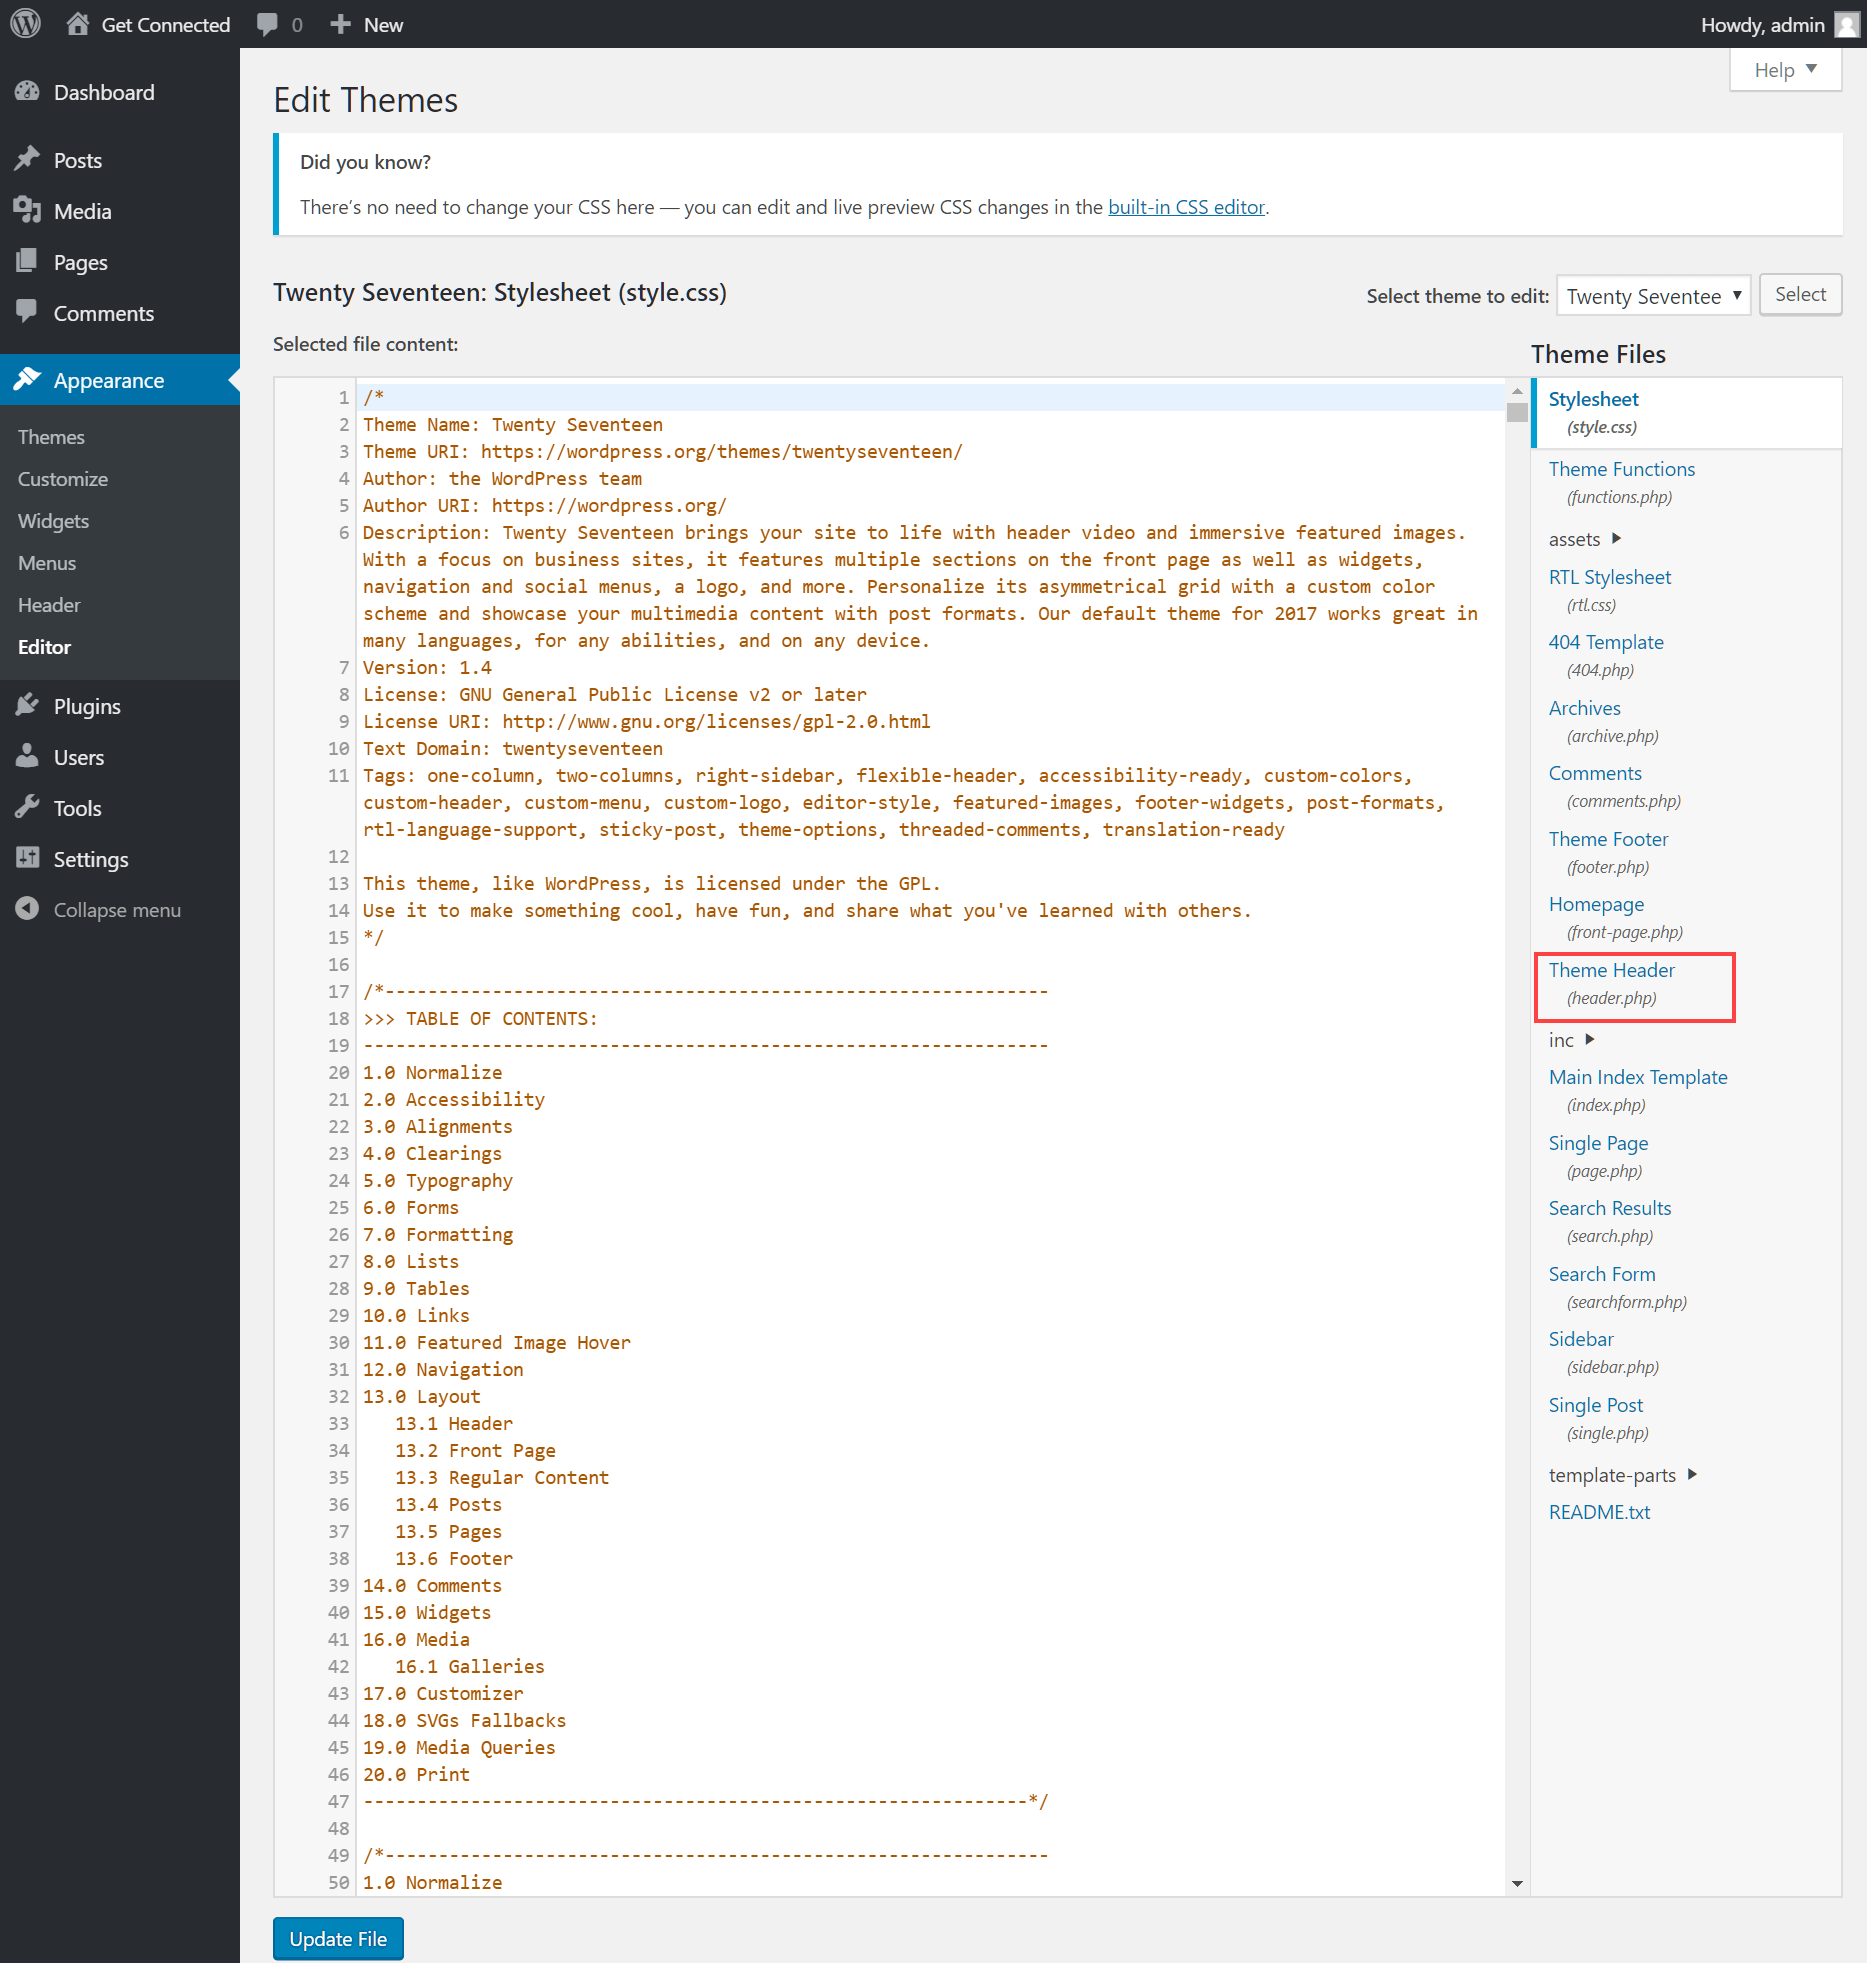
In the Theme Files sidebar, click Theme Header (header.php).
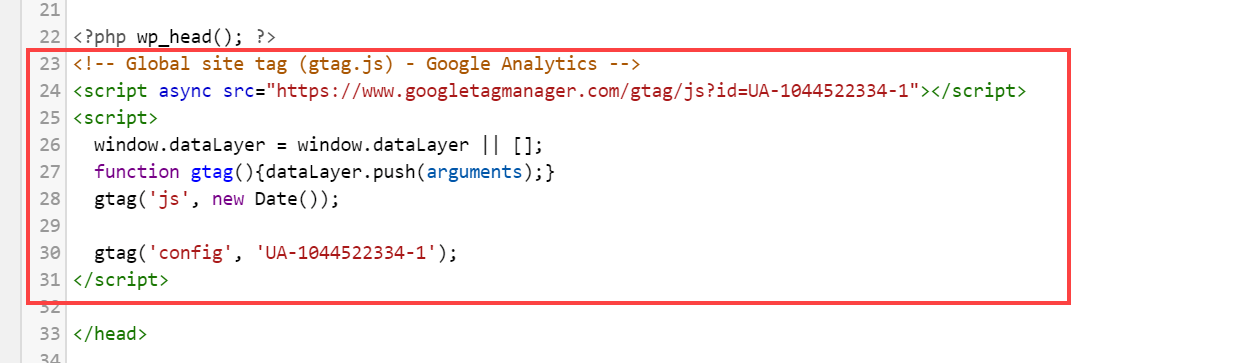
Find the closing </head> tag in the header file, and paste the Google Analytics Global Site tag above.
Save the file and your site traffic will be recorded in Google Analytics. Visit the Google Analytics website to view traffic reports.
If you notice any problems or if you need any help, please open a new support ticket from your HostPapa Dashboard. More details on how to open a support ticket can be found here.
