Two-factor authentication is a way to improve security by requiring two types of authentication, such as a password and a code sent to your mobile device, instead of just a password. You may already use two-factor authentication, also called 2FA, TFA, or two-step verification, with some of your online accounts. In this article, you’ll learn how to set up two-factor authentication to secure your HostPapa WordPress site.
Install the WordPress authenticator plugin
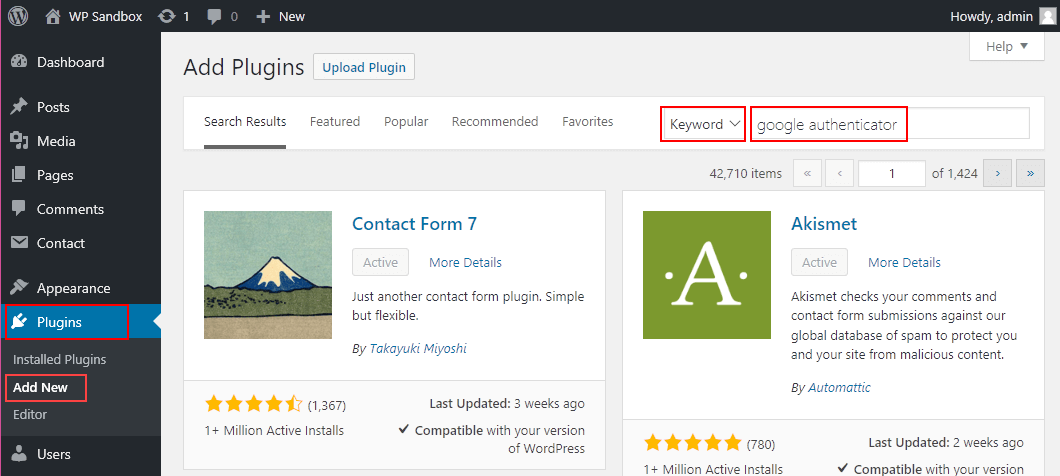
Log in to your WordPress Dashboard and go to Plugins > Add New.
There are several authenticator plugins available. In this example, we’re using the Google Authenticator by Henrik Schack. Make sure that Keyword is selected as the type of search and enter google authenticator in the search field.
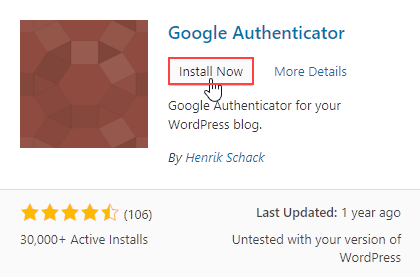
In the search results, find Google Authenticator by Henrik Schack and click Install Now.
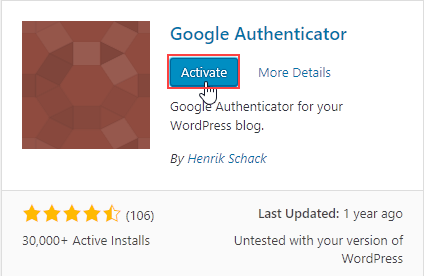
When the installation is complete, click Activate.
Install the authenticator app on your mobile device
The next step is to install an authenticator app on your mobile device. In this example, we’re installing the FreeOTP app, which is an open source project and is available for iOS and Android. Download the correct version for your device at:
- iOS – iTunes Store
- Android – Google Play
Connect the WordPress plugin to your mobile device
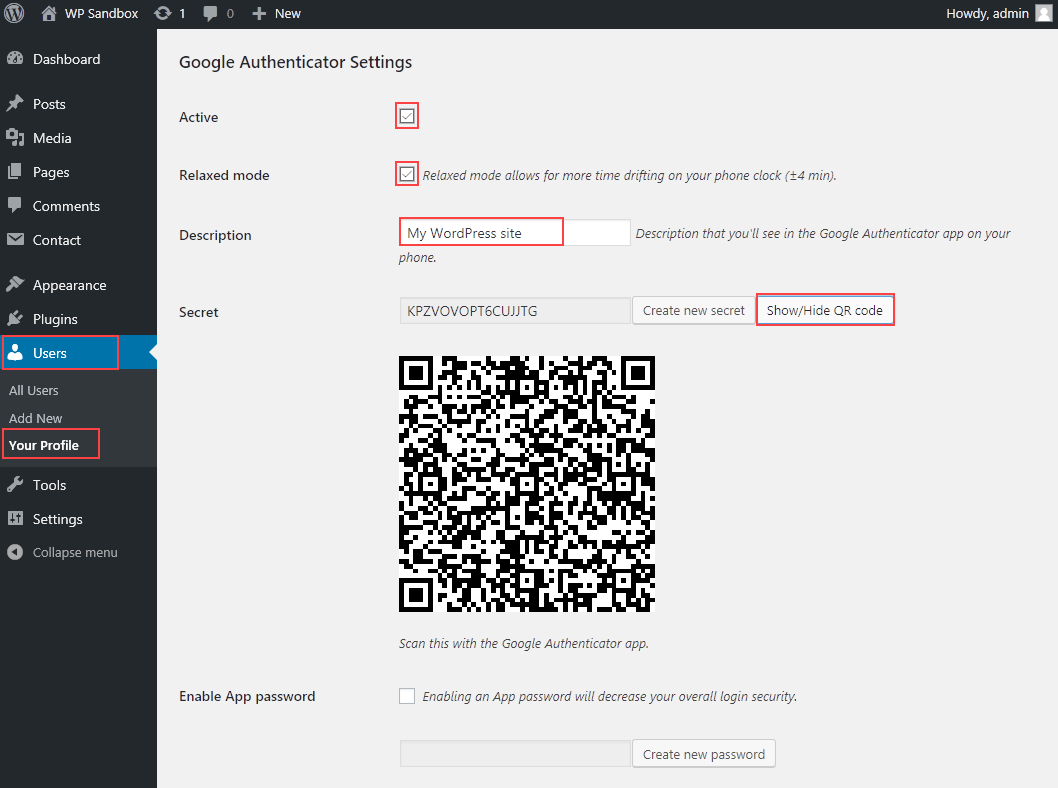
After you’ve installed the FreeOTP authenticator app on your mobile device, return to your WordPress Dashboard and go to Users > Your Profile.
In the Google Authenticator Settings, enter the following:
- Active – Select to activate Google Authenticator on your profile.
- Relaxed mode – Select to increase the time you have to enter the one-time password from 10 seconds to four minutes.
- Description – This description will be displayed in the FreeOTP app on your mobile device.
- Show/Hide QR code – Select to show the QR code, which you’ll capture with your mobile device.
Open the FreeOTP app on your mobile device and tap the QR code icon. Use your mobile device to scan the QR code displayed in the Google Authenticator Settings of your WordPress Dashboard. If the connection is successful, you’ll see the description displayed in the app.
Click Update Profile and log out of WordPress.
Test logging in using two-factor authentication
Go to your WordPress log in page. You should now see a Google Authenticator code text box in addition to the Username and Password boxes.
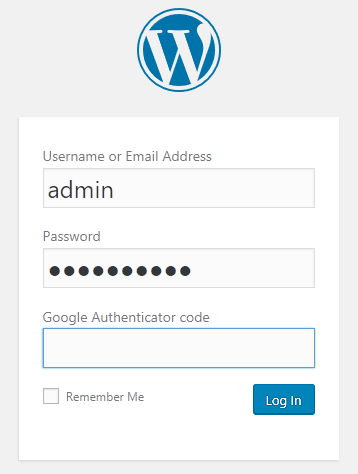
Open the FreeOTP app on your mobile device and tap WordPress to generate a one-time password. Enter the FreeOTP password in the Google Authenticator code text box on your WordPress log in page and click Log In.
Disabling two-factor authentication
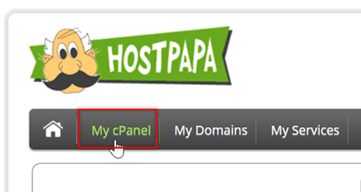
If you lose or can’t access your mobile device, you won’t be able to log in to WordPress unless you disable two-factor authentication. To do this, log in to your HostPapa Dashboard and click My cPanel.
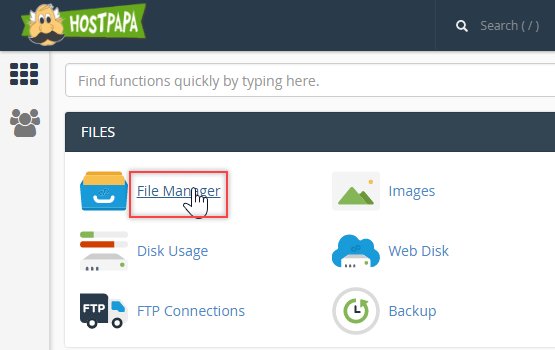
In cPanel, click File Manager.
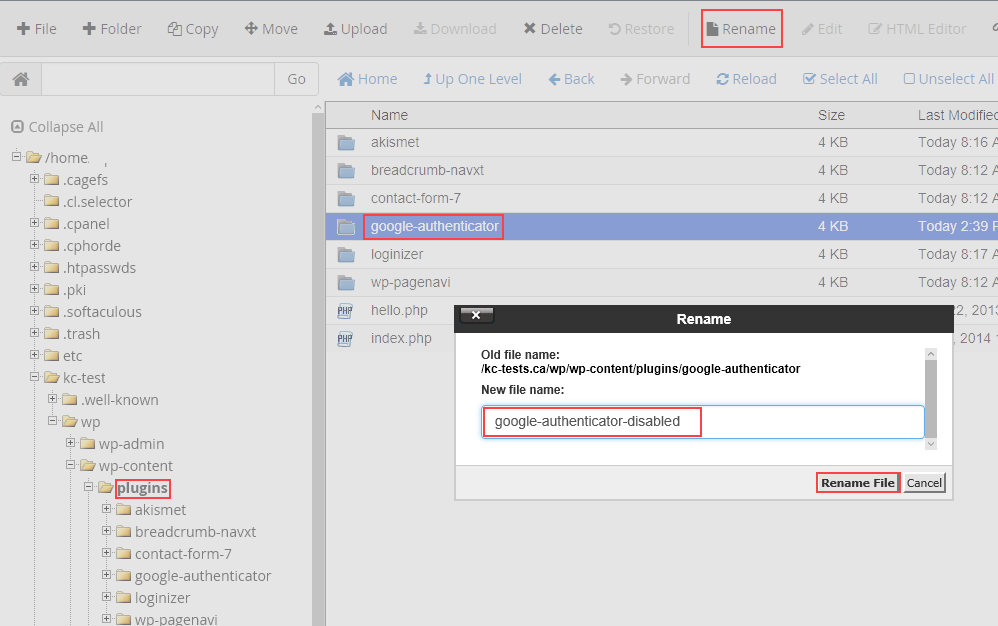
In the File Manager directory tree, select the app/plugins directory. Select the google-authenticator directory and click Rename. Enter a new name for the directory and click Rename File.
Go to your WordPress log in page. You should now see the Username and Password text boxes without the Google Authenticator code text box.
If you have any questions or need help, contact HostPapa Support by opening a support ticket. Details about how to open a support ticket are here.
