If you are experiencing security issues on your website, or if you want to restrict access to your site for any other reason, you can easily block an IP address or domain through cPanel’s IP Blocker will or via a .htaccess file.
This article will review how to use rules in .htaccess to block a domain, an IP address or restrict access to specific files and folders. If you want to use a more straightforward tool for this, we will also show you how to use cPanel’s IP Blocker. Just click here to go to that section.
How to use .htaccess to block a domain and restrict access to your site
.htaccess is a configuration file used by the Apache webserver. .htaccess rules override global settings for the directory in which the file is placed.
You may find that .htaccess files are created automatically on your server when you install popular web applications like WordPress, Drupal, and Magento. However, if the file does not exist, it can be easily created in a text editor and uploaded to your server. You can also create one directly from cPanel’s File Manager.
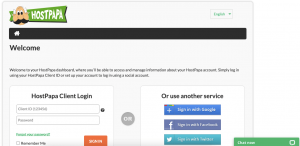
- Log in to your HostPapa Dashboard.
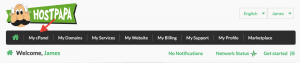
2. Click on My cPanel or My WordPress.
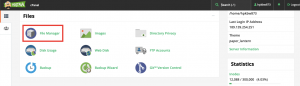
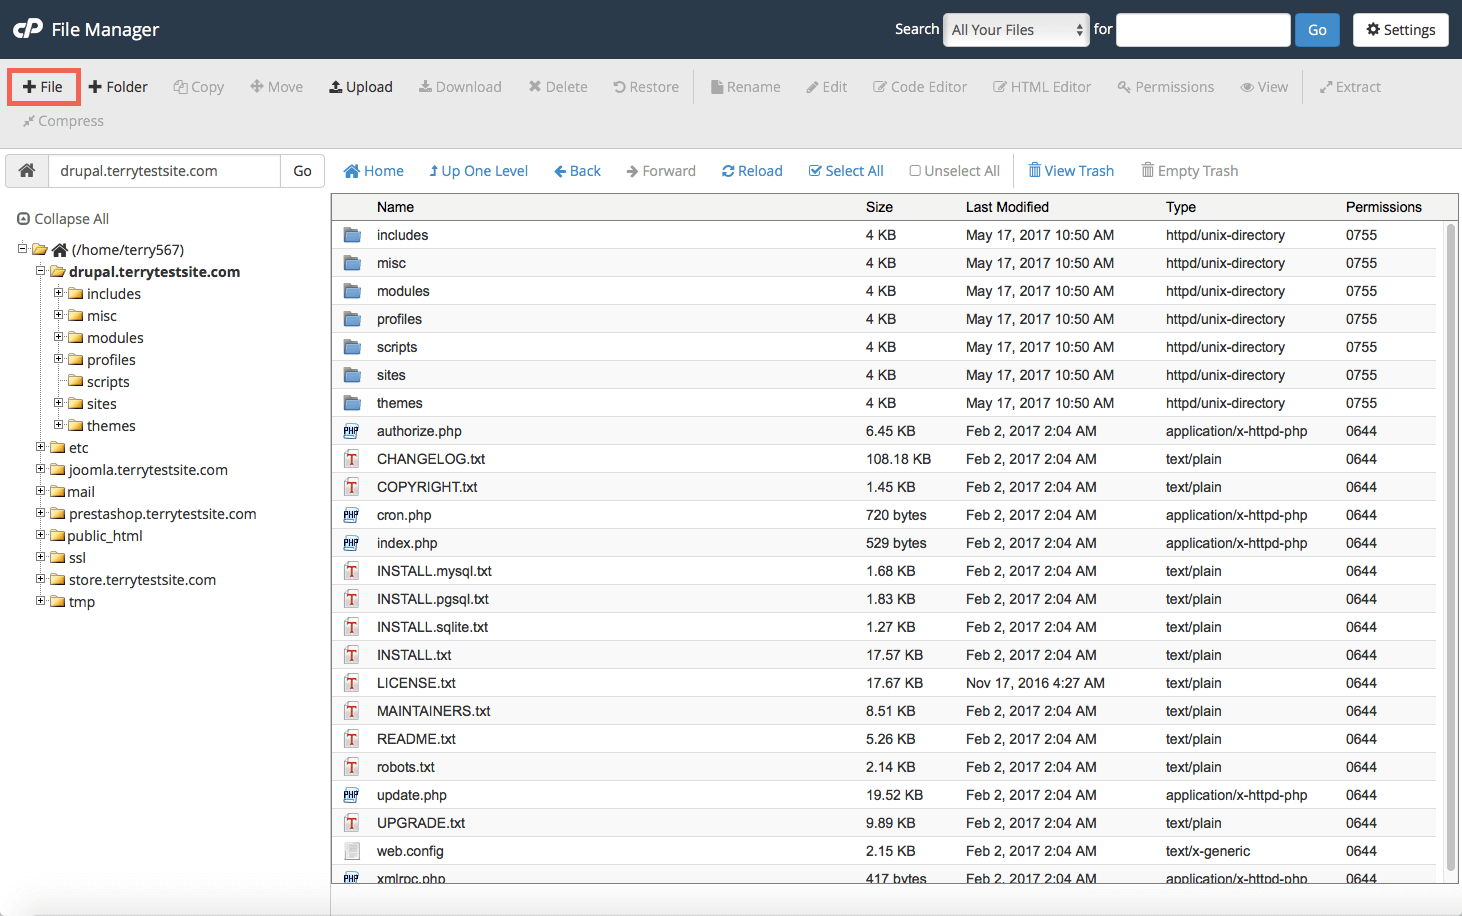
3. Select File Manager.
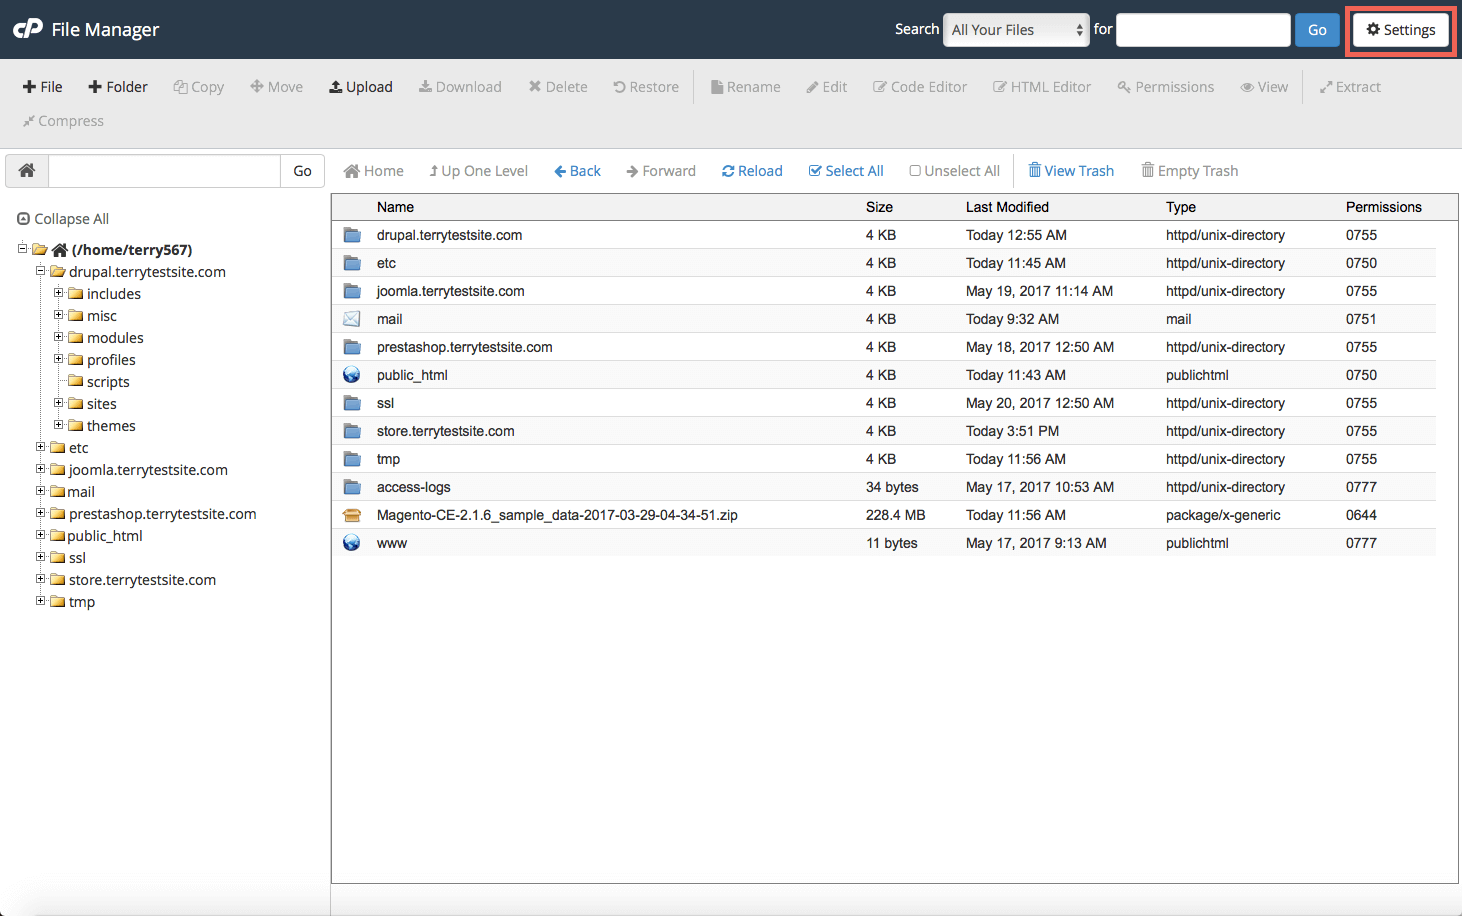
4. File Manager will open in a new window. Click the Settings button at the top right of the screen.
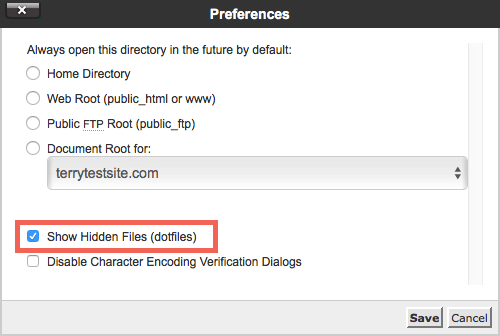
- .htaccess files are hidden from view by default. To expose them, ensure Show Hidden Files (dotfiles) is checked in the Preferences panel, then click Save.
- Navigate to your website root by clicking on the folders from the left sidebar. Check to see if a .htaccess file currently exists.
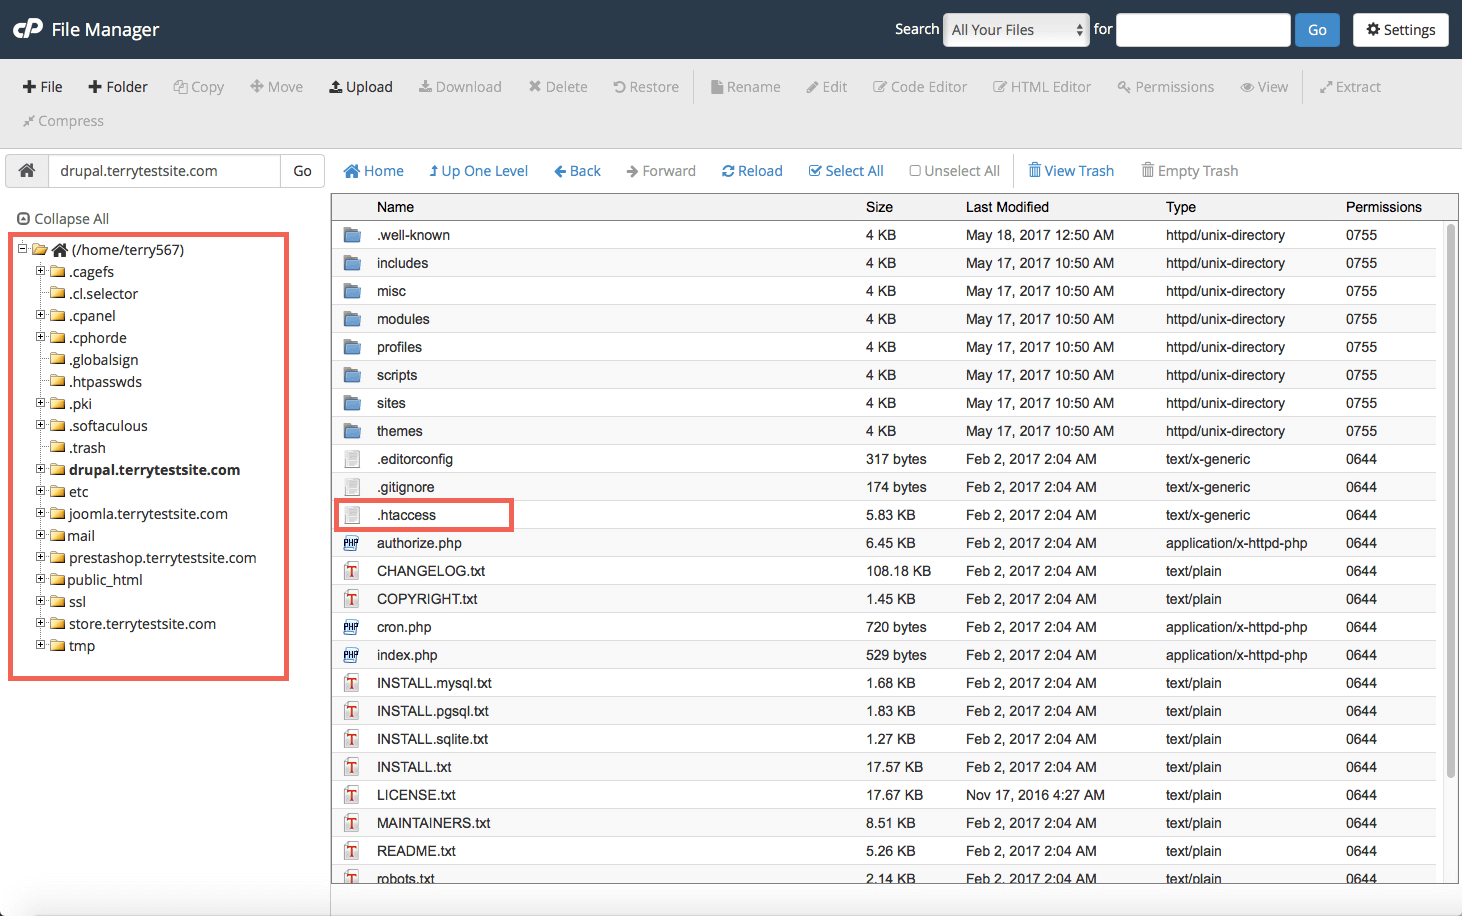
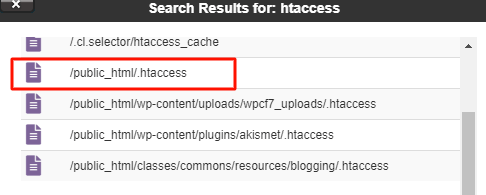
You can also use the search bar to locate the file quickly.
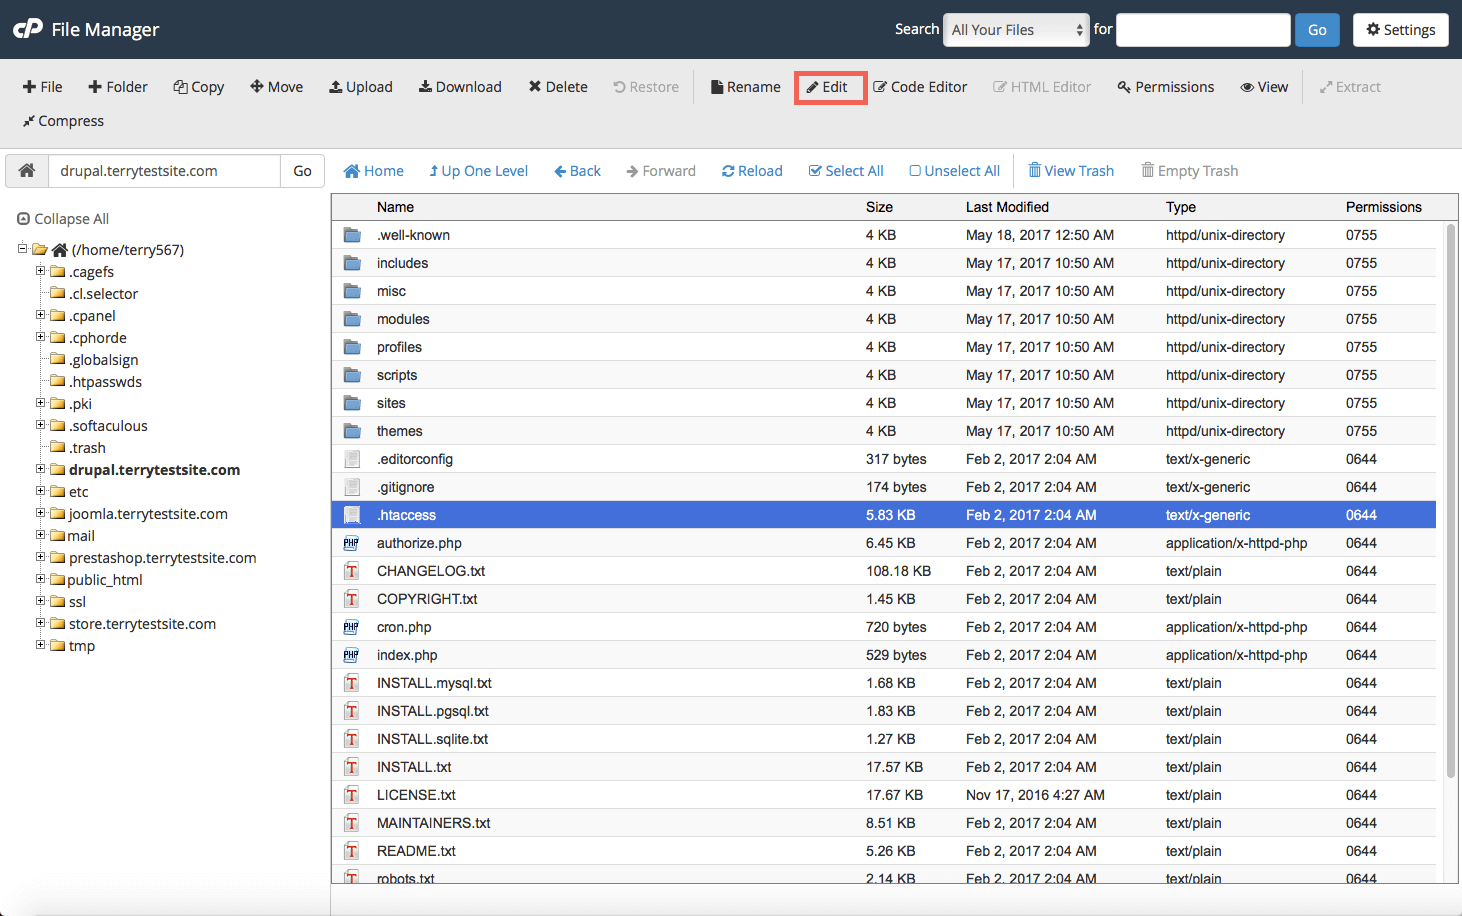
- If the .htaccess file exists, highlight it and select Edit from the top menu and skip to Step 8 (how to create .htaccess rules).
If the file does not exist, you can easily create a new one by selecting + File at the top left corner of the File Manager.
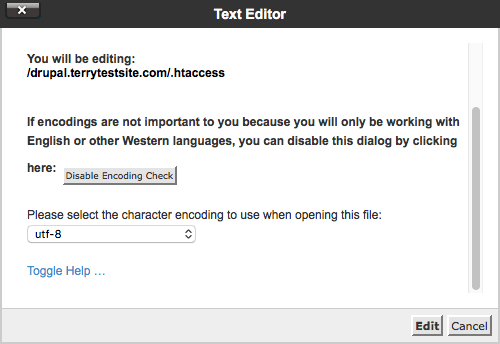
In the New File panel that opens, enter .htaccess as the file name and select Create New File to open the cPanel text editor. If asked to confirm Encoding settings, leave the default option in place and click Edit.
- Now that you have a file named .htaccess, IP deny rules must be created. These rules can be configured to block all users or specific users (based on their IP address) from accessing website resources. You can also use .htaccess to block a domain, deny access to certain file types, specific files (for example, configuration files), and more.
How to completely disable access to your account
- To prevent direct access to all files and folders on your server, create the .htaccess file in the root (top folder) of your server and add the following rule:
deny from all
- Then click on the Save Changes button.

How to deny access to specific file types through .htaccess
If you wish to deny access to certain types of files, you can do so with the following rule. This example blocks access to .php files.
<Files ~ "\.php$">

Order allow,deny

Deny from all

</Files>
Simply change the file extension in the first line of the rule for other file types. For example, this rule blocks access to .inc files:
<Files ~ "\.inc$">

Order allow,deny

Deny from all

</Files>
How to deny access to a specific file through .htaccess
Blocking access to a specific file is performed using the following rule:
<Files config.php>

order allow,deny

Deny from all

</Files>
This example targets a config.php file held in the same directory as the .htaccess file. To change the target, replace config.php in the first line with your chosen filename.
How to use .htaccess IP deny access
If you wish to block a specific user from accessing your website, you can do so using their IP address or the domain name from which they’re visiting. Use the following rule (replacing the numbers with the user’s IP address):
deny from 123.456.789.123
To deny access to a block of IP addresses, simply omit the last octet from the IP address:
deny from 123.456.789.
This blocks access to anyone using an IP in the range of 123.456.789.0 to 123.456.789.255.
How to use .htaccess to block a domain
Denying access via links from specific domains (e.g. www.problemdomain.com) is also possible through .htaccess. The following rule will display a 403 Forbidden error to any user accessing your site from a link hosted on the targeted domain:
SetEnvIfNoCase Referer "problemdomain.com" bad_referer

Order Allow,Deny

Allow from ALL

Deny from env=bad_referer
Change the domain in the first line of the rule to target the domain you wish to block. For a more subtle approach, this rule displays a 500 Internal Server Error for anyone linking from the target domain:
RewriteEngine on

RewriteCond %{HTTP_REFERER} example\.com [NC,OR]

RewriteRule .* - [F]
How to remove access restrictions through .htaccess
If you wish to remove access restrictions from your .htaccess file, simply delete the rule from the file in cPanel File Manager’s text editor and save the file.

How to block all IP addresses except specific ones
If you want to block all IP addresses except specific ones, use this rule:
Order allow,deny

Deny from all

Allow from IP1

Allow from IP2
How to restrict access to your website using cPanel’s IP Blocker
If you don’t want to use a .htaccess file, you can also go to cPanel’s IP Blocker feature.
IP Blocker is less flexible than .htaccess, but it is easier to use. For example, you can block an IP address, IP address range, or domain name, but you cannot target specific files or file types.
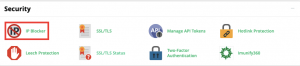
1. Head to My cPanel in your HostPapa Dashboard and scroll down to the Security section.
2. Click on IP Blocker.
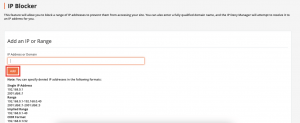
- In the Add an IP or Range field, enter the IP address, IP address range, or domain you wish to block.
- Click Add. That’s it!
IP Blocker checks the validity of the IP address format as you type. You can specify IP addresses in the following formats:
- Single IP Address: 192.168.0.1
- Range: 192.168.0.1-192.168.0.40
- Implied Range: 192.168.0.1-40
- CIDR Format: 192.168.0.1/32
- IP Block: 192.
cPanel will also check the domain name with its IP address via a lookup. If the IP address cannot be found, you will not be able to block the domain.
How to manage blocked IP addresses and domains through cPanel’s IP Blocker
At the bottom of the IP Blocker page, you’ll see a section named Currently-Blocked IP Addresses. This provides a list of IP addresses that are currently blocked from accessing your server. To lift access restrictions, simply click the Delete button next to each IP address or range.

If you need help with your HostPapa account, please open a support ticket from your dashboard.
