WordPress uses a range of background scheduled tasks to keep your website running smoothly. Each time a user loads a page of your site, a WordPress file called wp-cron.php is called. This file checks whether a scheduled task is ready to be launched and, if so, executes it.
This process works well, but can be a target for distributed denial of service (DDoS) attacks. Repeated, high volume calls to the wp-cron.php file (or a cron job, as it’s commonly known) can significantly increase server load, causing your website to time out and scheduled tasks to fail.
If that’s a concern, you can change the way in which WordPress runs scheduled tasks, replacing the call to the wp-cron.php file with a “real” cron job managed by the server’s operating system.
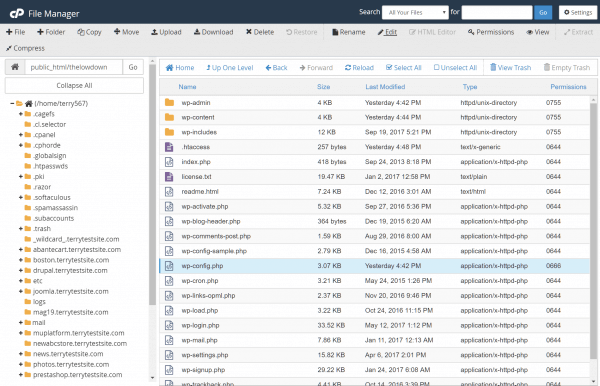
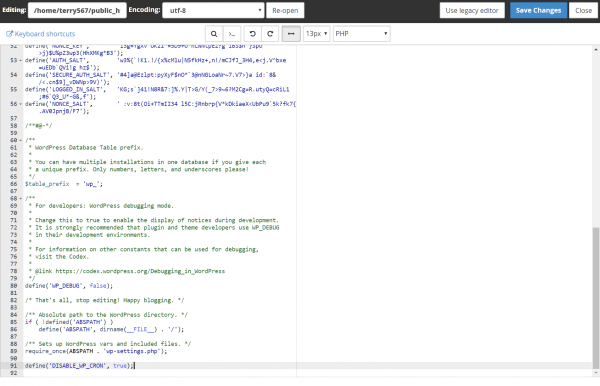
The first step is to disable the WordPress cron job. To do so, use your FTP client and a text editor or the cPanel File Manager to edit the WordPress wp-config.php file. You’ll find it in the top folder of your WordPress installation.
Add the following line:
define('DISABLE_WP_CRON', true);
Make sure to add this line before That’s all, stop editing! line. It would be best to add it after define(‘DB_COLLATE’, ”); line.
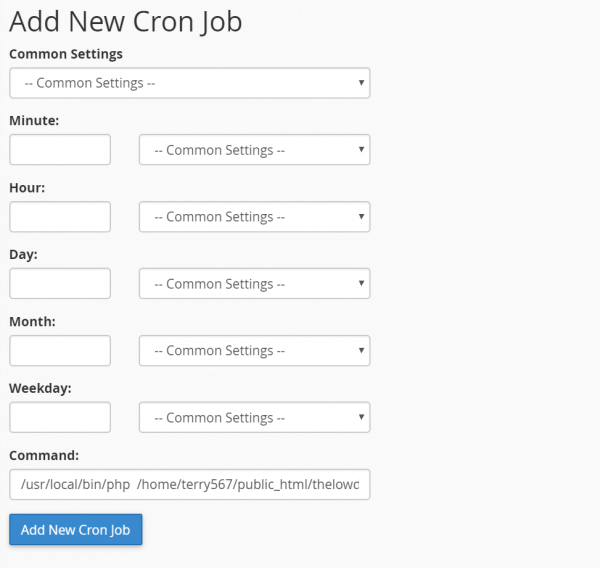
Next, set up a server-managed cron job using My cPanel. Head to the Advanced section and look for the Cron jobs icon.
Under Add New Cron Job, enter the following line in the command field:
/usr/local/bin/php /home/user/public_html/wp-cron.php
Replace /home/user/public_html/wp-cron.php with the actual path to your wp-cron.php file. Head back to cPanel File Manager if you need to check the path.
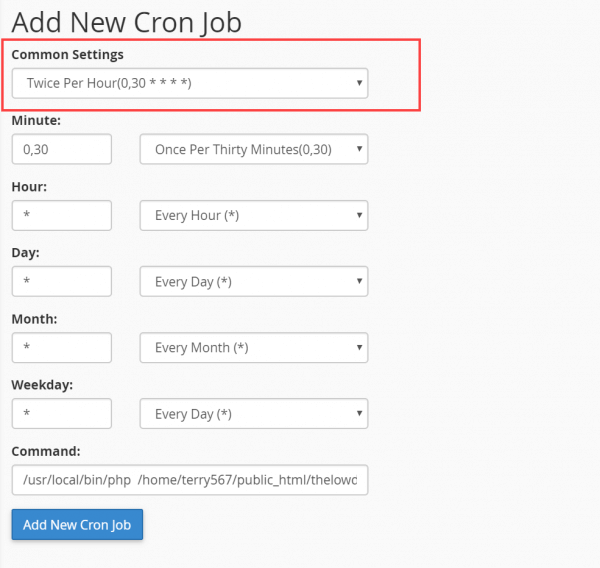
Higher up the screen, use the Common Settings dropdown menu to set the schedule. Select Twice Per Hour. This automatically completes the schedule settings.
If you wish, you can add your email address to receive a regular report each time the cron job runs. It’s a good idea to do so, to ensure your scheduled tasks are running.
Click the Add New Cron Job button to complete configuration.
For further questions, or if you need help, please open a support ticket from your HostPapa Dashboard. Follow this link to learn how.


