Photo Gallery by WD enhances the core photo gallery features in WordPress with an array of customization options, layout templates and advanced features.
The plugin allows you to create fully responsive image and video galleries that automatically resize depending on the size of screen. A free edition can be downloaded and installed from the WordPress Plugin repository, while a commercial edition, WordPress Photo Gallery Pro supports extended features.
Follow these steps to install and set up Photo Gallery by WD for enhanced WordPress image slideshows and galleries.
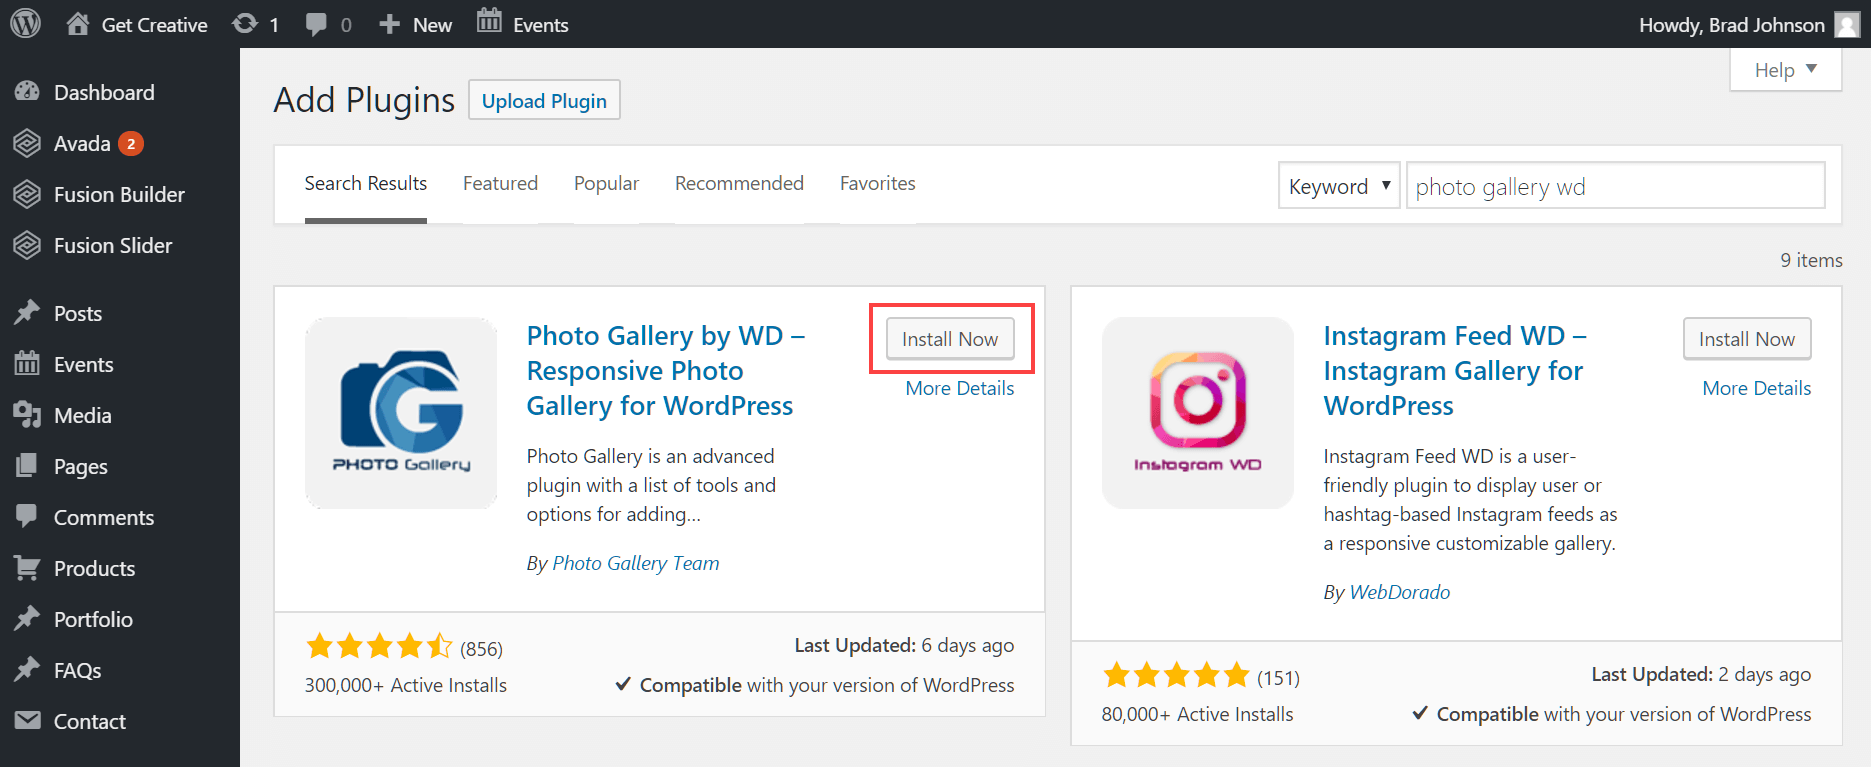
Sign into your WordPress administration menu and, from the sidebar, select Plugins > Add New. Search for Photo Gallery by WD and install it, then activate the plugin. To learn more about installing WordPress plugins, read this HostPapa knowledge base article: How to install plugins in WordPress.
Once activated, you’ll notice a new Photo Gallery entry in your admin sidebar. Click it to proceed.
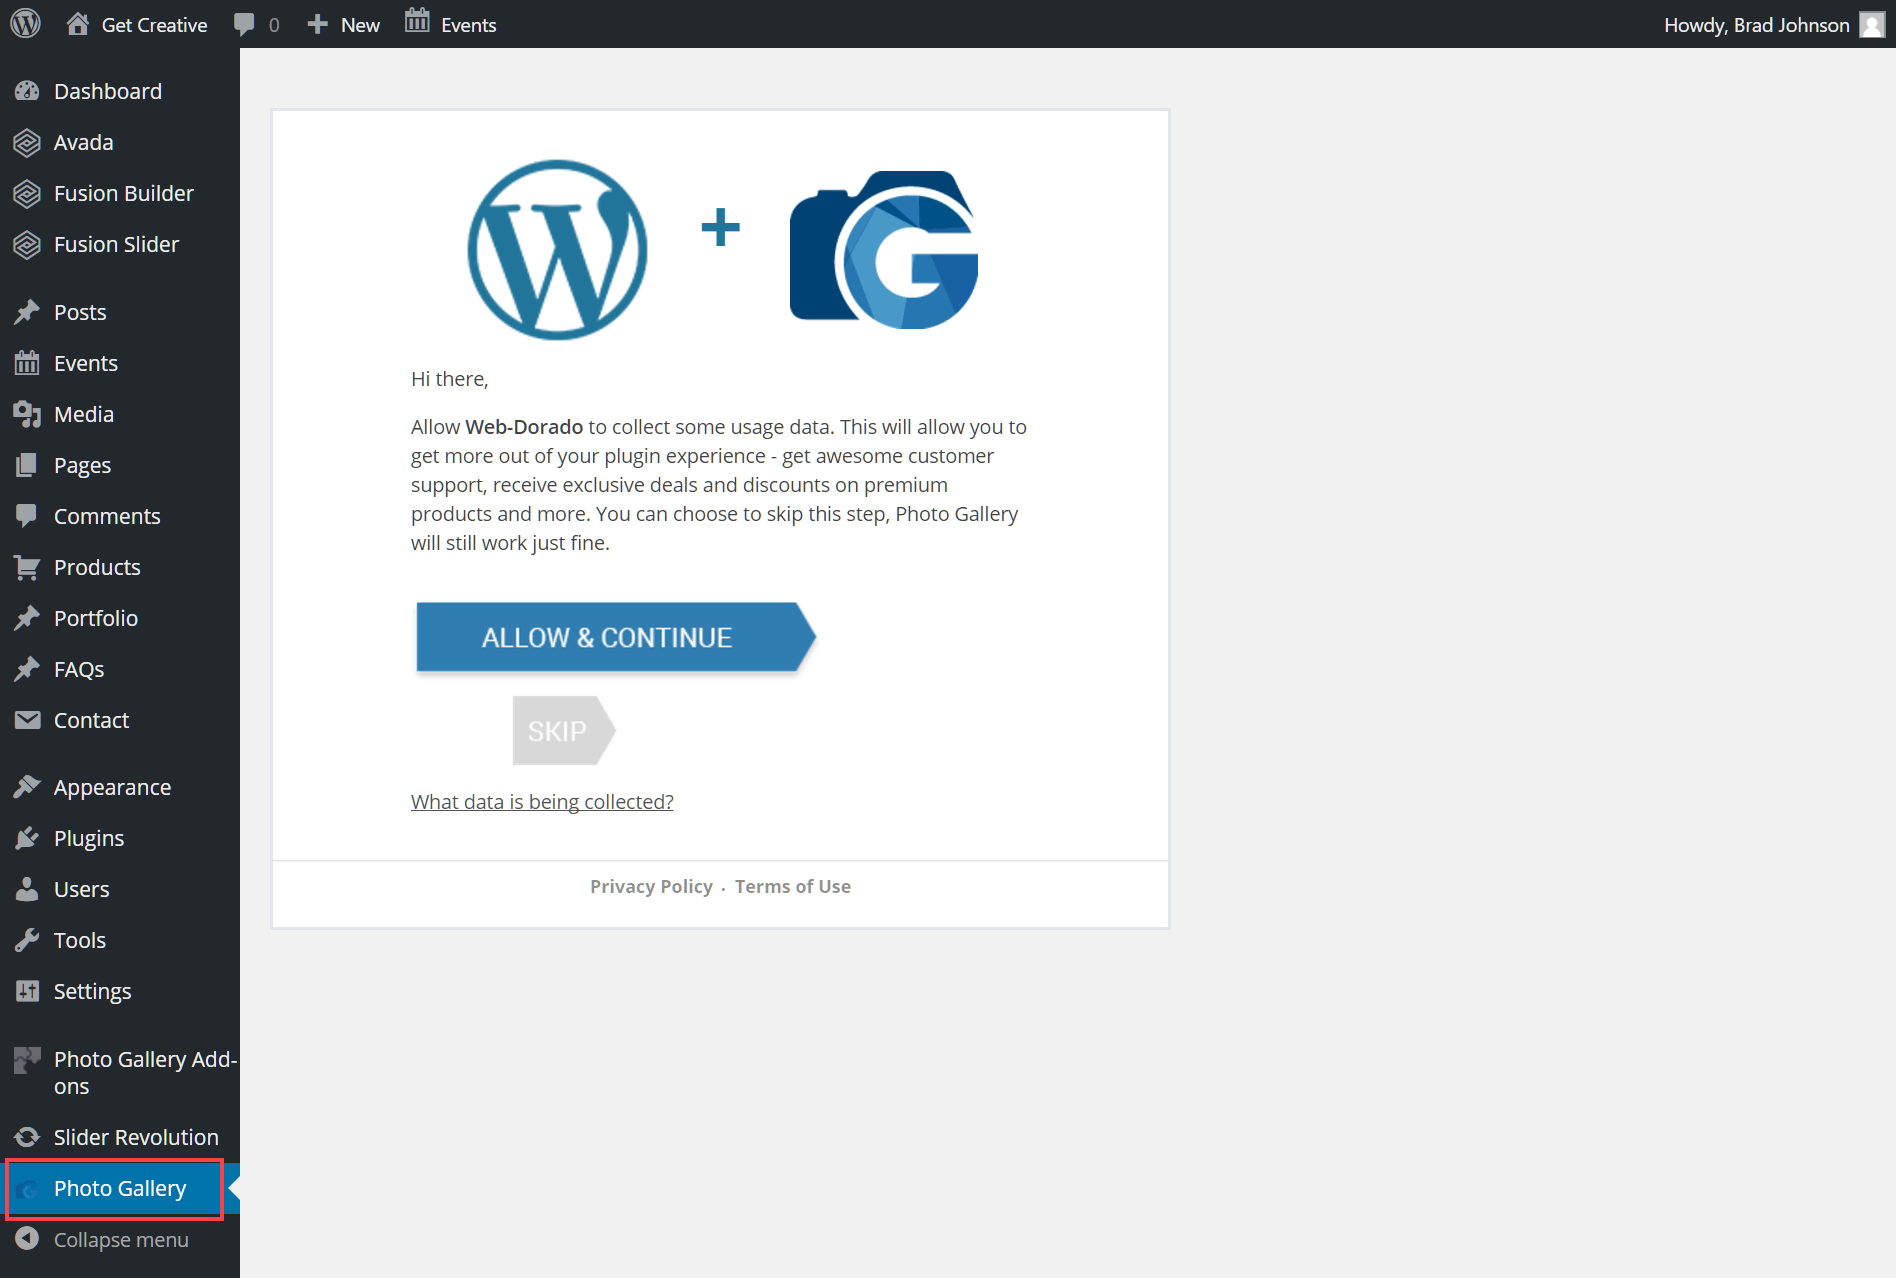
You’ll first be invited to share usage data with the Photo Gallery development team – this is an optional step. Make your choice with the Allow & Continue or Skip buttons.
You’ll be taken to the Overview page, which offers a wealth of information about the plugin, its usage, special offers and support options.
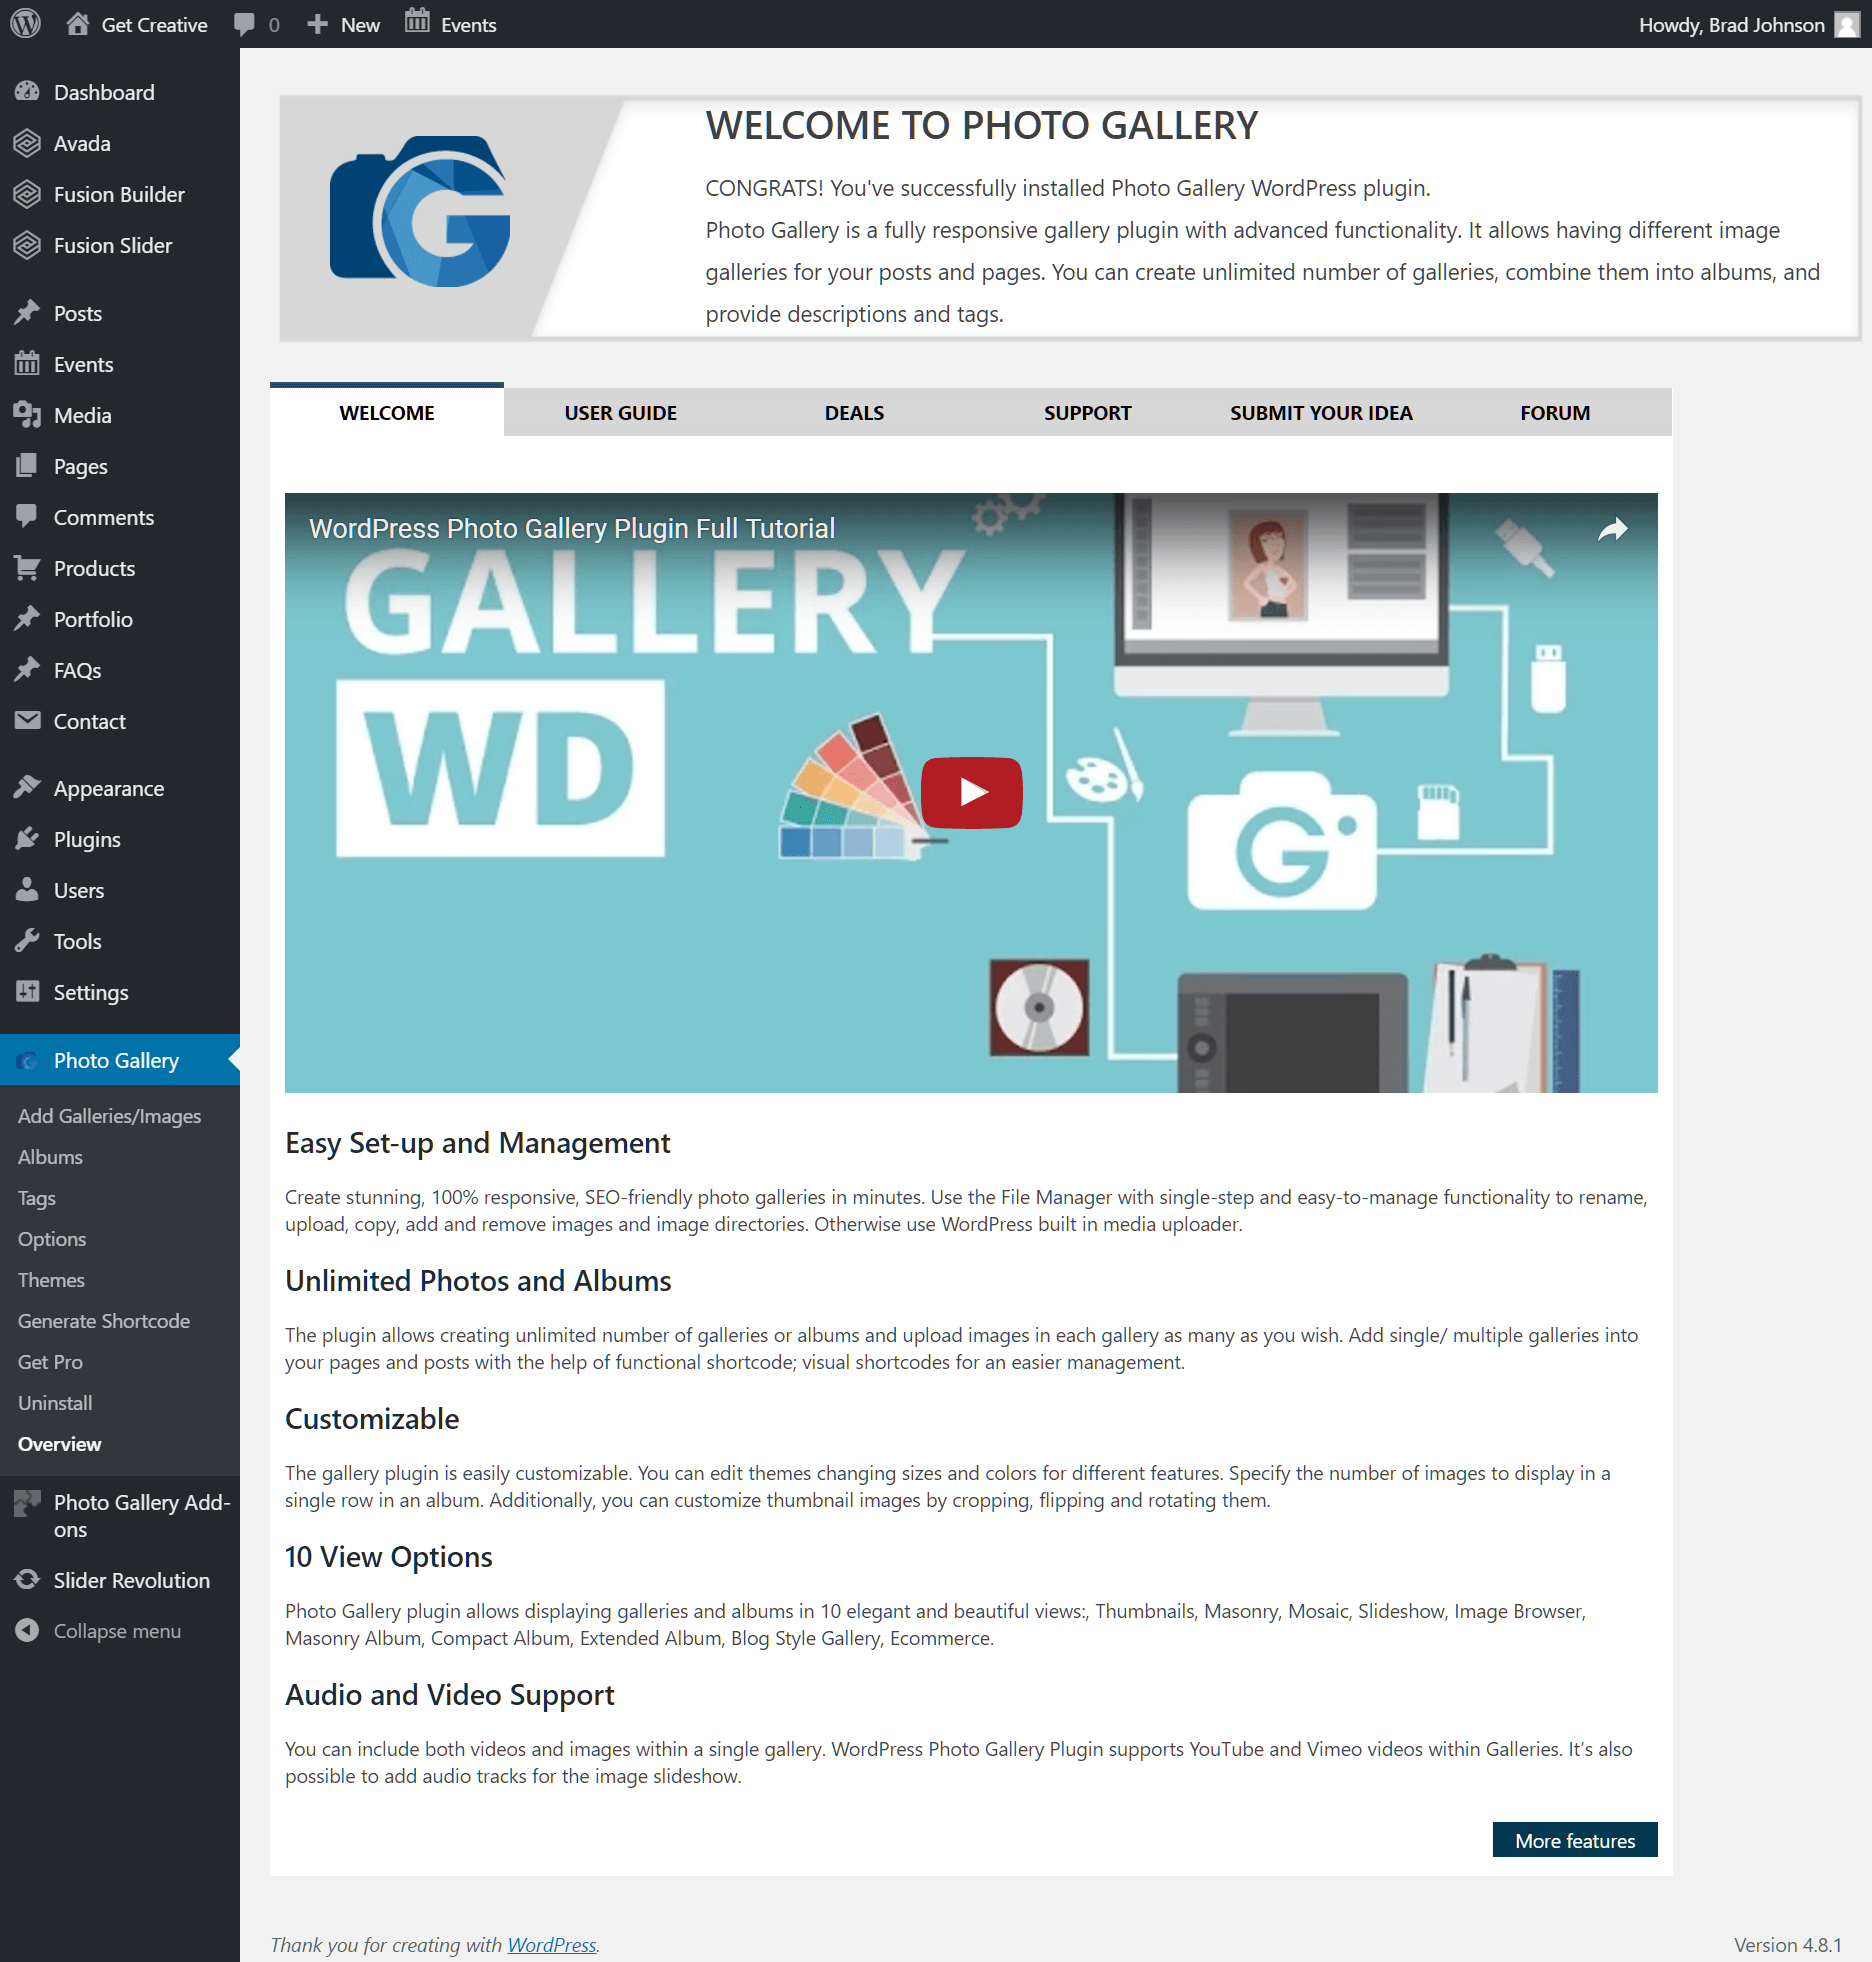
Feel free to browse the various sections of the Overview page to learn more about the plugin and its associated features.
Create a new photo gallery
You can create photo galleries for your website using two alternative methods. First, from within the WordPress post or page editor by clicking the Insert Photo Gallery button found in the editor panel.

You can also head to Photo Gallery > Add Galleries/Images to create your photo gallery, then later embed it in your post or page. Let’s try that option now.
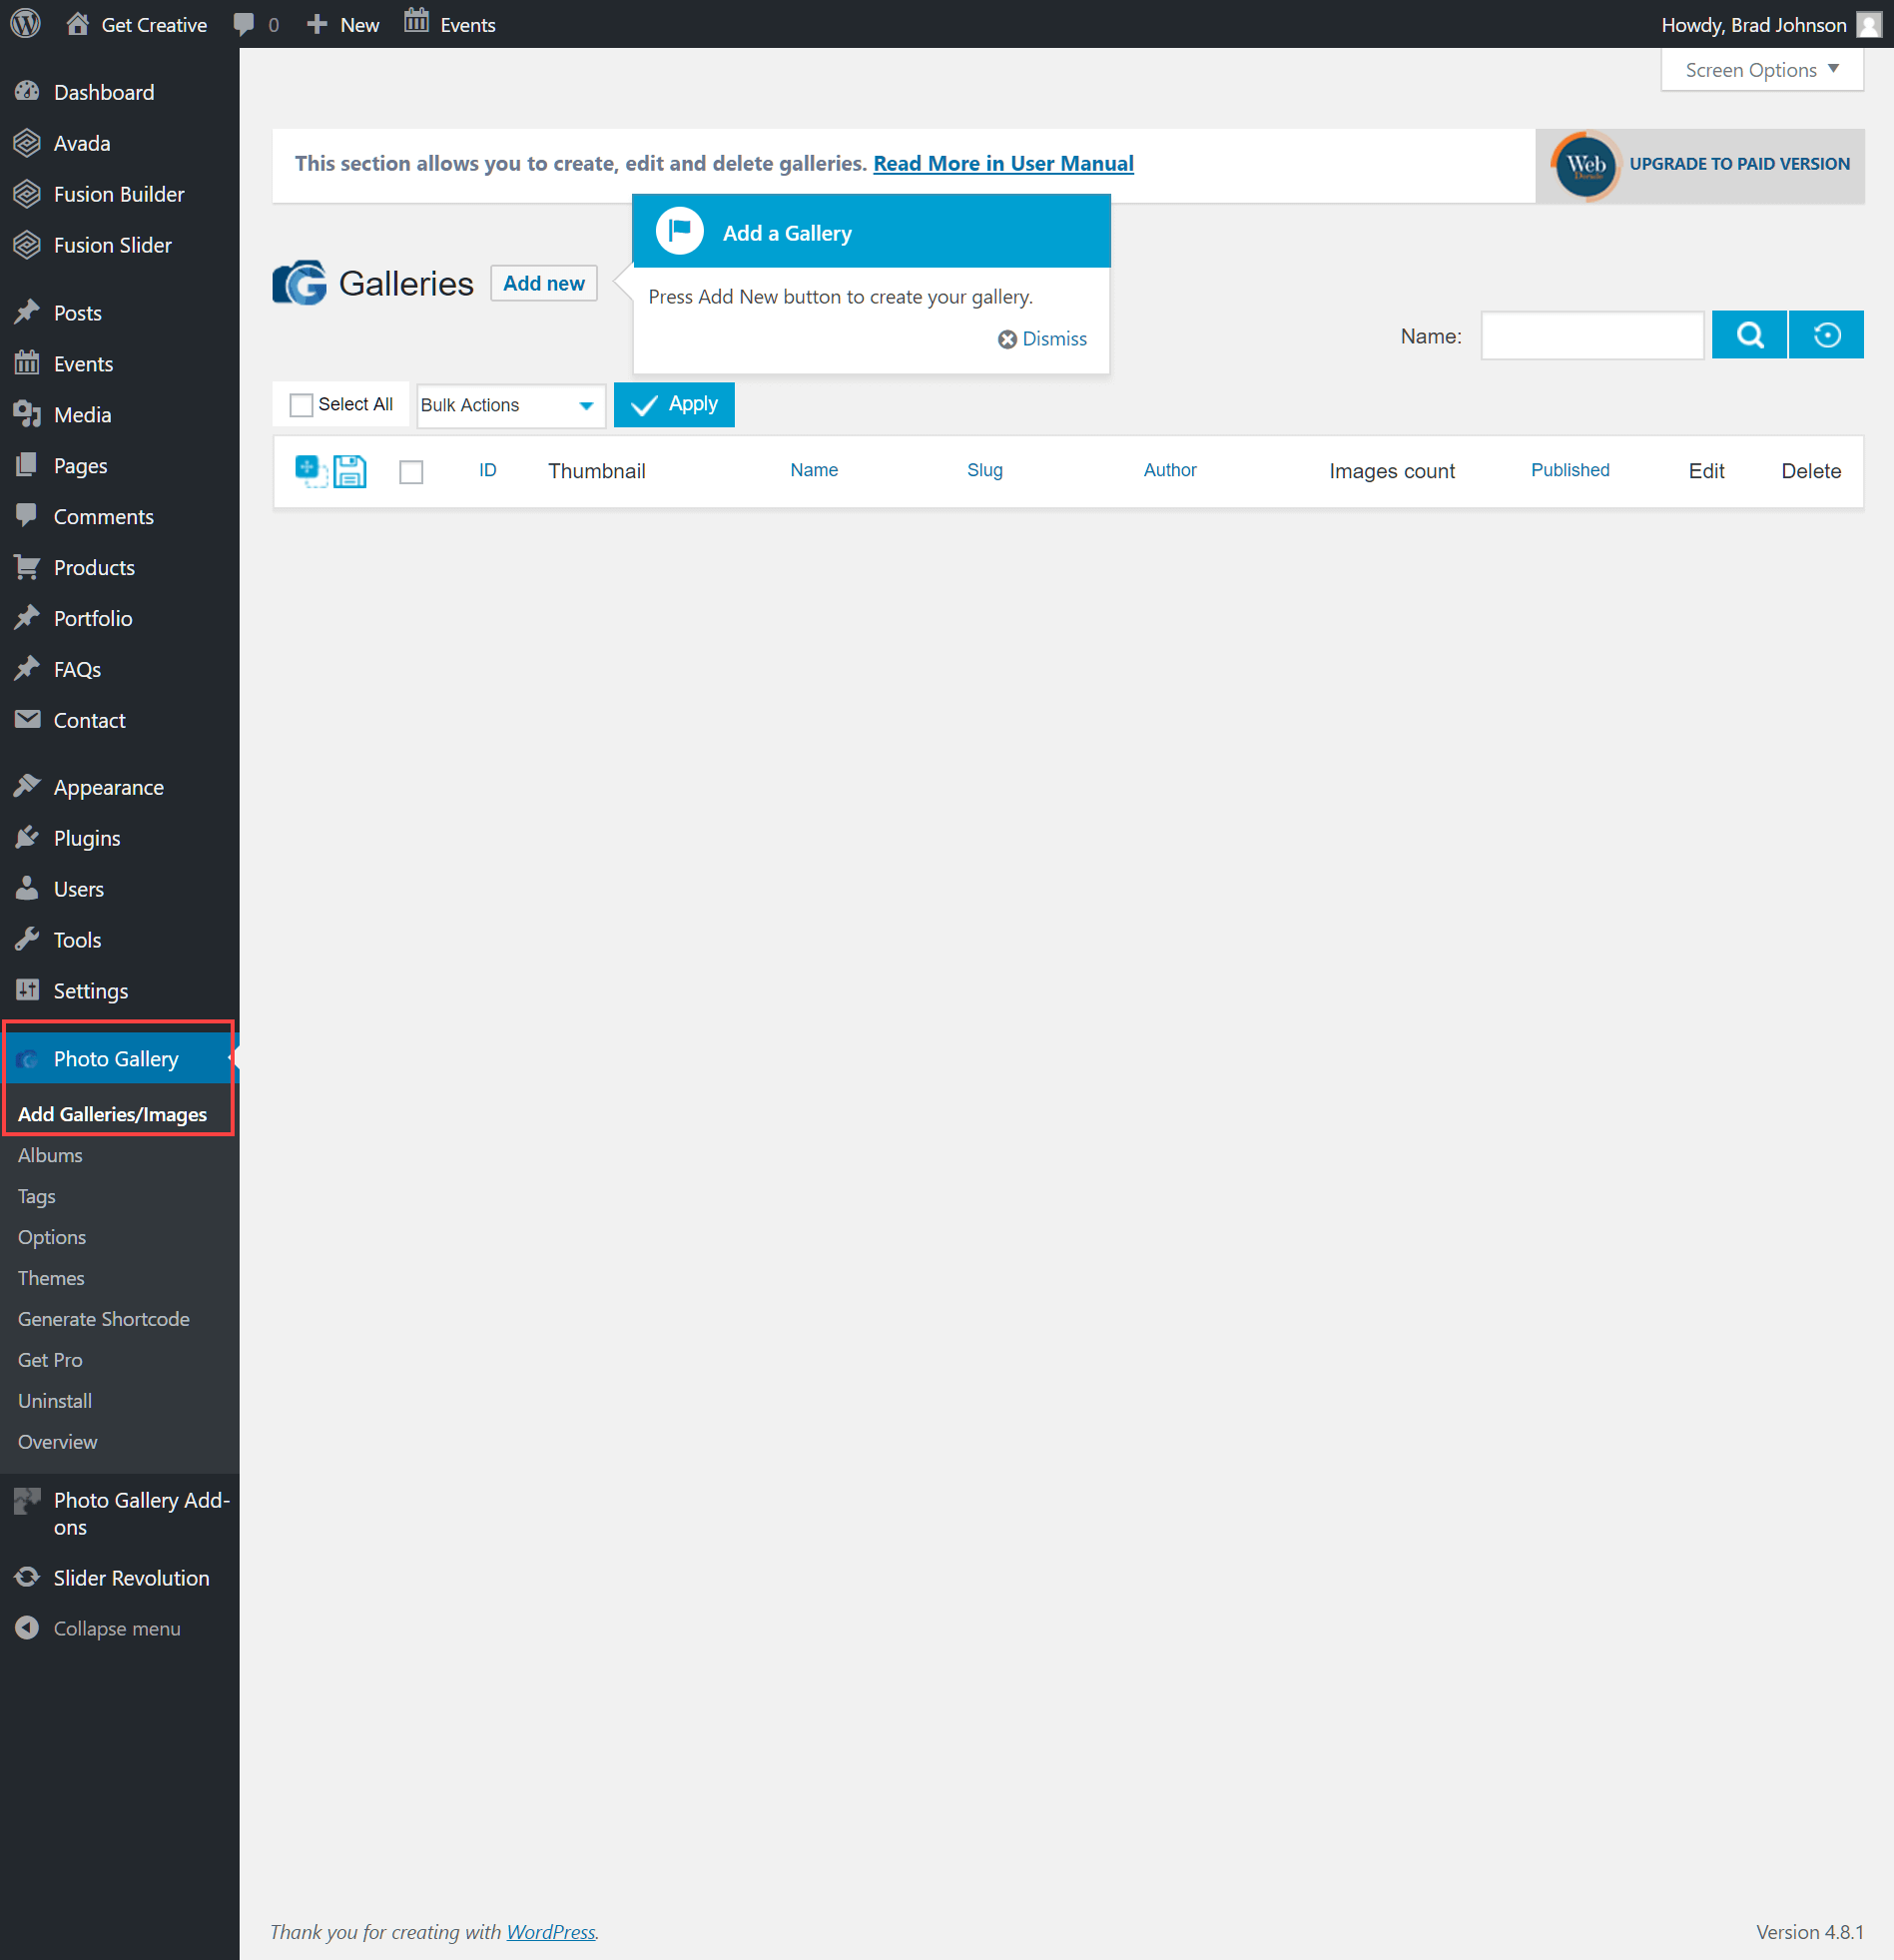
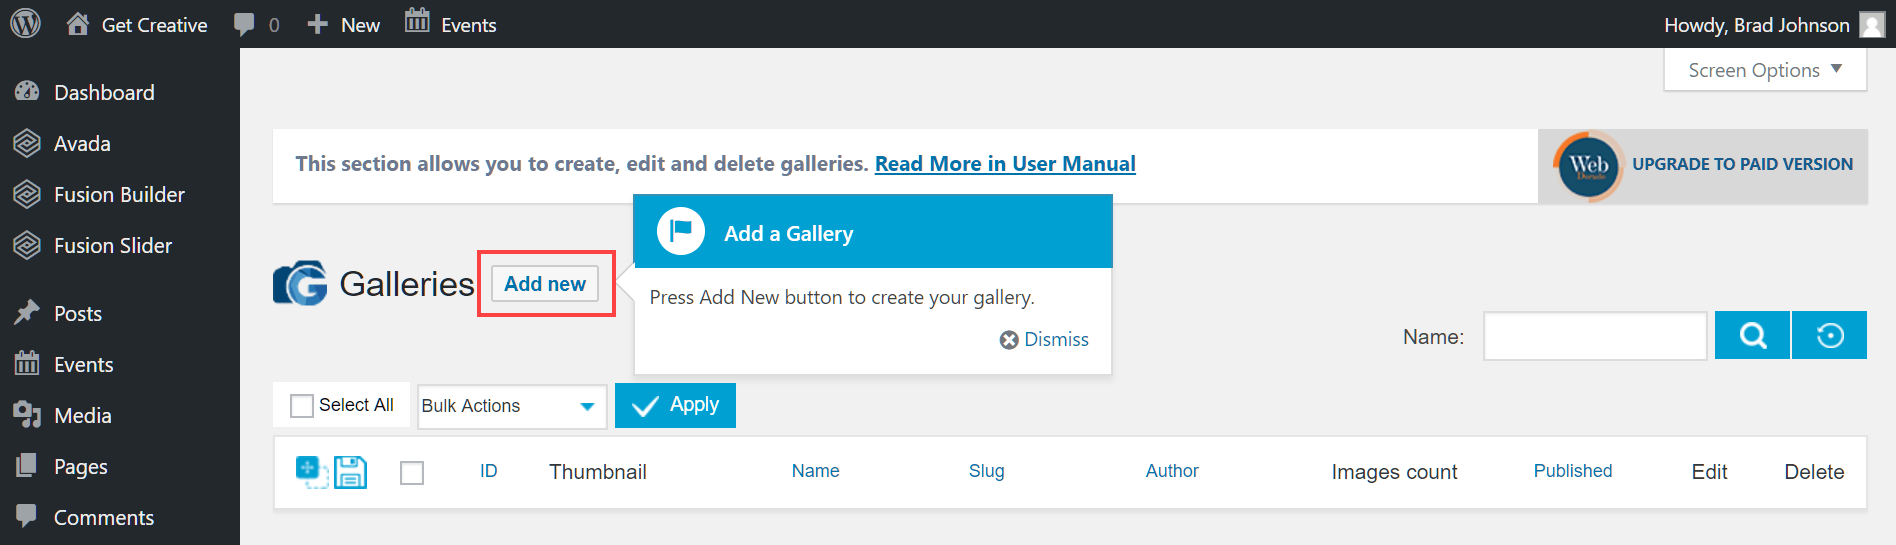
In the Galleries page, click the Add new button to get started.
Provide a Name and a Description (optional) for your new gallery. A Slug (the text used to locate the gallery at the end of the URL) can also be provided or will be automatically generated for you when you save the gallery.
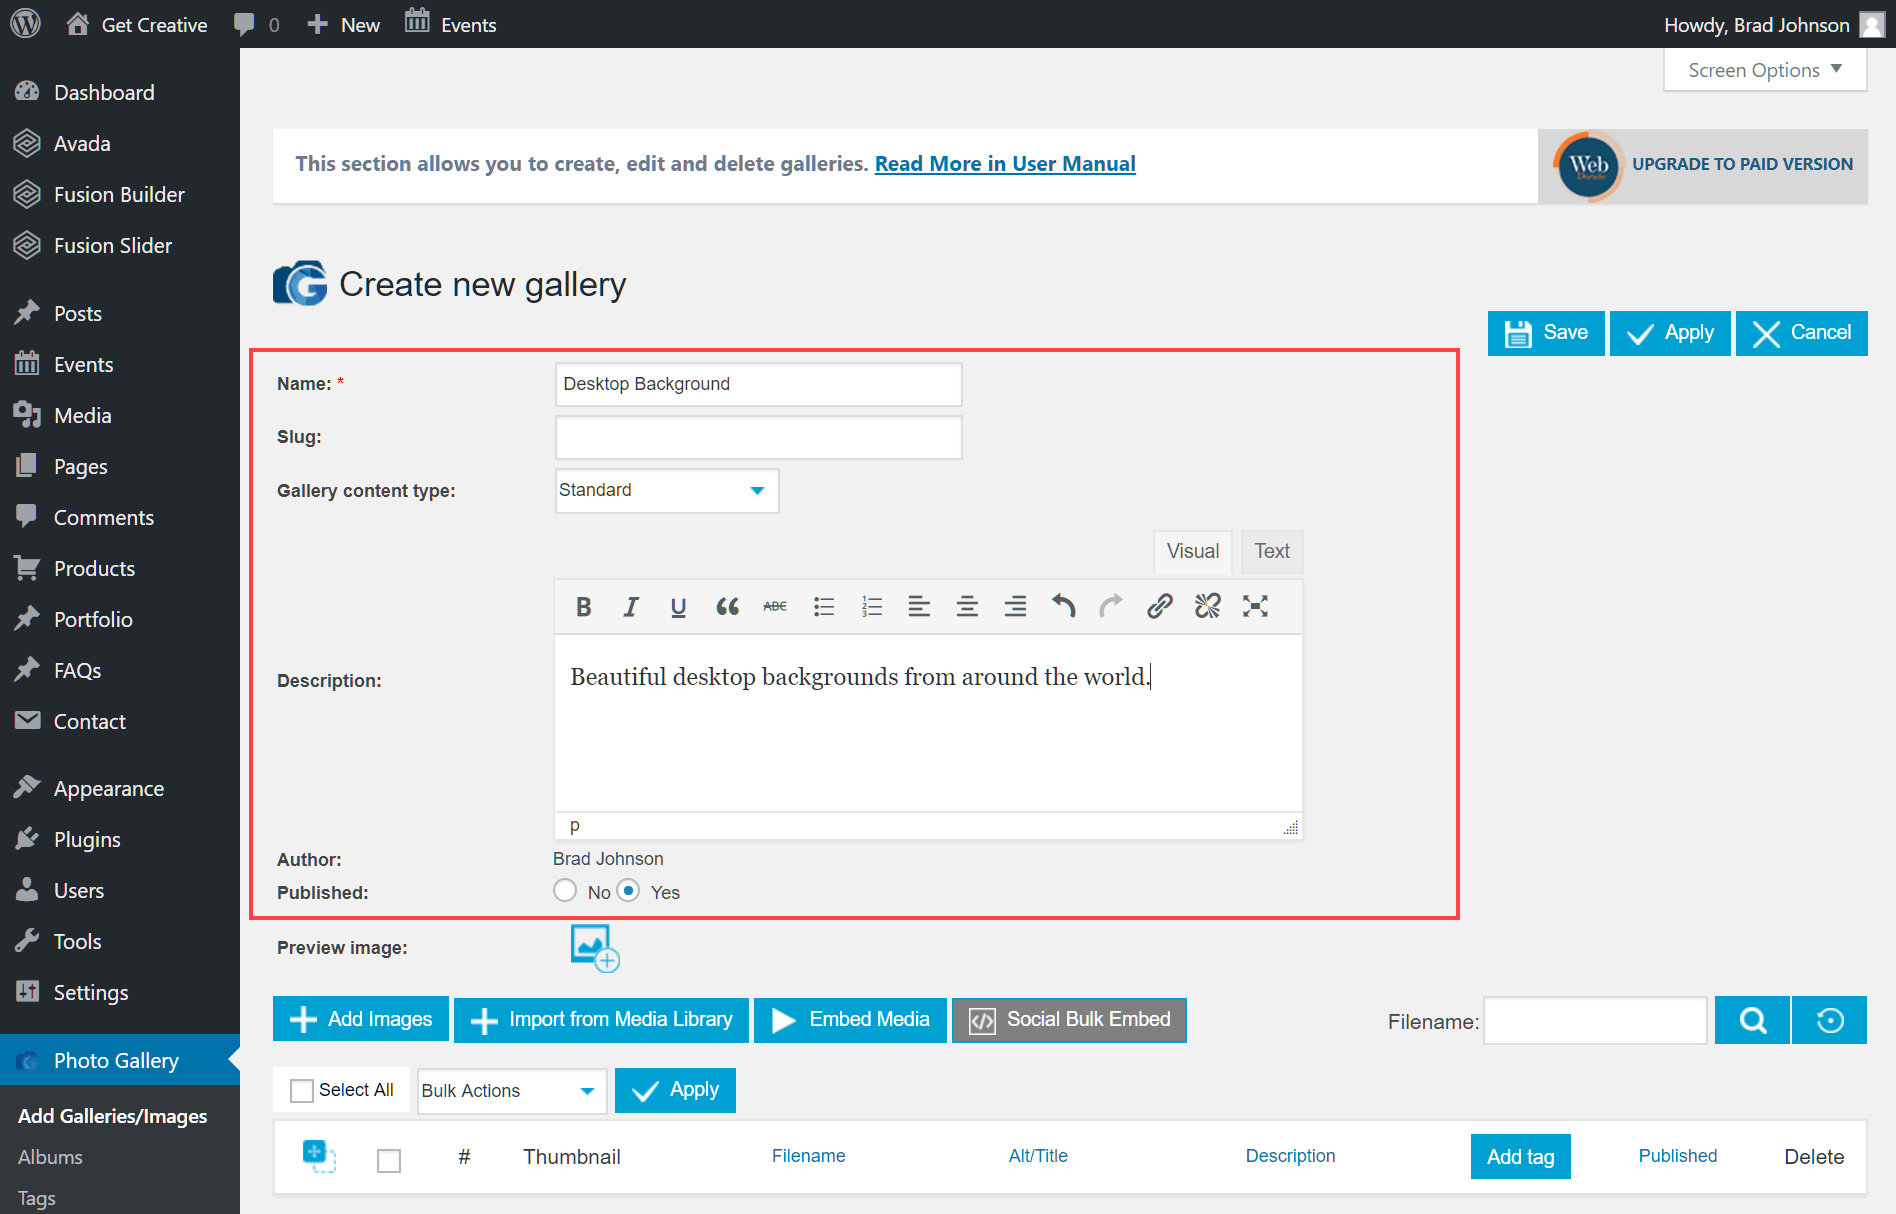
Add images to the gallery using the buttons below. + Add Images allows you to upload photos from your local PC while + Import from Media Library can be used to add images that are already stored in your WordPress media library. You can also embed media from YouTube, Vimeo, Instagram, Flickr or Dailymotion. If you’ve purchased the commercial edition of the plugin, the Social Bulk Embed button will become active, allowing you to conveniently embed multiple files from a range of social networks.

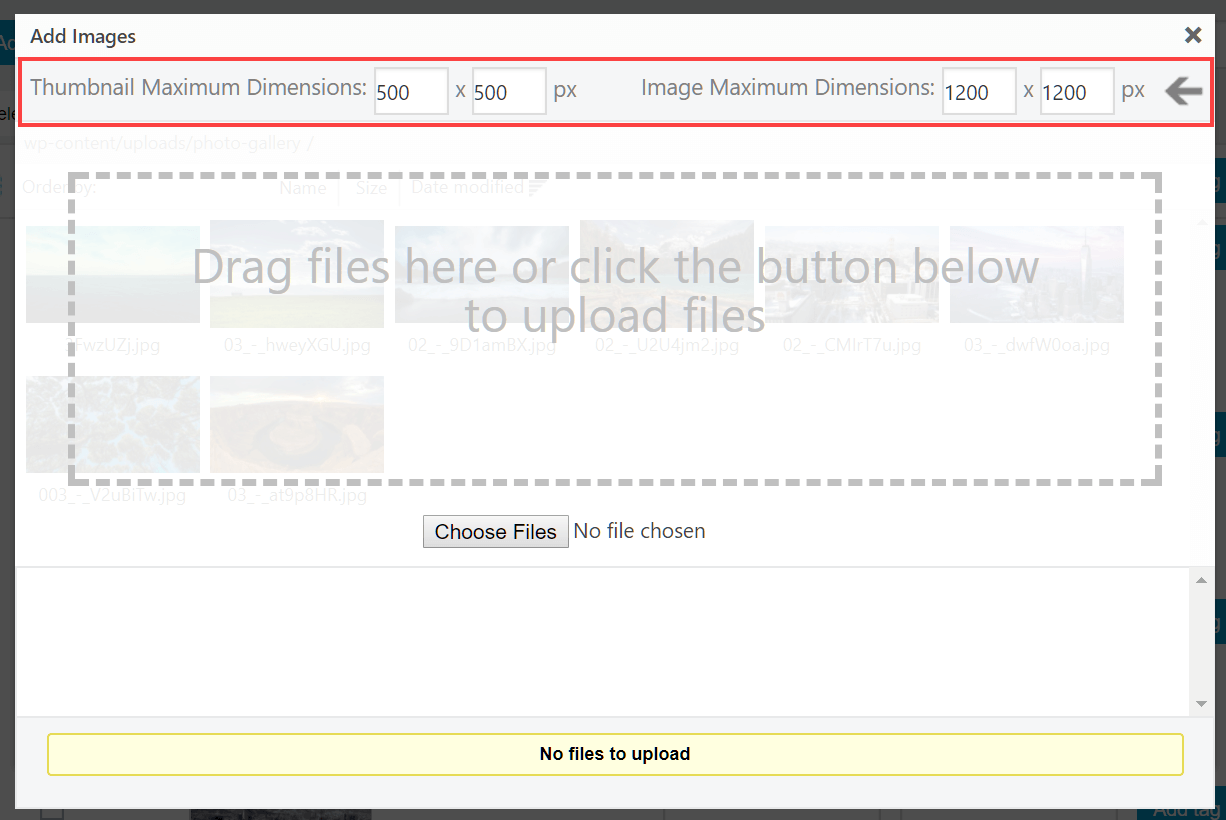
If you choose to upload files, you will be asked to set a maximum thumbnail and image size for your files.
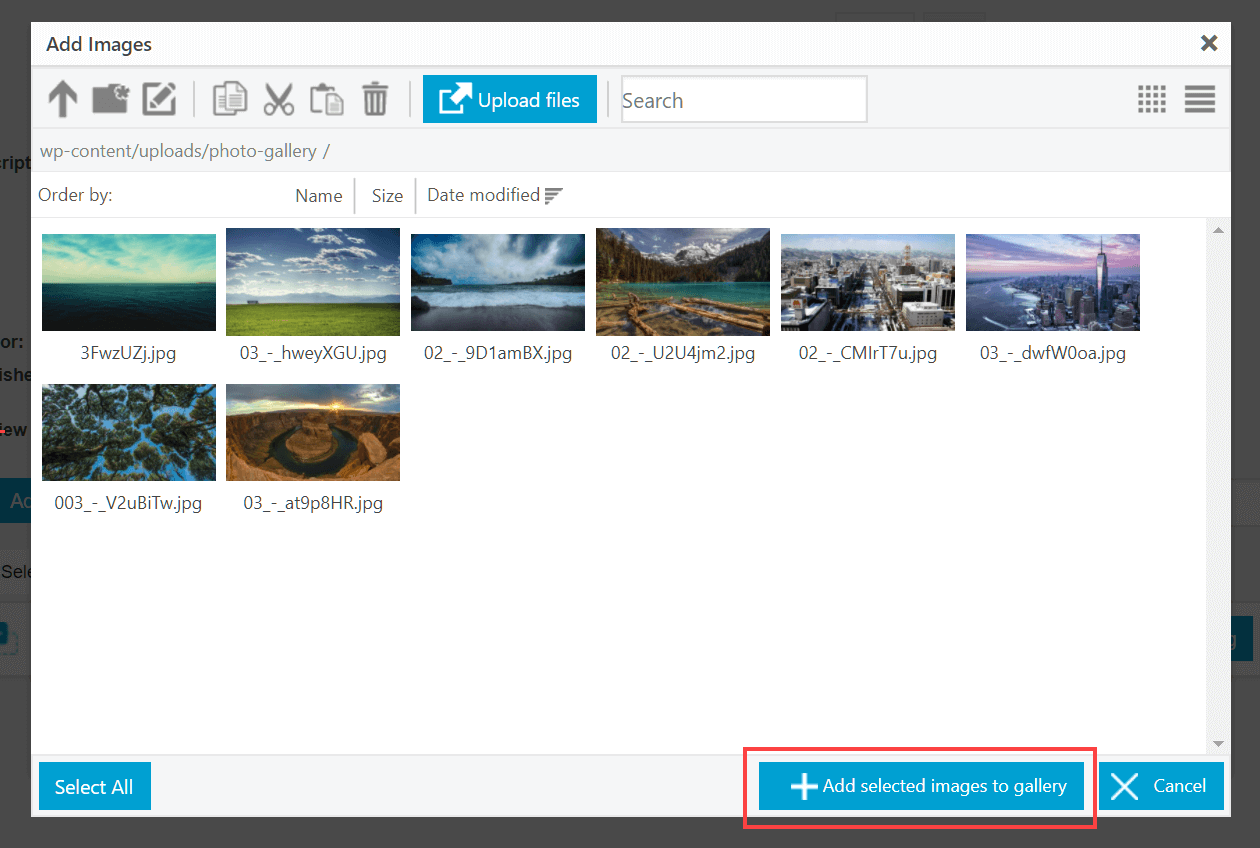
Add your images, then highlight them using the mouse and click the + Add selected images to gallery button.
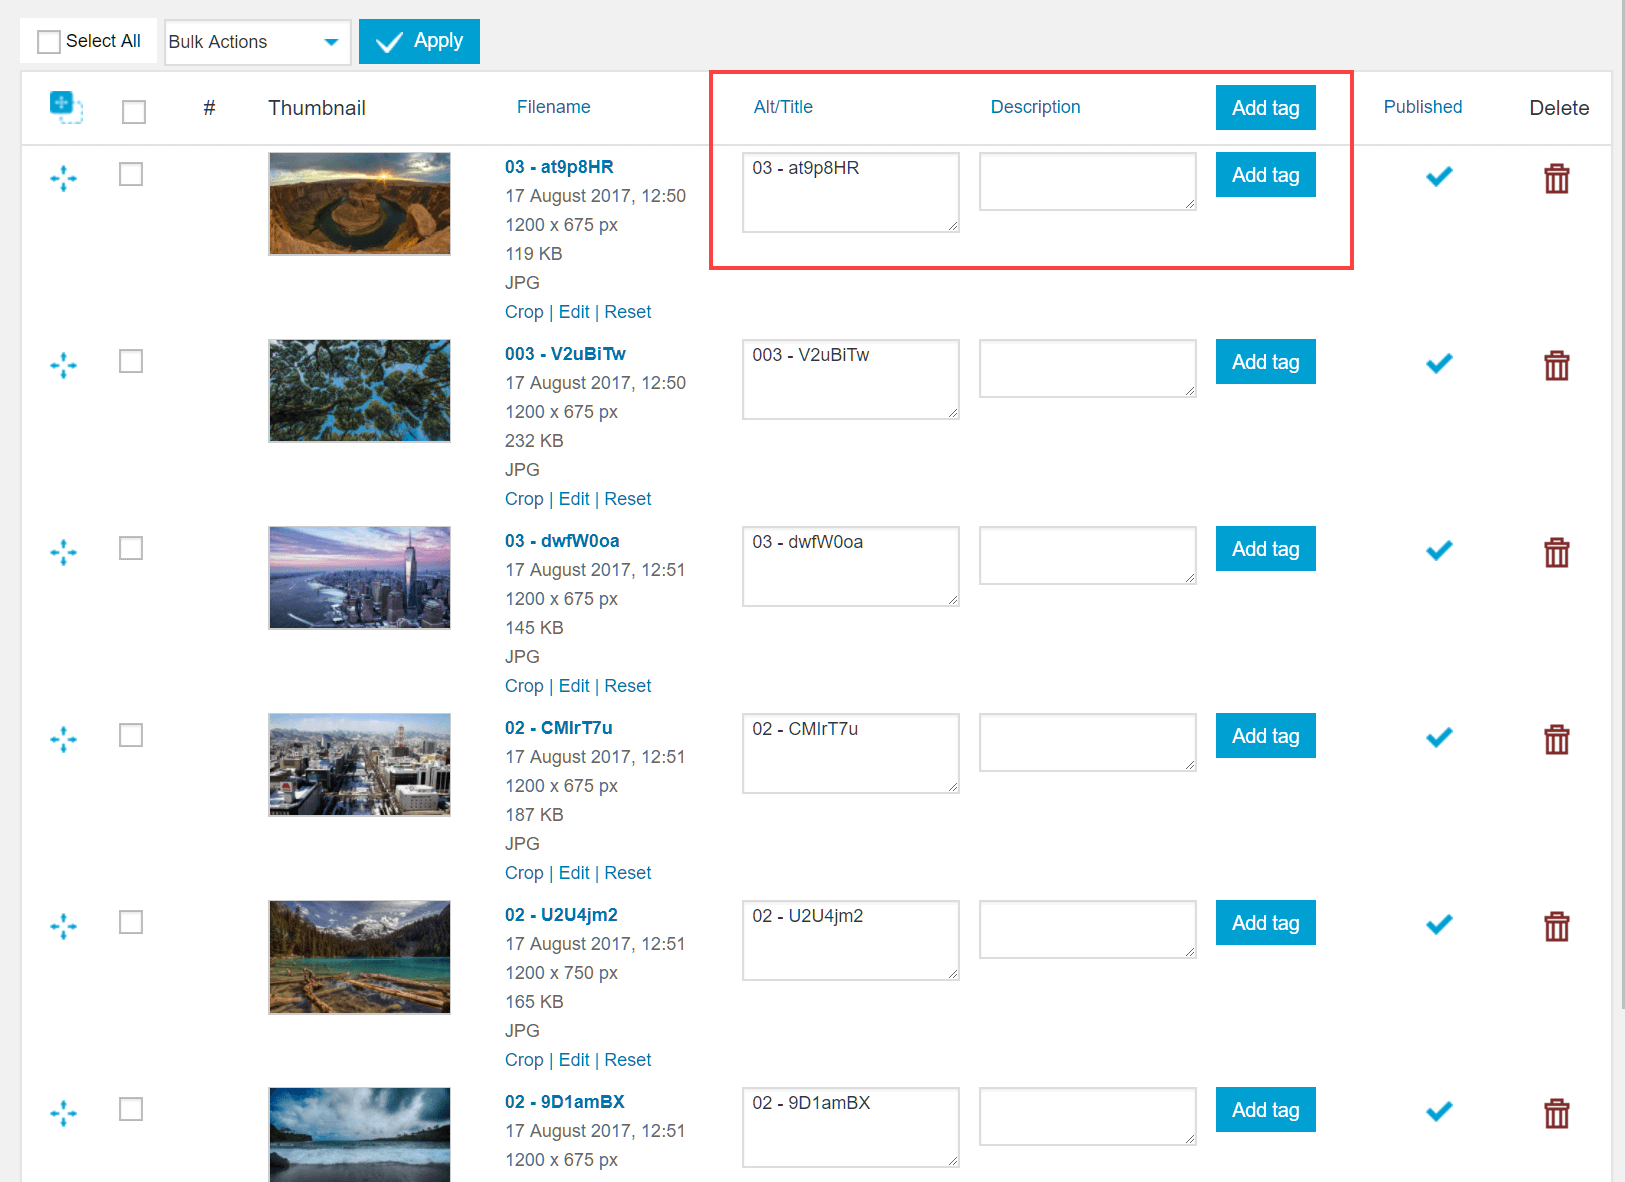
Once the files have been added to your gallery, you can set a title, description and metatags for each.
When you’re ready, click the Save button at the top of the page to proceed.
Generate a gallery shortcode
You embed your newly created image gallery using a shortcode. This is a simple text label that WordPress uses to locate and embed the gallery when displaying the page for your users.
You must first create a shortcode before it can be embedded in a post or page. At this point, you can also customize the gallery display settings for consistency with your WordPress theme.
Head to Photo Gallery > Generate Shortcode to view your options.
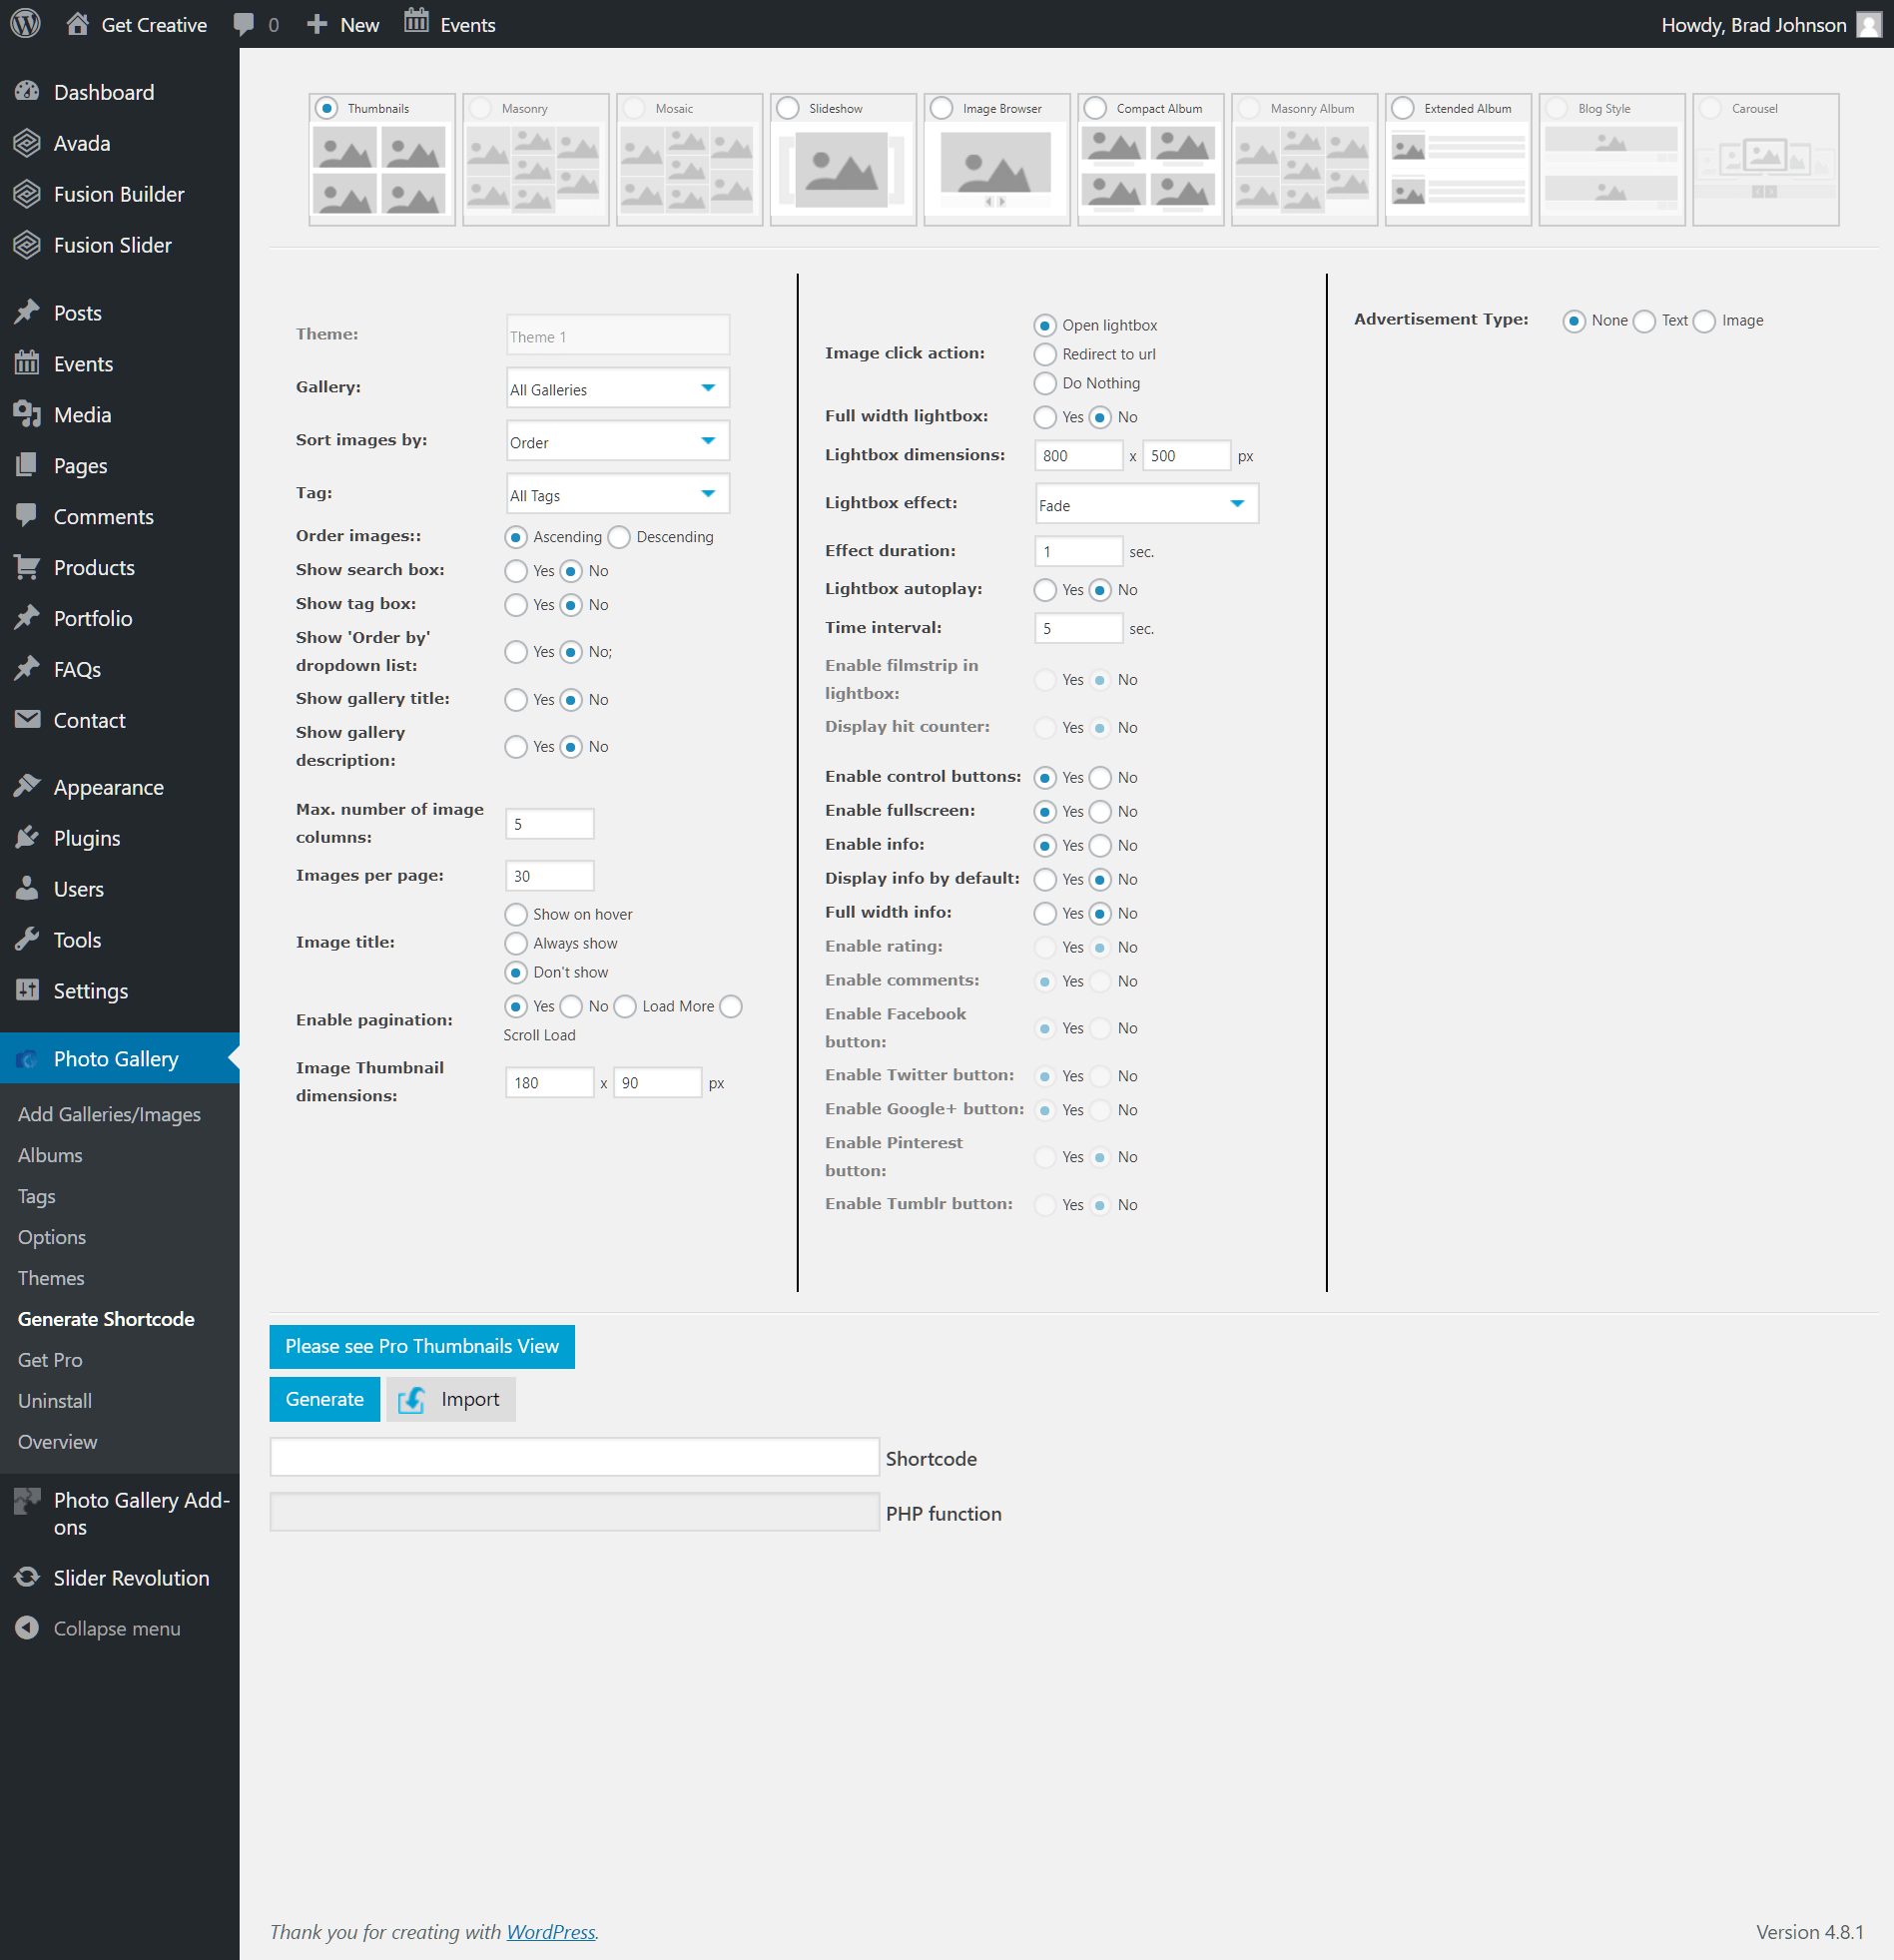
You’ll be presented with a wide range of customization features. Some of these options are exclusive to the plugin’s commercial edition, but users of the free edition can still take advantage of many of the features included.
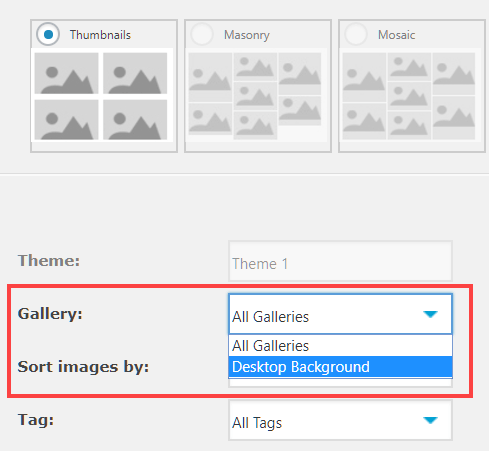
Select a layout for your gallery using the radio buttons at the top of the page, then use the Gallery dropdown menu to select the gallery name that you have just created.
Work through the gallery customization options to tailor its design to your liking. You can return to this section to fine tune the settings whenever you wish.
When you’re ready to proceed, click the Generate button.
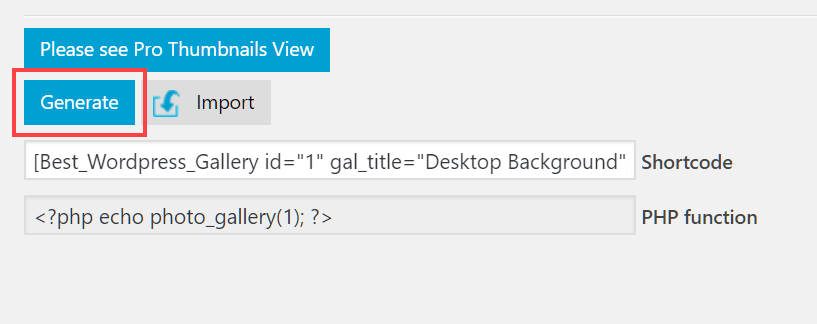
The Shortcode and PHP function fields will now be populated. You can use the Shortcode text in the WordPress post or page editor to embed your gallery, while advanced users can use the PHP code to embed the gallery in any PHP page.
Customize default options and gallery themes
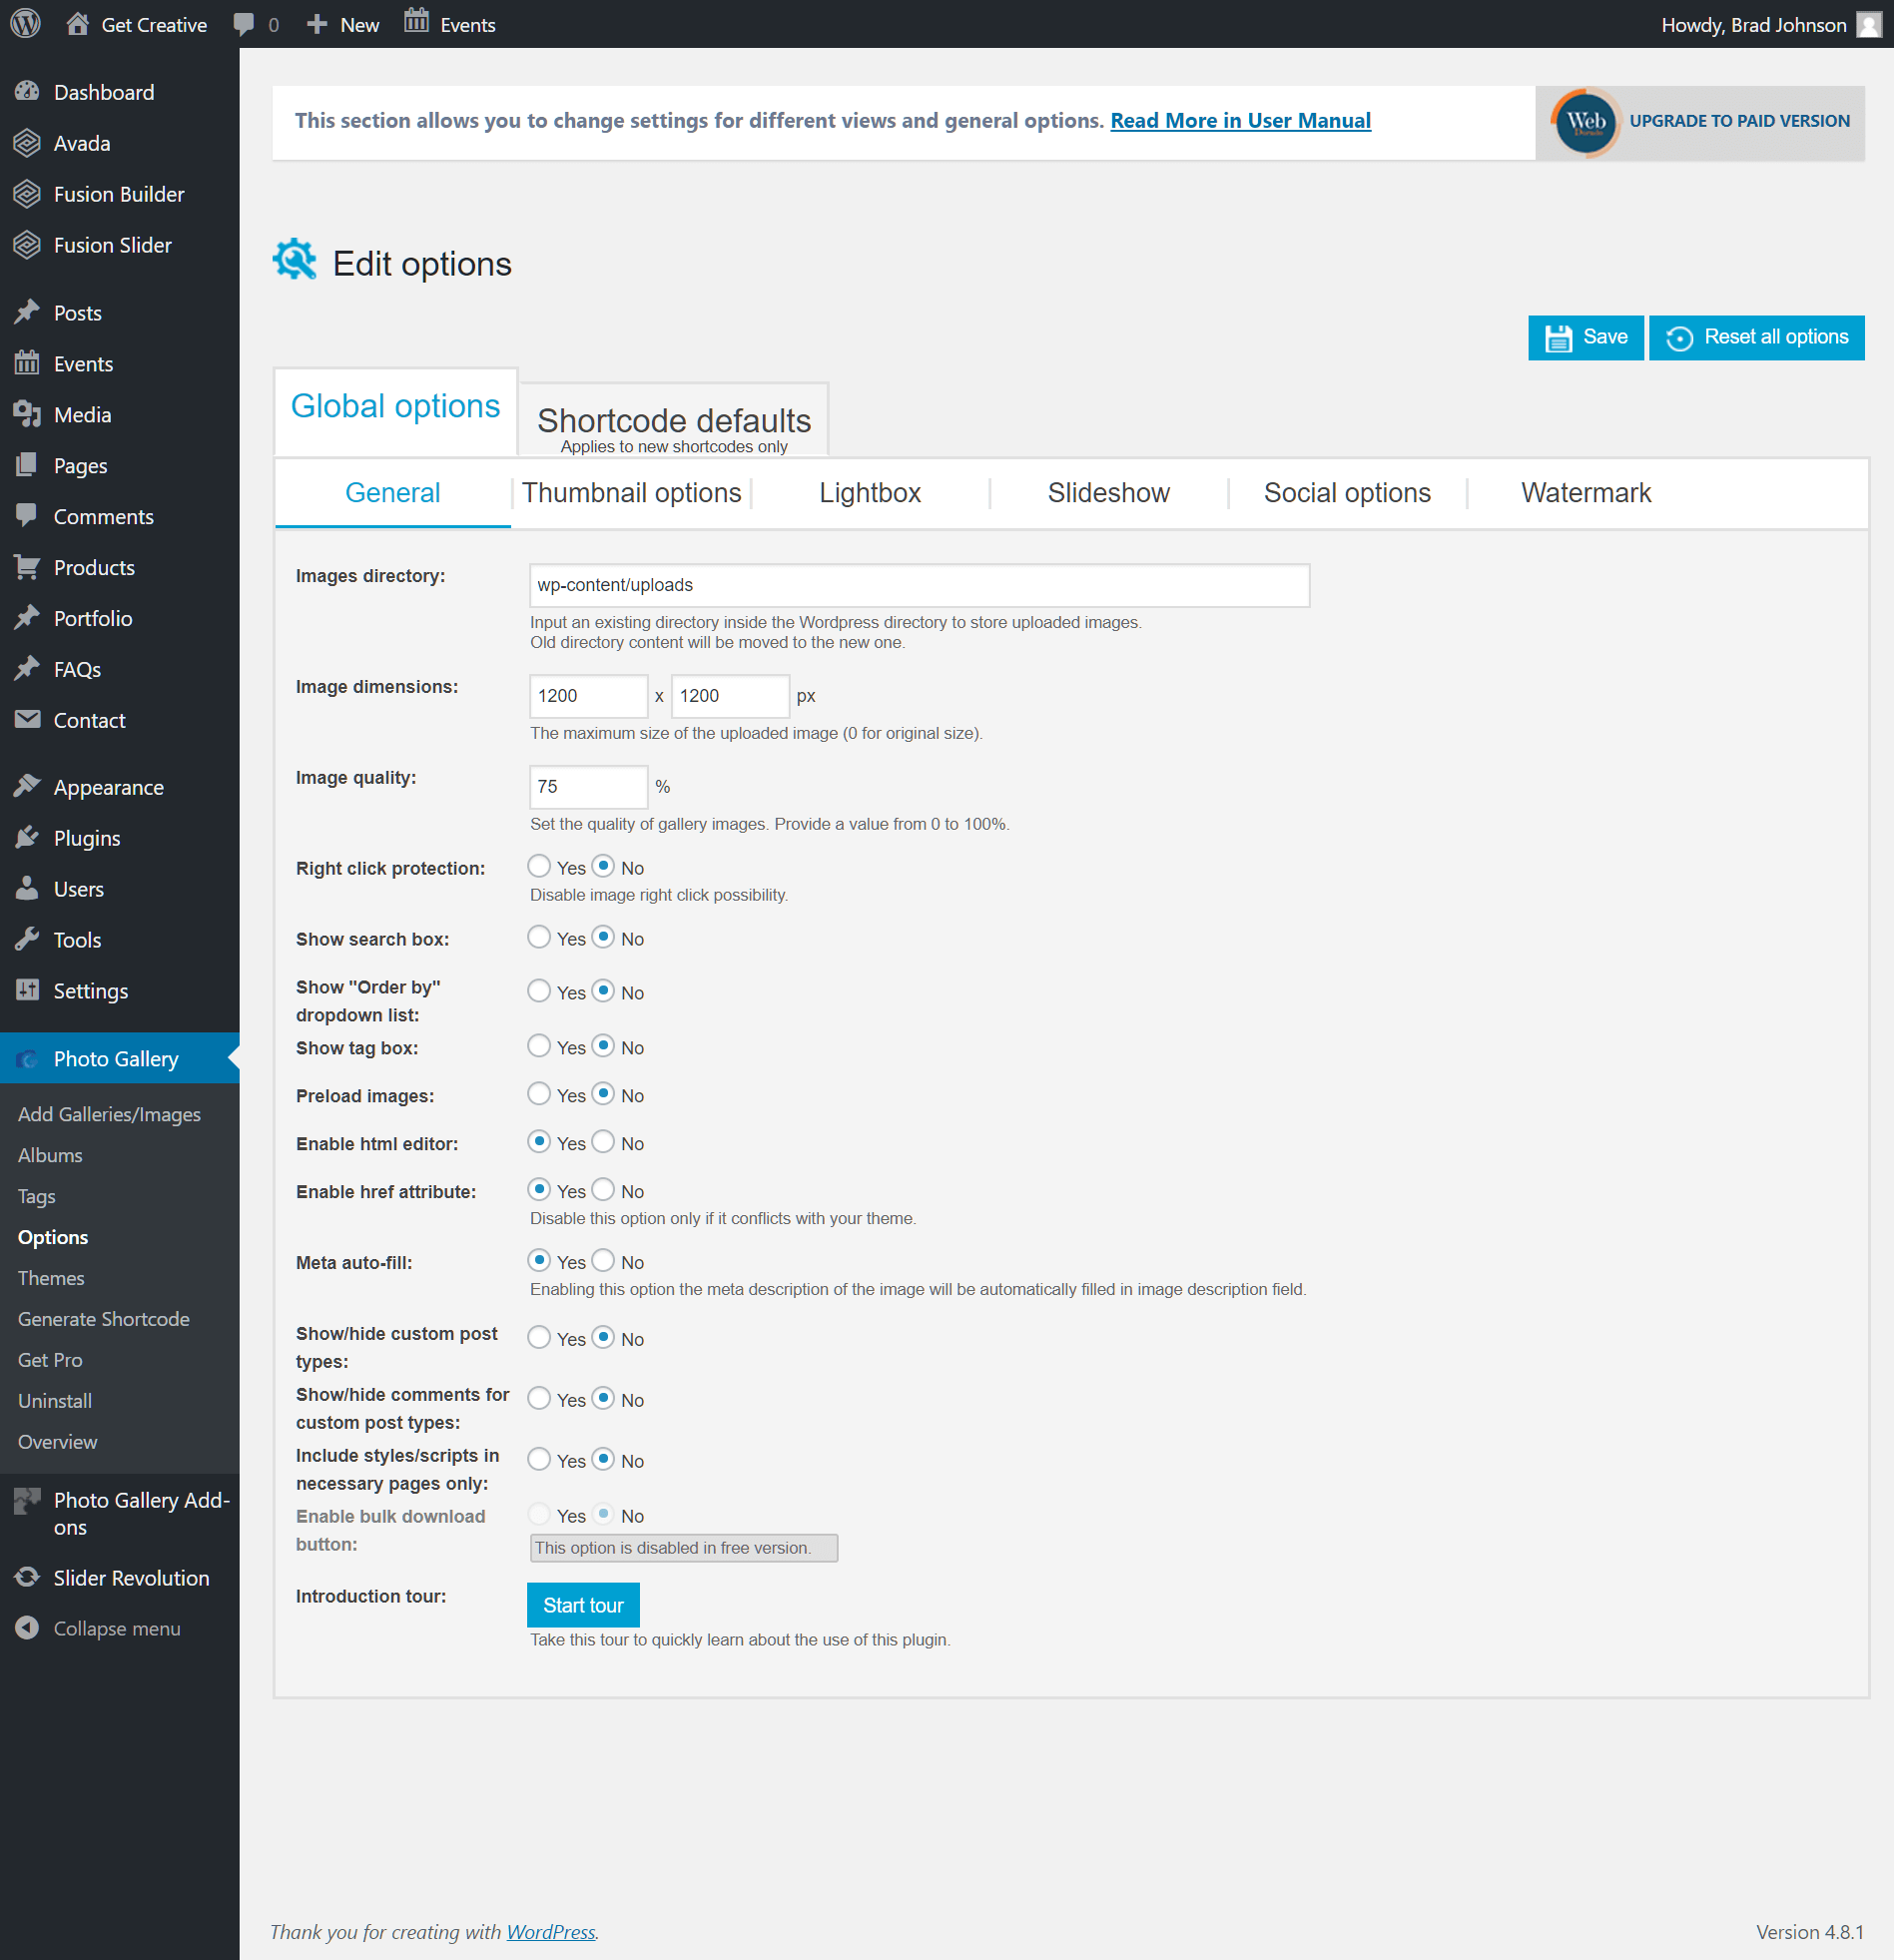
For further customization options, check out the Options and Themes pages. The Options page provides a swathe of configuration settings to control elements such as image dimensions, thumbnail options, lightbox settings and watermarks.
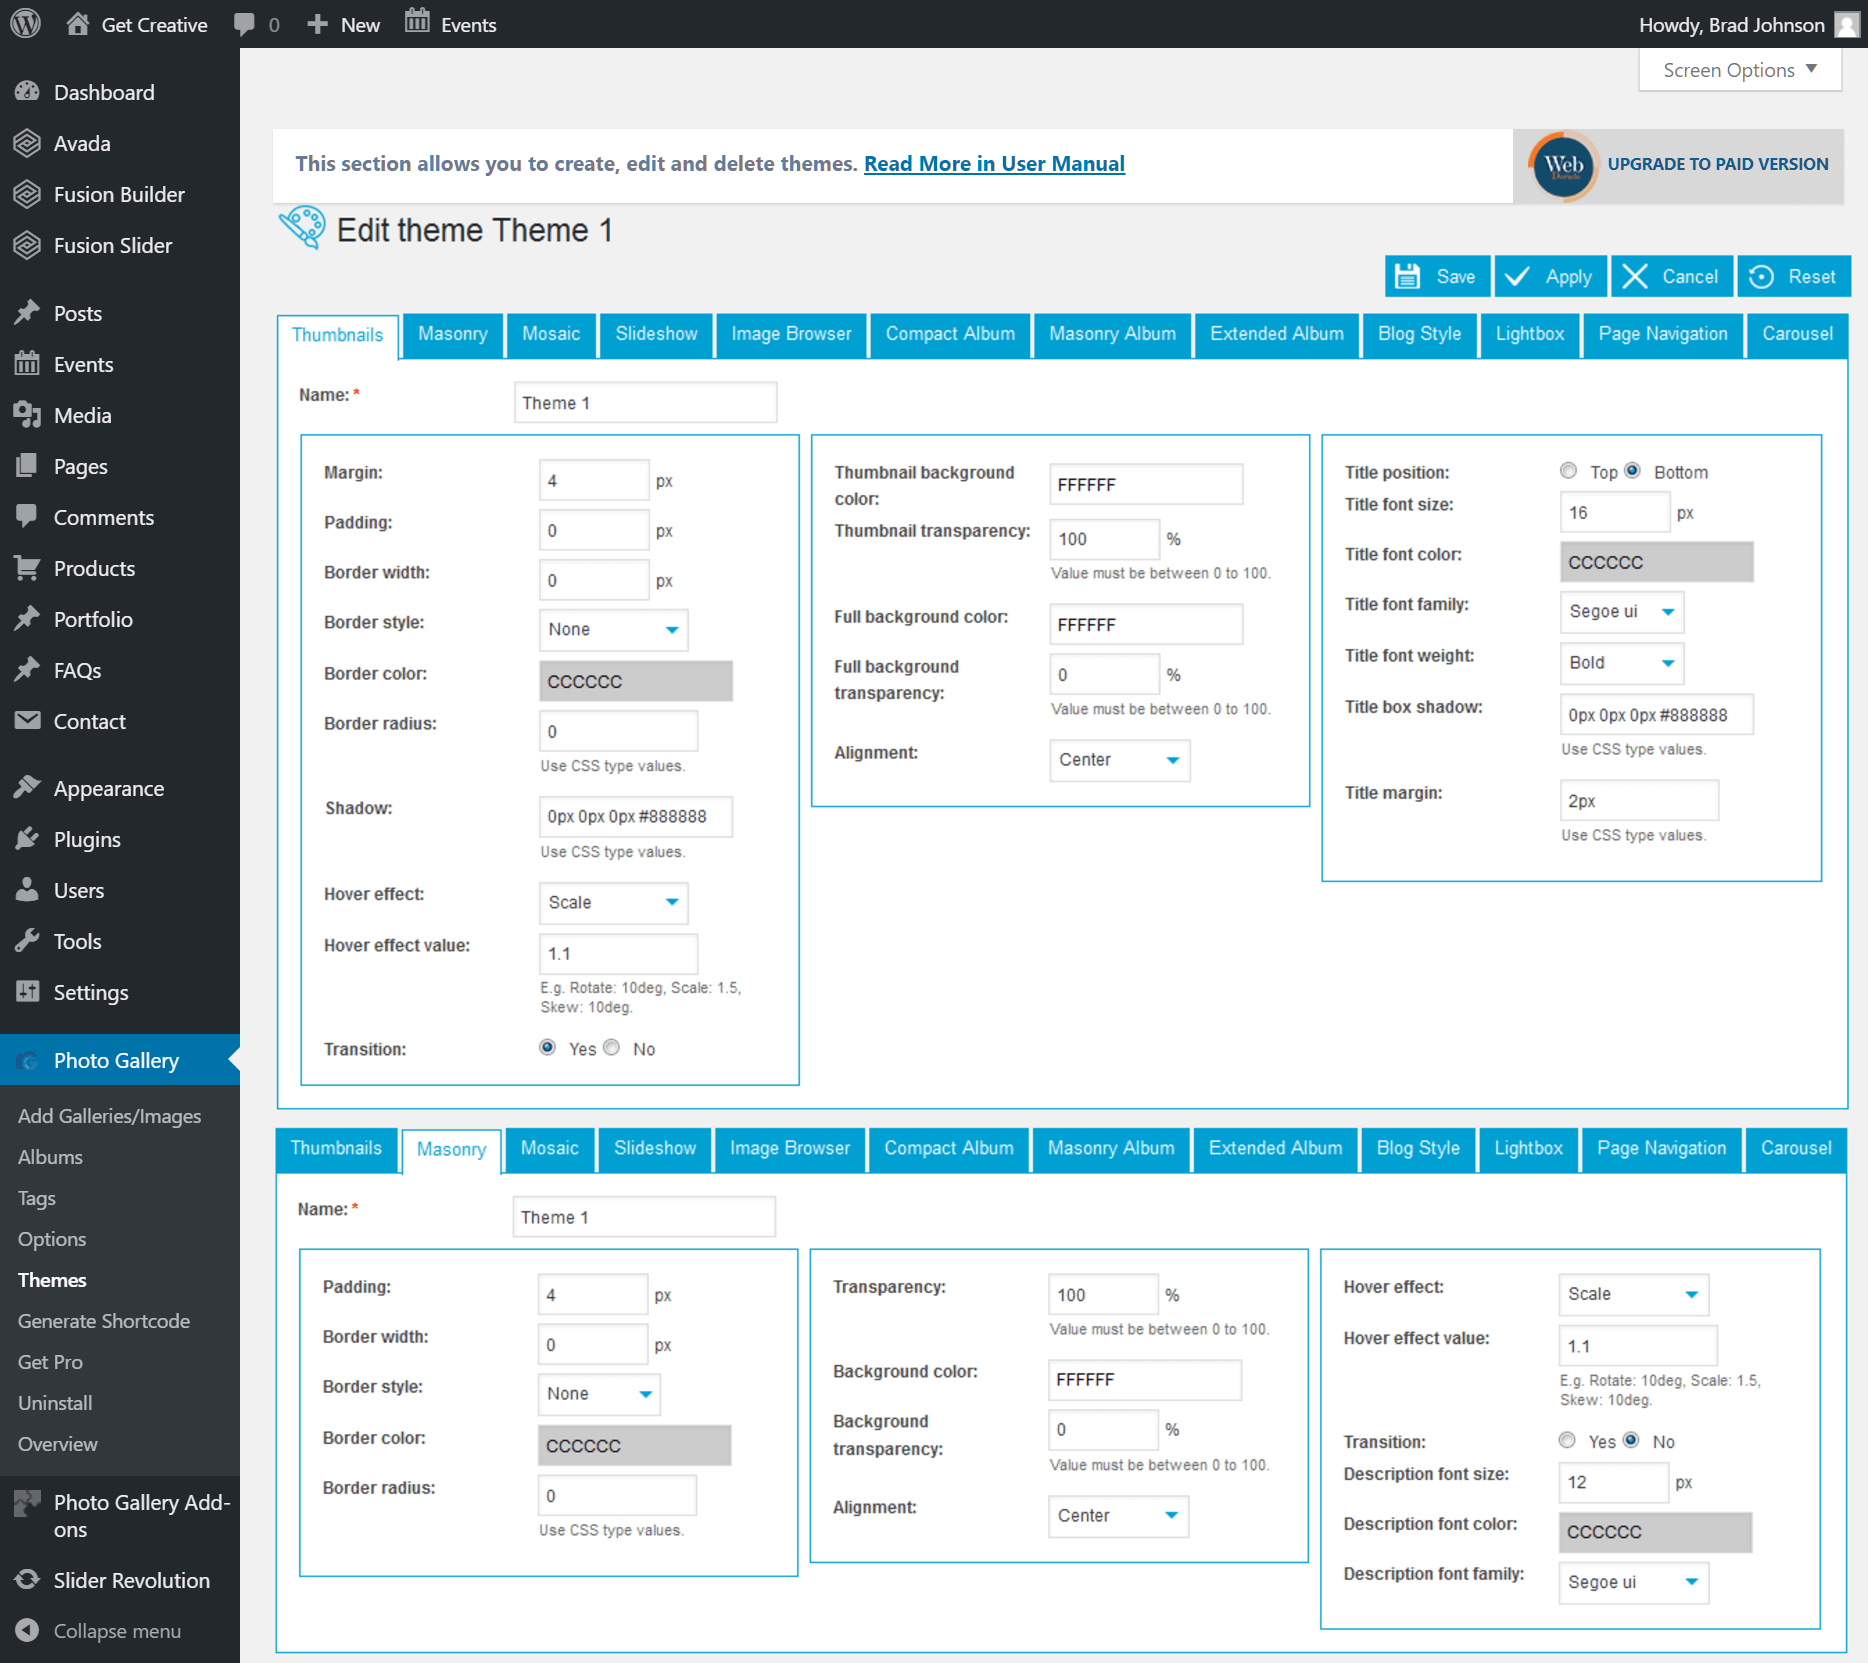
In Themes, you have access to granular design settings that allow you to precisely adjust the formatting of your galleries, albums and slideshows. Spend some time building one of more themes for your galleries and you’ll then find they’re easy to apply to any galleries you build in the future.
For further questions, or if you need help, please open a support ticket from your HostPapa Dashboard. Follow this link to learn how.
