You can install Joomla! using the Softaculous Apps Installer via your cPanel, or by manually uploading the Joomla! files and running the Joomla! installer.
The Softaculous Apps Installer will be easier if you are less experienced working with an FTP client or phpMyAdmin. A manual Joomla! installation will give you some extra configuration choices, including the option of installing some sample content.
(1) How to Install Joomla! using the Softaculous Apps Installer
- Open the HostPapa cPanel for your domain
- Search for and open Softaculous
- Search for and install the Joomla! script
- Most of the Software Setup settings are straightforward:
- if you are given a choice, select the latest version of Joomla!
- for security reasons, use something other than admin for the Admin Username
- Make sure you note your username and password
- Click install
After successfully installing Joomla! with Softaculious you’ll be able to vist the front end of your site at www.yourdomain.ca or log in to the backend of your site at www.yourdomain.ca/administrator using the Admin Username and Password you specified above.
(2) How to install Joomla! manually
Manually installing Joomla! involves uploading a copy of the Joomla! files to your public_html directory, creating a blank database, then visiting the Joomla! installer.
Upload the Joomla! files and create your database
- Download the full Joomla! package from www.Joomla!.org/download.html to your local computer
- Unzip or unpack the package you just downloaded, then using your favourite FTP program, connect to your HostPapa account and upload all the files to the directory where you wish to host your Joomla! site
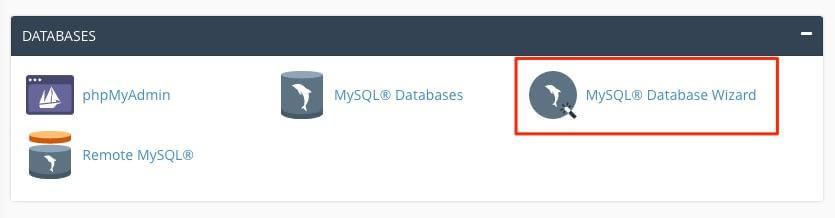
- From your HostPapa Control Panel, open the MySQL Database Wizard and follow the steps to create a new blank database with a username and the password
- When asked, assign ALL PRIVILEGES to this new user
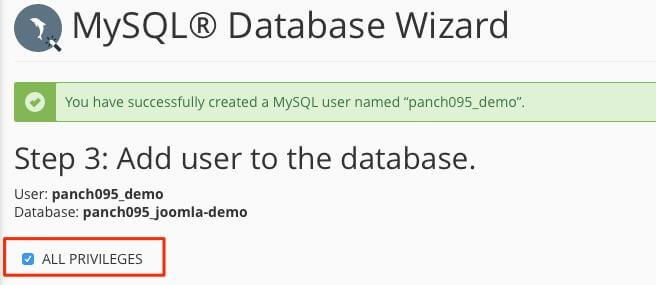
Remember to take note of these database credentials.
Run the Joomla! installer
1. With any browser, go to your domain name eg https://www.your-site.ca . If you are installing Joomla! in a subdirectory, browse to that address.
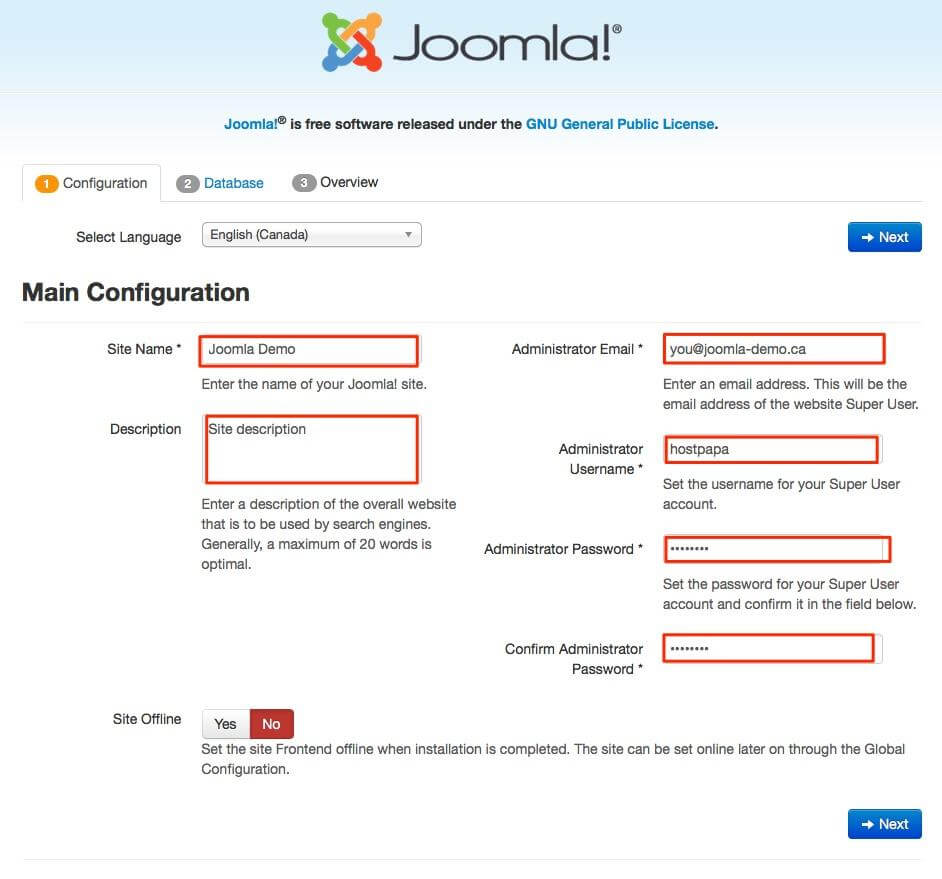
2. In the configuration window, fill-in:
-
- Your site name
- Site description (optional)
- Your email address
- Your username (for security reasons, use something other than admin)
- Your password
Then Next
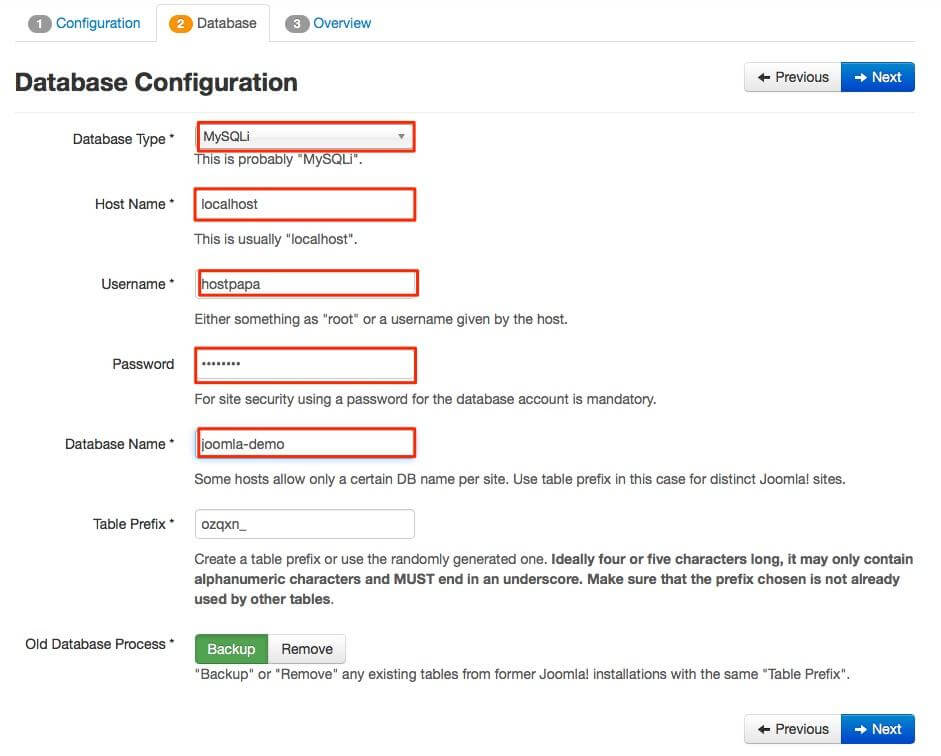
3. In the Database window
-
- Select database type: MySQLi
And enter - Host Name: localhost
- And the username, password and database name that your specified in the MySQL Database Wizard above
- Select database type: MySQLi
Then Next
4. In the Overview window you can choose whether or not you want some data installed. If you are new to Joomla!, choose an option which is similar to the type of site you wish to create. The sample data will get you off to a fast start and you can delete it later.
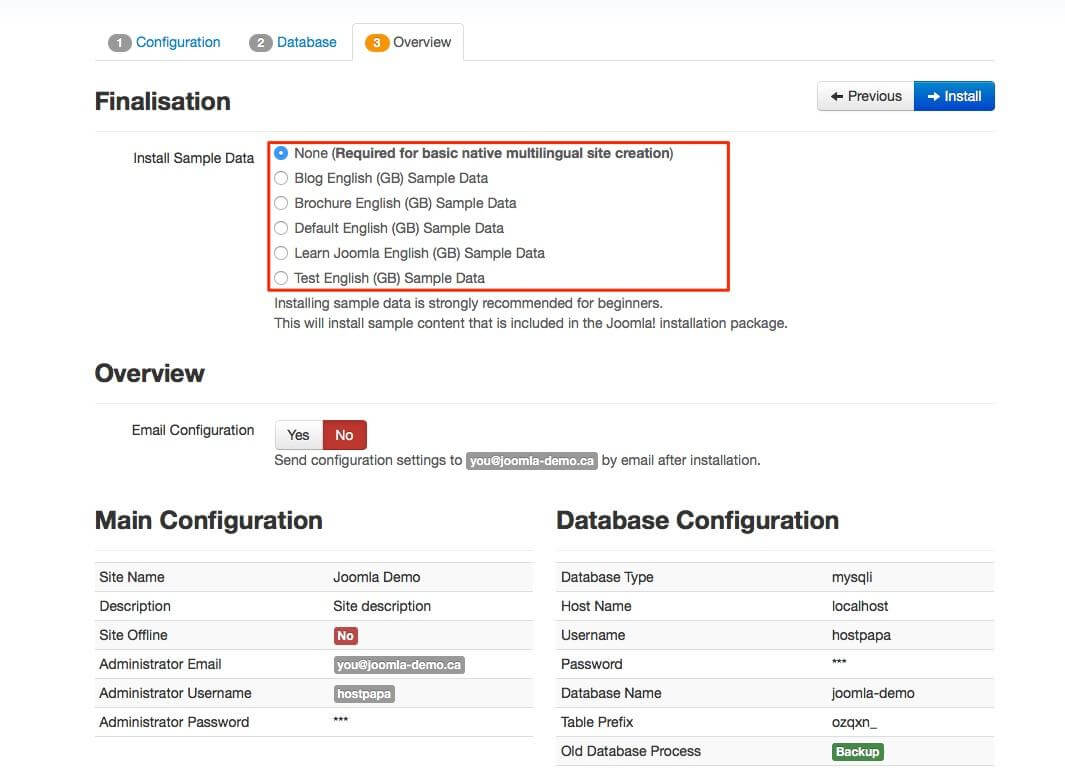
This same overview window will also show a check of required items and recommended settings for your Joomla! site. If any of the required items are missing, contact HostPapa support for assistance.
Then Install
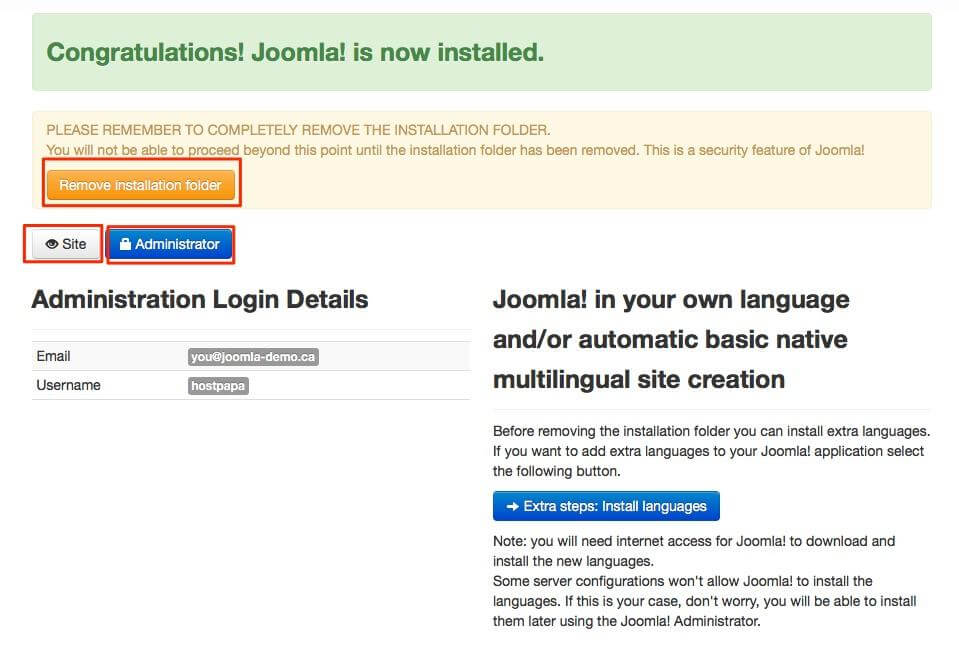
5.If the installation was successful you’ll get the confirmation screen.
-
- Click the button to Remove Installation Folder
Congratulations! You have successfully installed Joomla! manually. This same confirmation screen has links to the front end or public view of your site, at the back end or administrator login to your site.