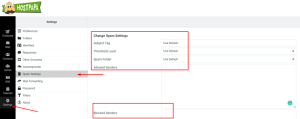
The allowed and blocked senders lists let you create a list of senders that will either be automatically allowed and bypass your spam filter or be automatically blocked from being received in your inbox.
Addresses in your Contacts are considered to be in your allowed senders list even though the contact entries are not displayed. If you add an address to the blocked senders list in your Contacts, the address will be blocked as the blocked senders list takes precedence over your Contacts.
The allowed and blocked senders list uses the star (*) as a wildcard which lets you set up to block or allow any emails from a specific domain. These should be used with caution as you may accidentally block every email sent from *@gmail.com, for example.
You can add up to 1,000 entries to the allowed and blocked list.
To adjust the allowed or blocked senders list:
- Access your HostPapa webmail.
- In the Settings tab, click Spam settings.
- Add or remove the email address on a separate line to the Allowed senders list or the Blocked senders list text field.
Note: If you want to block an entire domain, use the star (*) to denote a wildcard before the at (@) symbol.
- Select Save when you’re done.
If you need help with your HostPapa account, please open a support ticket from your dashboard.
