Shared Hosting and Reseller Hosting customers can enable Cloudflare. In this article, we’ll show you how to activate Cloudflare on your HostPapa Shared Hosting account:
If you have purchased Protection Power or SiteLock Shield, CDN is already included in your plan, and there is no need to enable or sign up for another CDN product.
However, if you wish to enable Cloudflare, follow these steps:
1. Access your Cloudflare account here.
If this is your first time accessing the Cloudflare interface, you will be asked to create a free account. Provide your email address with a password, and agree to the terms of service once you have read them. You will then receive a welcome email from Cloudflare for your account.
2. Click Add Site.

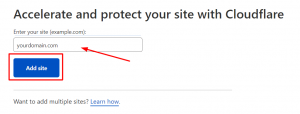
3. Enter your domain address and click Add site.
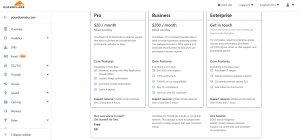
4. You will be prompted to select a Cloudflare plan. Choose the plan you want to purchase or simply select the Free plan. Then click Continue.
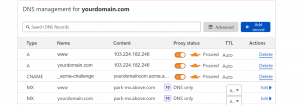
5. Review your DNS records. Cloudflare will automatically proxy or route A and CNAME records.
The orange clouds show which records are proxied, the records with no icon can’t be proxied to Cloudflare.
6. Click Continue.
To properly use Cloudflare, you will need to replace HostPapa’s nameservers with Cloudflare’s.
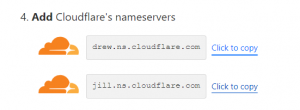
To change your domain’s nameservers, follow these steps:
1. Log in to your HostPapa dashboard.
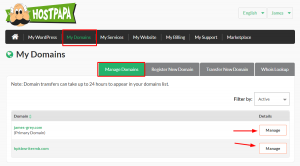
2. Click on My Domains.
3. In Manage Domains, click Manage next to the domain you want to edit.
4. Click Nameservers.
5. Choose Use custom nameservers and add Cloudflare’s nameservers.
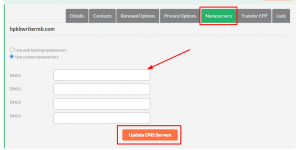
6. Click Update DNS servers to save.
Once you have updated your domain’s name servers, go back to Cloudflare and click Done, check nameservers.

Updating your nameservers may take up to 60 minutes. Once they are updated, you will be able to use the Cloudflare dashboard.
If you need help with your HostPapa account, please open a support ticket from your dashboard.
