If more than one person needs access to your HostPapa Dashboard, like a web admin, you can create separate logins for each user. This support article shows you how to add, edit, or delete your HostPapa Dashboard users. See the next video or follow the steps below:
1. Log in to your HostPapa Dashboard.
2. Click on your name at the top right side of the page, then select My Profile from the drop-down menu.

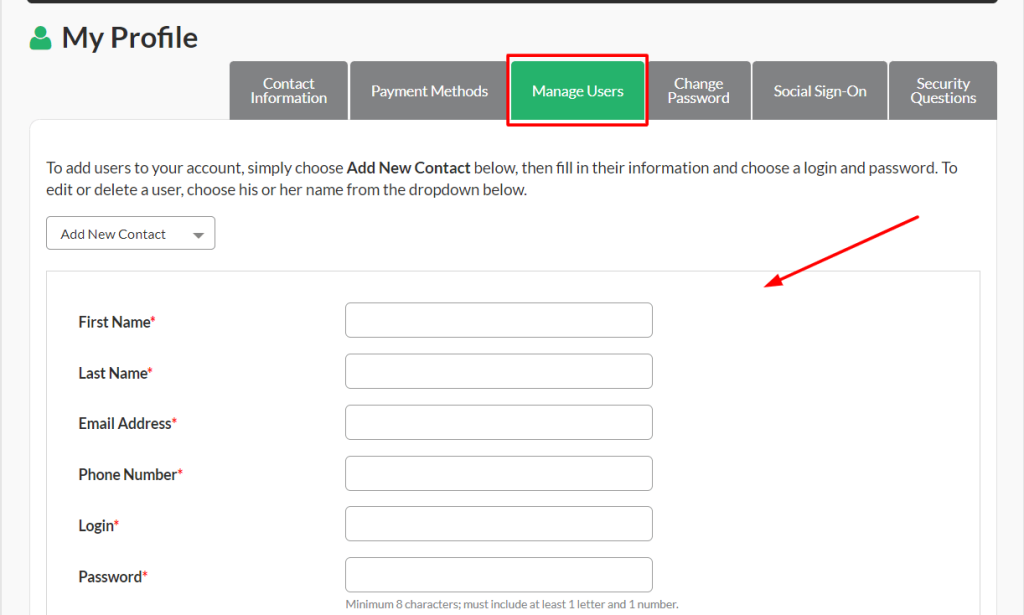
3. Click the Manage Users tab.
4. To add a new user, complete the information on the different forms.

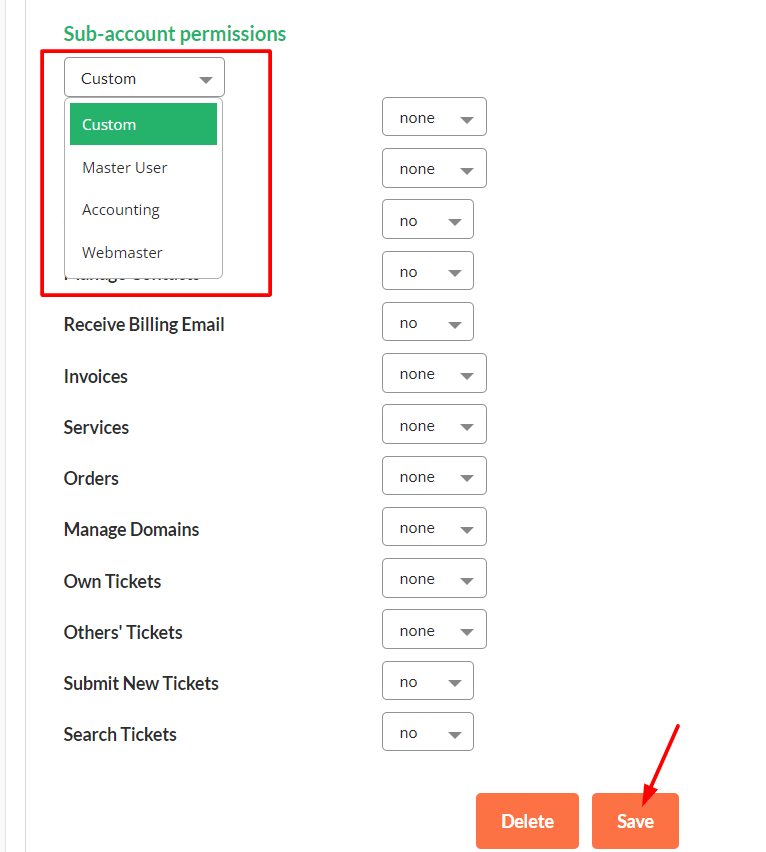
6. Set the specific permissions. Some presets can be used to rapidly edit the new user permissions by clicking Custom.

7. Click Save.
Note: The new user will receive an email to the address you used during the user creation process.
Edit or delete a HostPapa Dashboard user
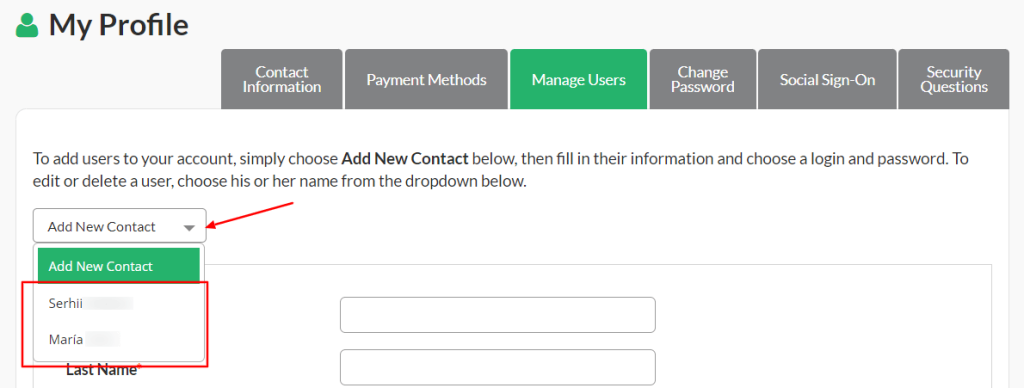
1. In the Manage Users tab, click Add new contact to open the drop-down menu.
2. Select the user you wish to edit or delete.

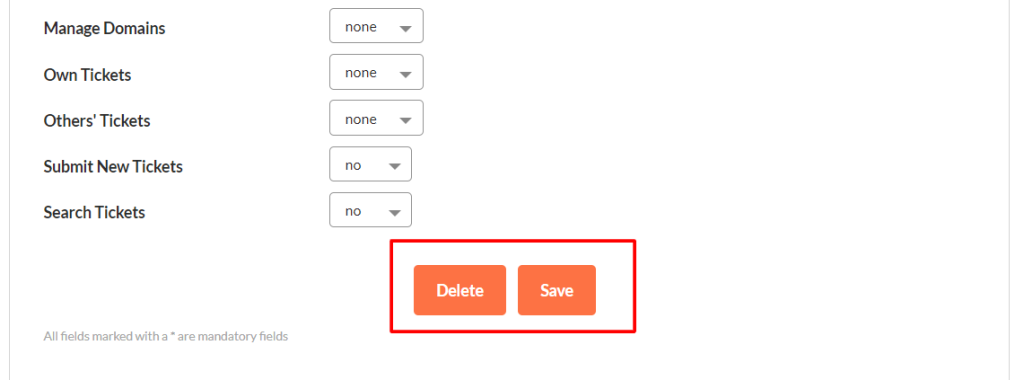
3. At the bottom of the form, you can Save after editing the needed information or click Delete to remove the user.

That’s it! Now you know how to add, edit or delete your HostPapa Dashboard users.
If you need help with your HostPapa account, please open a support ticket from your dashboard.
