Congratulations on becoming a HostPapa Domains Reseller! We’ll cover some basic but essential operations for you as a domain reseller in this guide.
Logging in
To login, please open the following link in your browser:
https://hostpapadomains.com/resellers/
Make sure to use the username and password provided by HostPapa in the Domains Reseller account welcome email.
If you haven’t created the Domains Reseller account yet, please follow this link.
Adding funds to your Domains Reseller Account
Make sure you’re logged in to your Domains Reseller account first. Your Domains Reseller account is under the OpenSRS registrar, so please follow the official documentation here.
Please remember that all transactions are billed in USD.
Account funding is possible using the New OpenSRS Control Panel.
Setting up the default nameservers
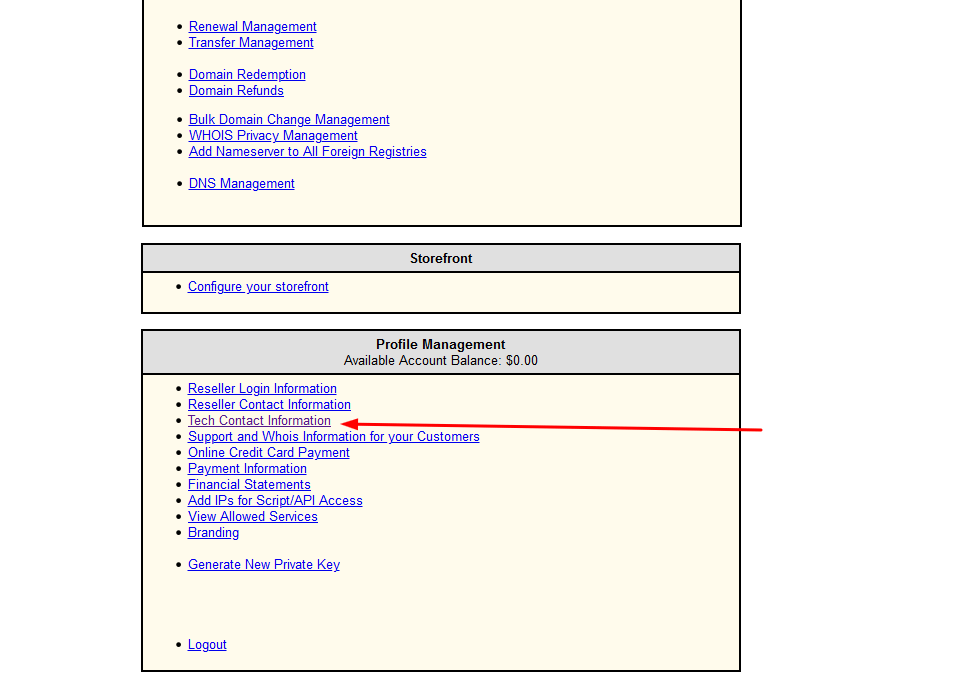
Make sure you’re logged in to your Domains Reseller account first. To set up the default nameservers, on the old Control Panel, scroll down to Profile Management section and click on the Tech Contact Information link:
 On the next page (NameServer Information section), select the Use custom DNS radio option, then enter the values you would like to use as name servers for your new registered or transferred domain names.
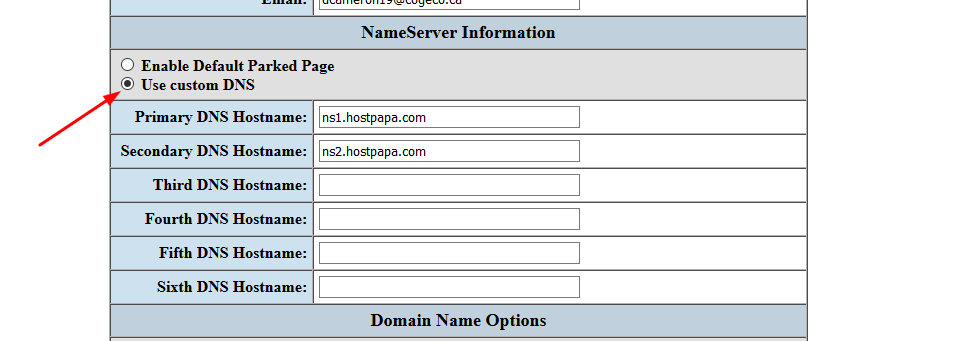 Click on the Save Changes button to apply changes.
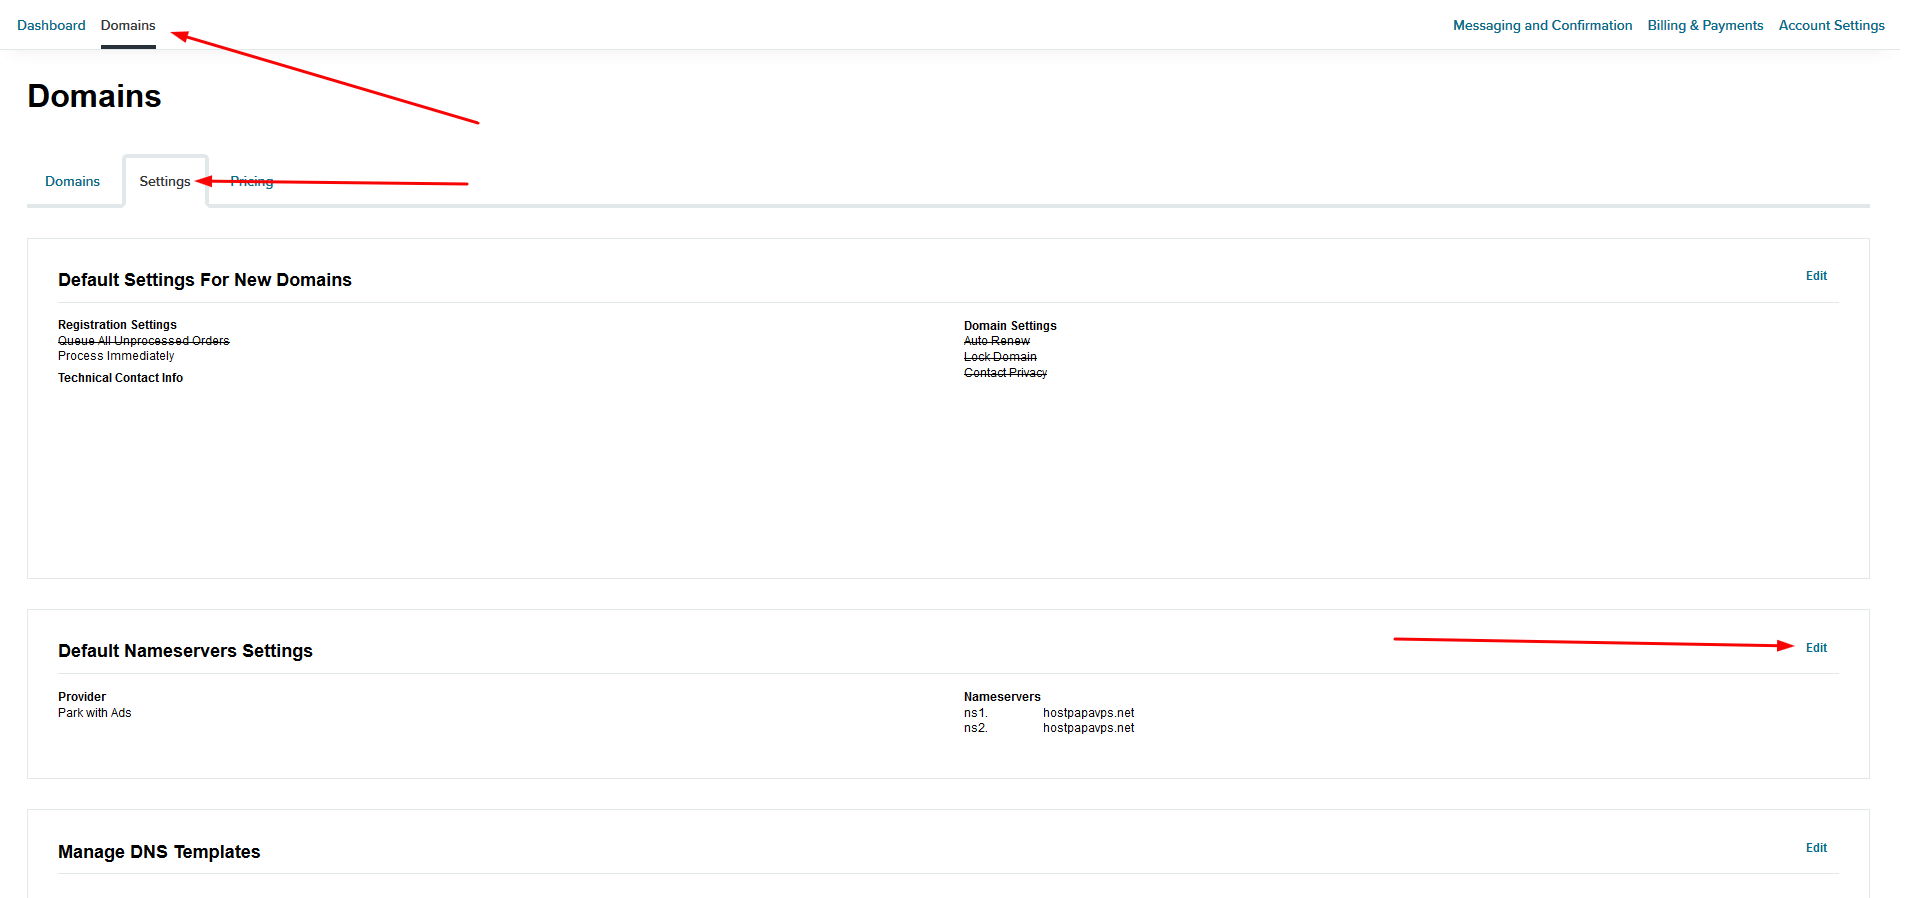
On the new Control Panel, navigate to Domains > Settings option. Click on Edit for Default Nameservers Settings option.
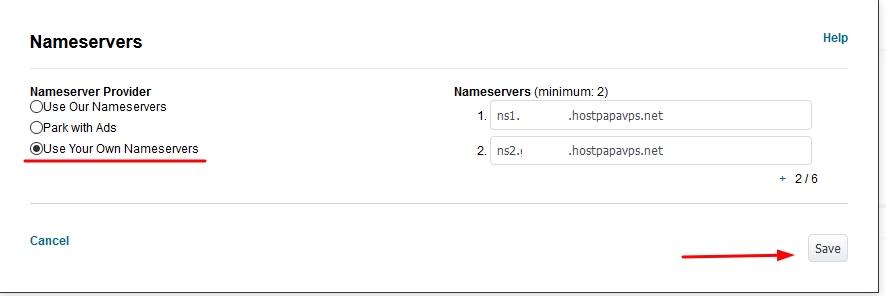
 Choose to Use Your Own Nameservers option, enter the name servers you wish to set up for new registered or transferred domains, and click on the Save button.
Transferring a domain name
Make sure you’re logged in to your Domains Reseller account, and that you have sufficient funds first.
You can place a new domain transfer order manually from the old or new account Control Panel.
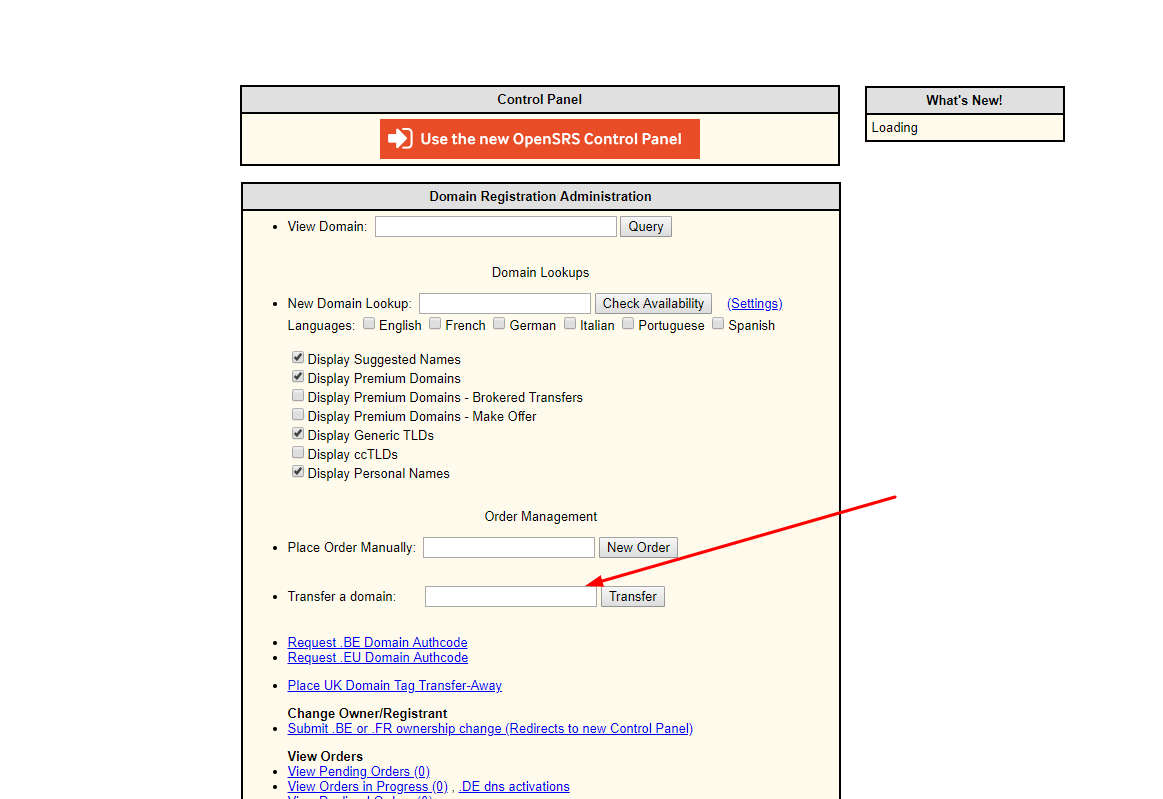
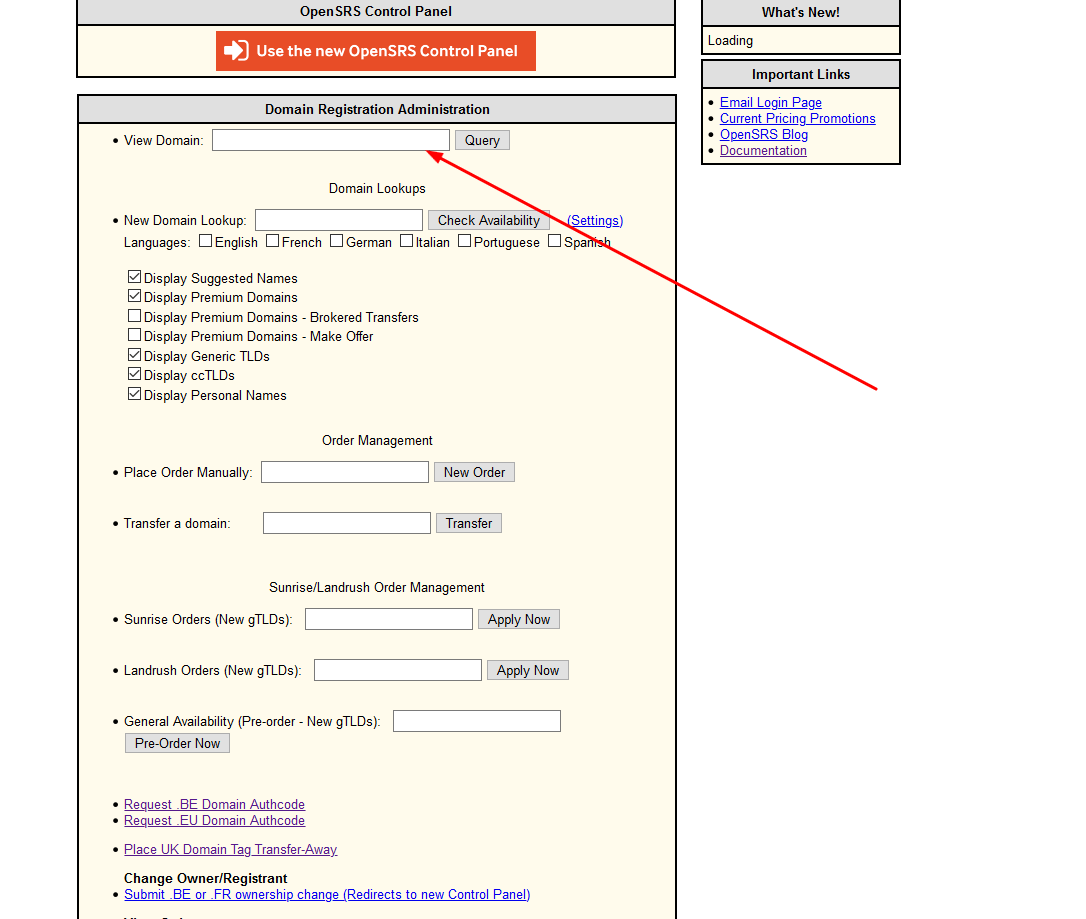
On the old Control Panel, enter the domain name and press the Transfer button:
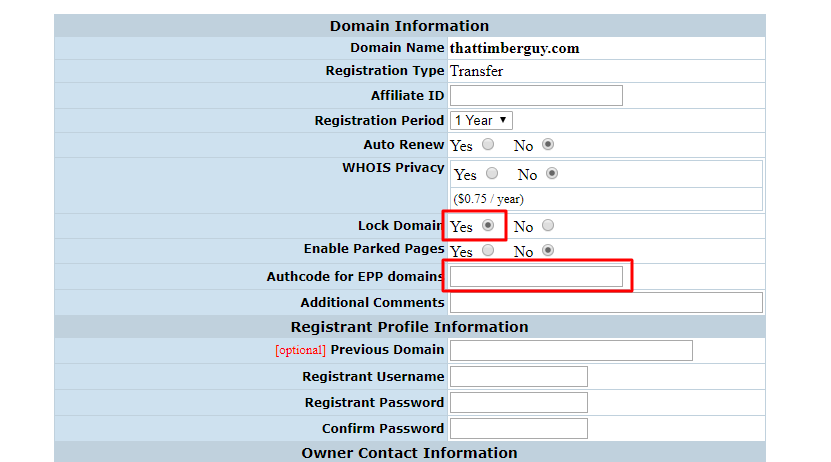
On the new page, please:
- Fill the domain transfer code (EPP code).
- Choose whether to enable Domain Privacy or not (enabling Privacy comes with an additional cost).
- We recommend checking Yes on the Lock Domain option.
- Fill username and a password of a minimum length of 10. We recommend using a password generator application like https://passwordsgenerator.net/
 Scroll down and fill Owner and Admin contact details:
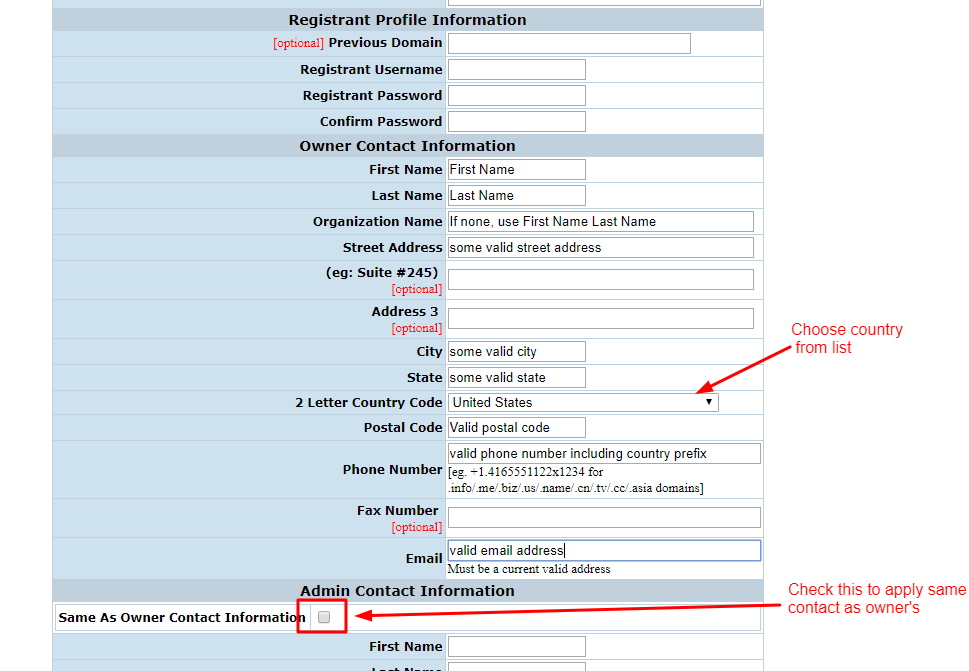 Use your contact details for Billing and Technical contact.
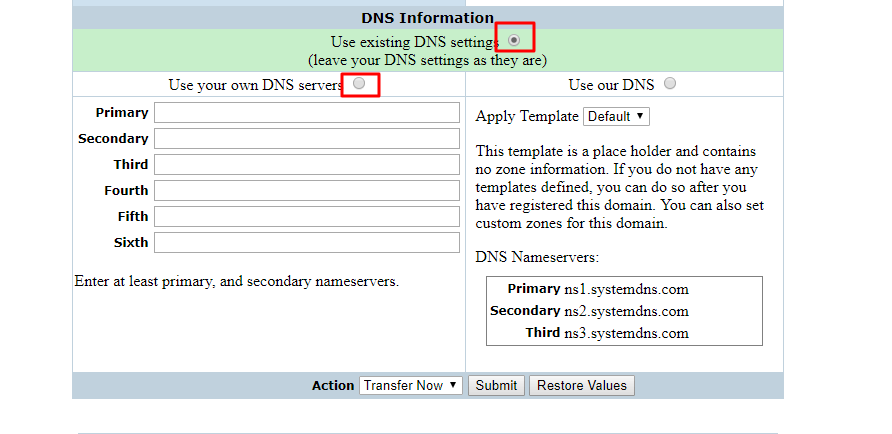
The last part is to choose the domain DNS (name servers) options.
The default setting is to keep existing DNS settings during transfer, and when transfer finishes, you may update name servers from your Domains Reseller account.
You may also choose to automatically change name servers when the transfer completes by checking the Use your own DNS servers option and filling the name servers associated with your hosting account (Reseller or VPS). These values can be found on the service’s welcome email.
 Please remember that once the transfer is in progress, name servers can be updated neither on the former Registrar nor on the new Registrar (you) until domain transfer completes.
Once all the details are in place, press the Submit button.
If everything is correctly filled and valid, you will notice a green message confirming that the order succeeded.
If there is anything wrong, a red error message will provide details about failure reasons. Most of the time, error messages are suggestive, and it is easy to understand where the issue is.
On the new Control Panel, apply the same steps as for registering a new domain name. Please note that the domain which will is to be transferred needs to be unlocked at the current registrar before placing the transfer order.
Registering a new domain name
Make sure you’re logged in to your Domains Reseller account, and that you have sufficient funds first.
You can place a new domain registration order manually from any of the old or new account Control Panel.
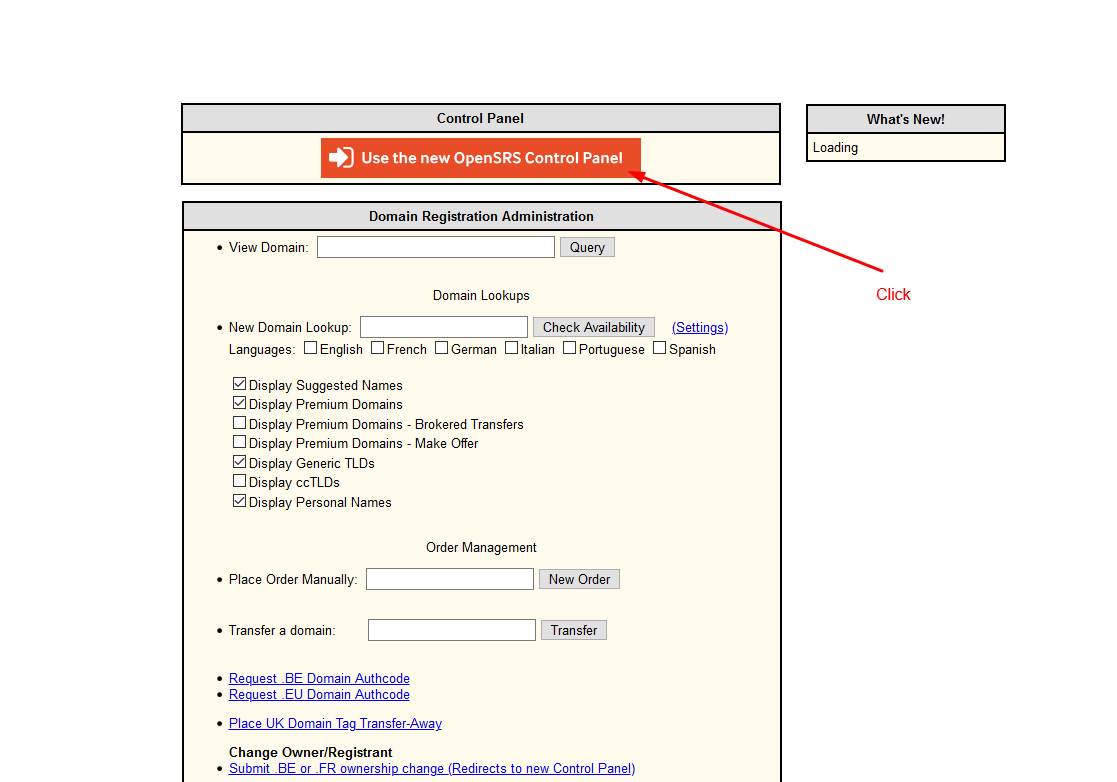
On the old Control Panel, enter the domain name and press the Check Availability button:
 On the next page, you will see if the domain name is available along with similar domain names suggestions. If the domain is available, you will have the link to register the domain name.
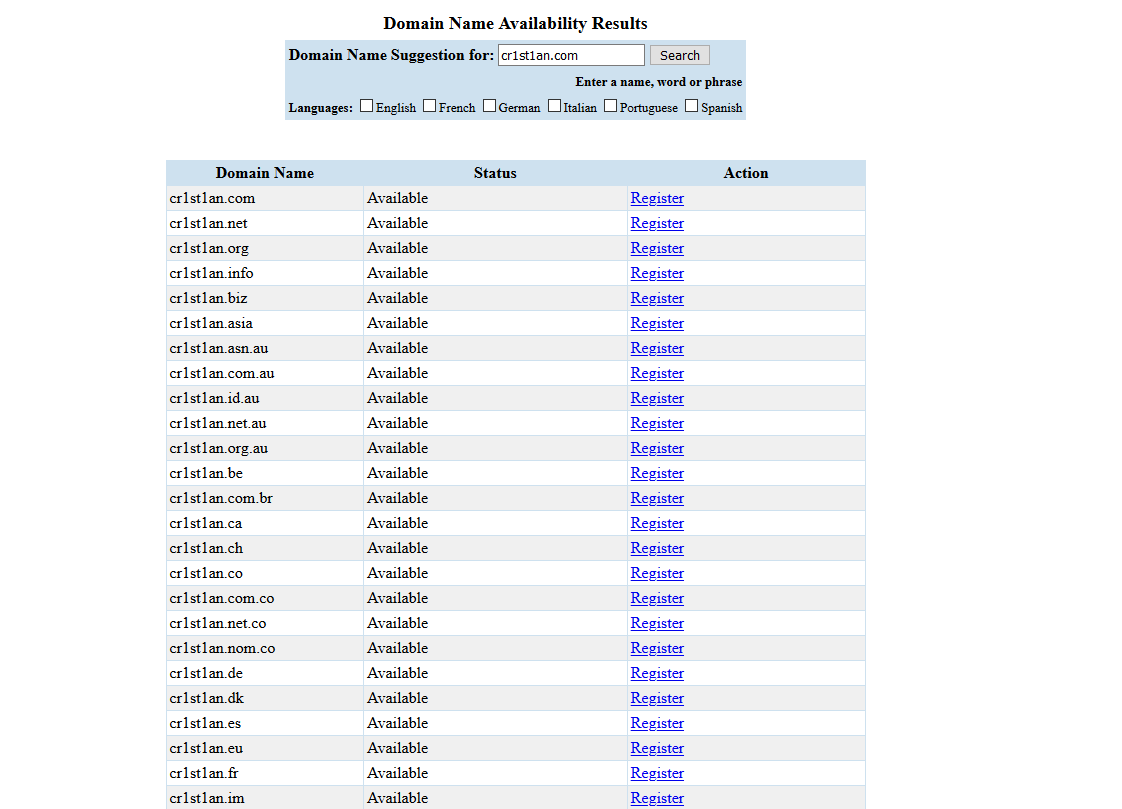 Click on the Register link to proceed to the next step.
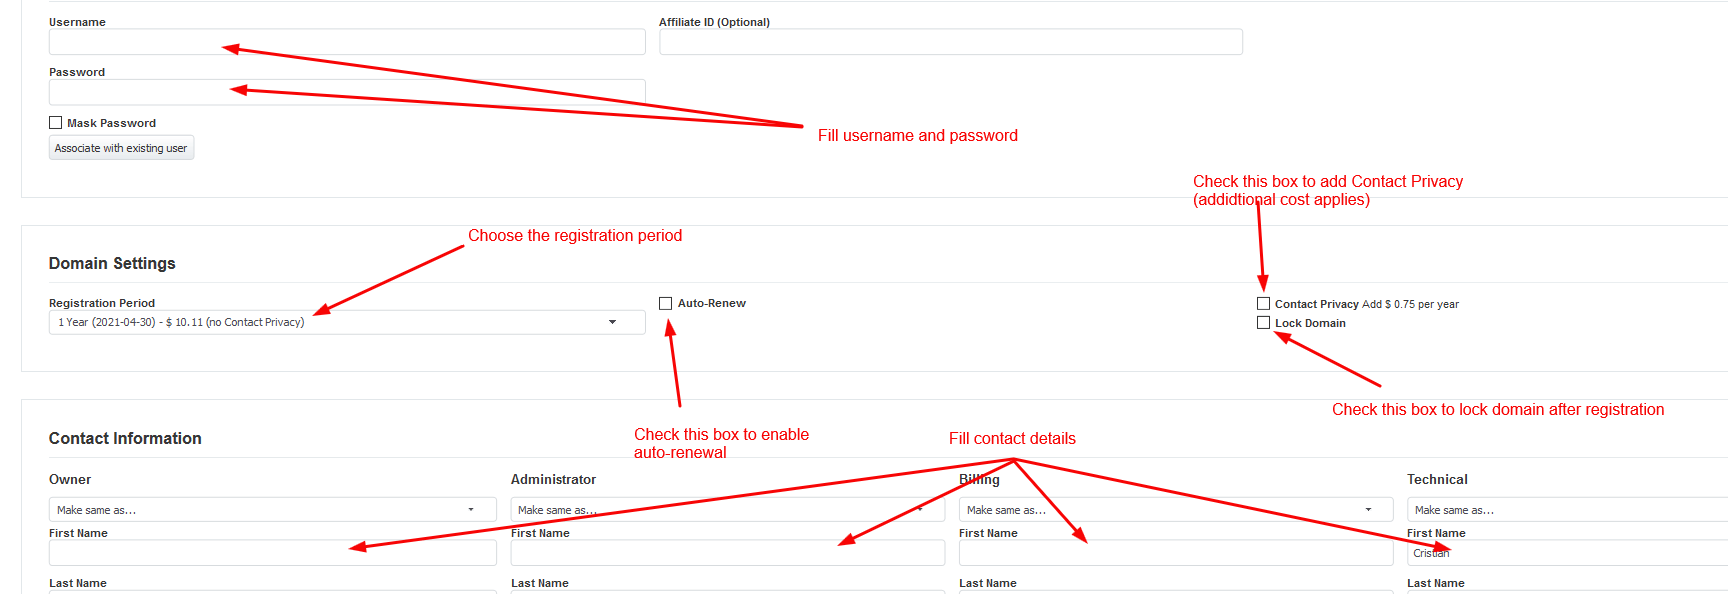
On the New Domain Registration Form, choose the registration term*, whether to enable the Auto Renew** option or not, and whether to enable the Domain Privacy*** option or not.
We recommend enabling the Lock Domain option.
Fill username and a password of a minimum length of 10. We recommend using a password generator application like https://passwordsgenerator.net/
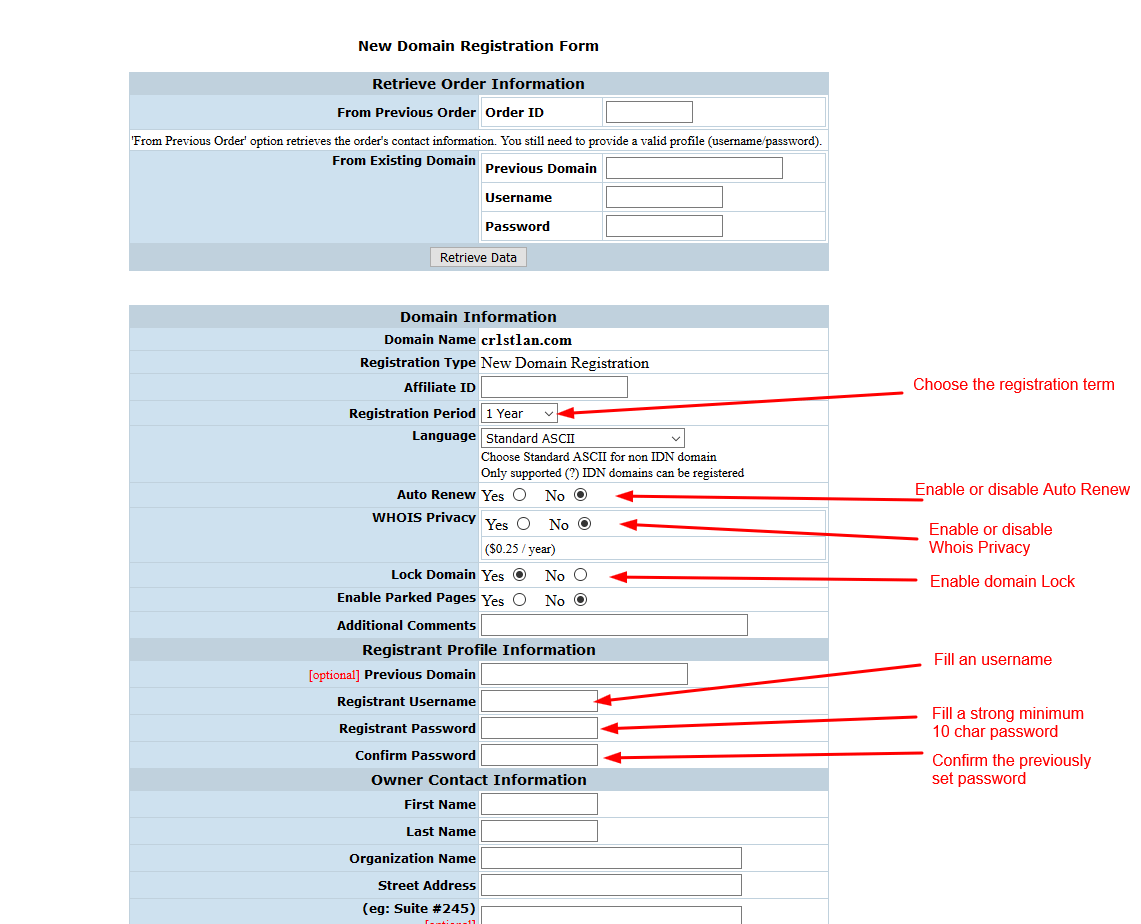 * Registration term may be different depending on TLD. Some TLDs may be available on annual terms only.
** If Auto Renew is enabled, the domain will be charged for renewal automatically 30 days before expiry. This can be enabled / disabled later, after registration.
*** Enabling Whois Privacy comes with an additional cost.
Next, scroll down and fill Registrant* and Admin** Contact Information:
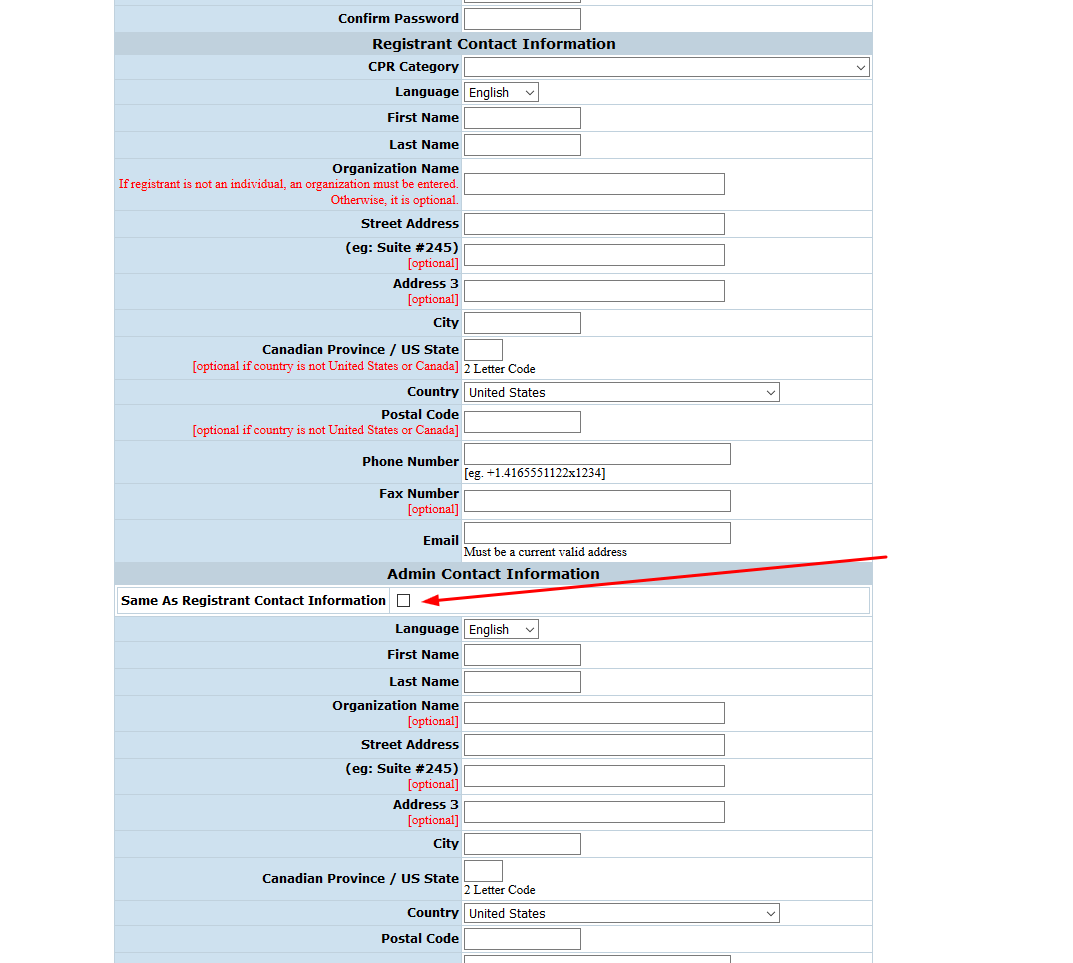 Use your contact details for Billing and Technical contact.
* For certain TLDs, usually ccTLDs, there are specific eligibility criteria for registrants. Please make sure you are aware of various ccTLD policies: https://help.opensrs.com/hc/en-us/sections/115001583368-TLD-Policies
** If the registrant’s contact details are the same as admin’s ones, you may check the box for the Same As Registrant Contact Information option.
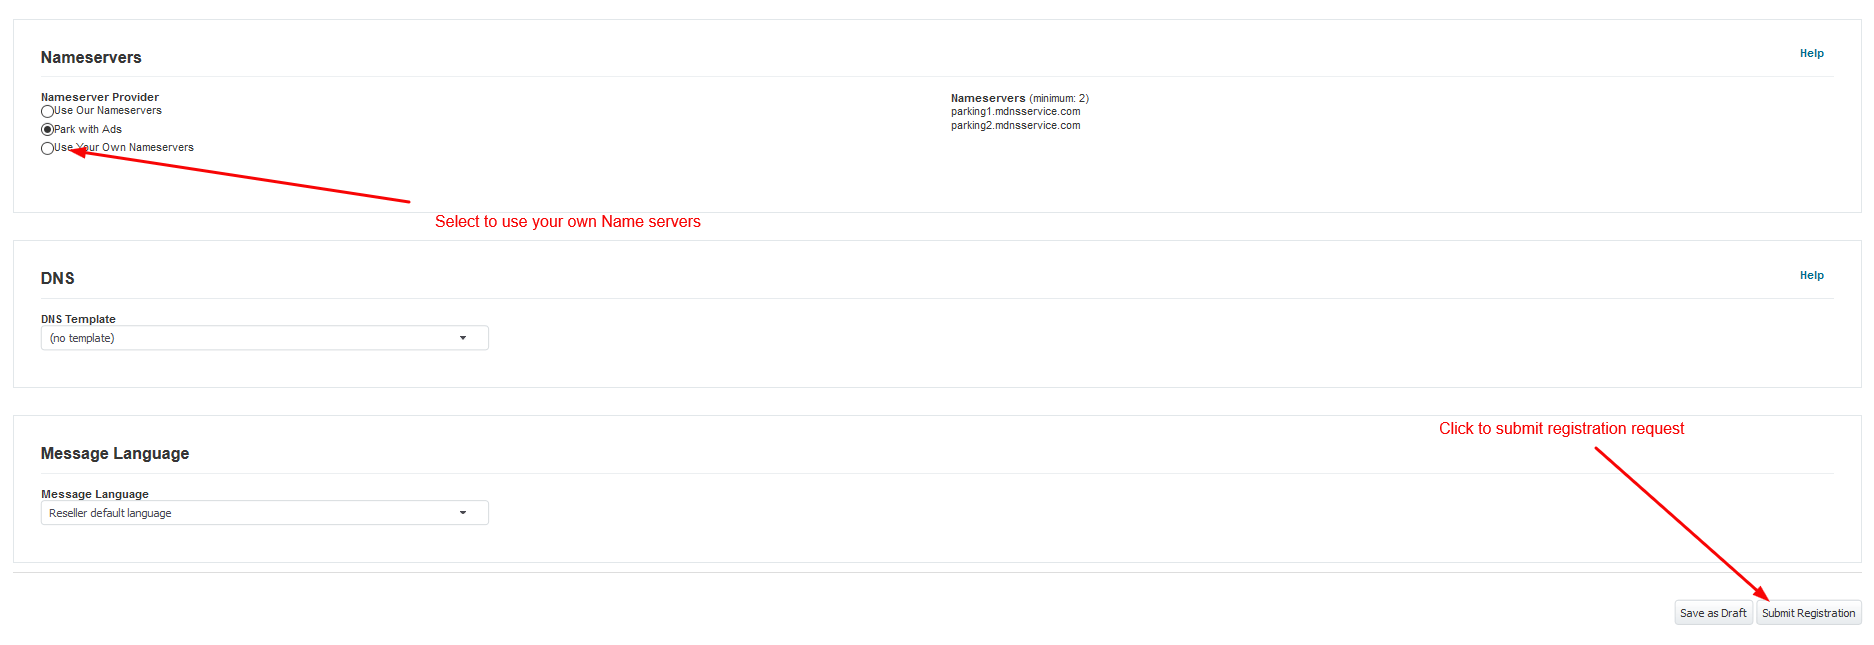
The last part is to choose the domain DNS (name servers) options.
The default setting is to use your DNS settings, which can be configured as the name servers associated with your hosting account (Reseller or VPS). These values can be found on the service’s welcome email.
 Once all the details are in place, press the Submit button.
If everything is correctly filled and valid, you will notice a green message confirming that the order succeeded.
If there is anything wrong, a red error message will provide details about failure reasons. Most of the time, error messages are suggestive, and it is easy to understand where the issue is.
On the new Control Panel, navigate to Domains section and press the + button on the left side. Then enter the desired domain name on the search box.
 On the new form:
- Fill Username and Password.
- Select the registration period.
- Choose whether to enable auto-renewal, contact privacy, and domain lock.
- Fill up contact information for the new domain, choose the name servers.
Once completed, click on the Submit Registration button at the bottom of the page.