Setting up Mac Mail is easy – simply follow the steps below:
1. Open Mac Mail.
2. Click on Preferences from the Mail menu in the top toolbar.
3. Click on the Accounts tab.
4. Within the Accounts tab, click on the plus (+) sign in the bottom left corner to create your new account.
A dialog box will now appear. This is where you will enter your general account information:
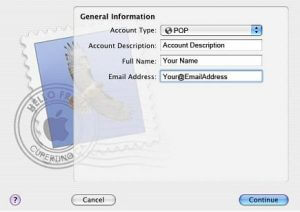
5. Set the Account Type to POP3.
6. Enter your name and email address.
7. Click Continue.
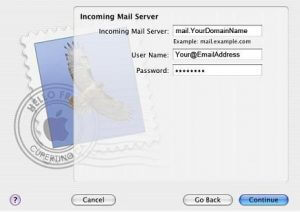
8. Now you will need to configure the incoming mail server. If you have a shared hosting account, insert mail.yourdomain.com (replace yourdomain.com with your actual domain). If you use Basic or Advanced Email service, insert mail.papamail.net as the incoming mail server.
9. Enter your username and password for your email account.
10. Click Continue.
11. Now you will need to configure the outgoing mail server. If you have a shared hosting account, insert mail.yourdomain.com (replace yourdomain.com with your actual domain). If you use Basic or Advanced Email service, insert mail.papamail.net as the outgoing mail server.
12. Make sure Use Authentication is checked.
13. Enter your email address and password.
14. Click Continue.
Using Authenticated SMTP
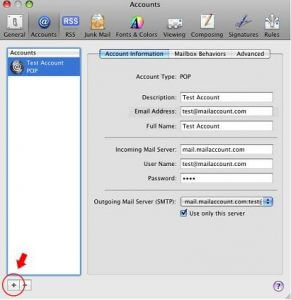
1. Click on the Account Information tab.
2. Click within the Outgoing Mail Server (SMTP) drop-down box.
3. Click on Edit Server List.
4. Click within the Outgoing Mail Server (SMTP) drop-down box.
5. Click Add Server.
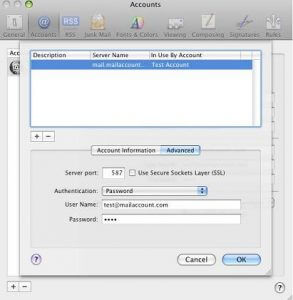
6. Set the server port to 587
