This tutorial will walk you through setting Apple Mail for Mac with your HostPapa’s Basic or Advanced Email account.
Please note that if you have not already done so, you will first need to configure and activate your HostPapa email service.
NOTE: For this tutorial, we will use setup@webtraining.cloud as our test email account. You will need to change some of the settings to match your setup.
First, open the Mail app.
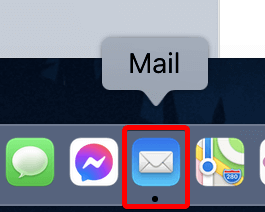
NOTE: If you haven’t added a new account yet, you’ll be taken directly to the Add Account prompt.
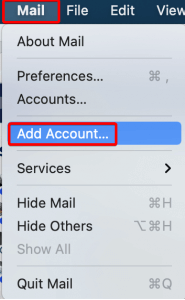
From the Mail menu, choose Add Account.
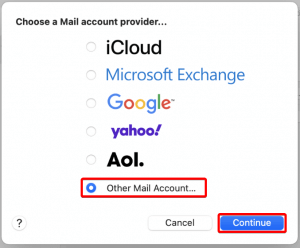
Next, choose the Other Mail Account… option, then click Continue.
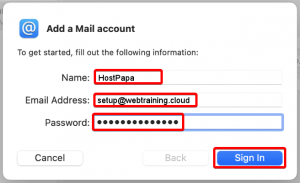
Next, fill in the Name you would like to appear when sending email (instead of HostPapa), along with your email address and the email account password.
Click Sign In, and the application will attempt to contact the mail server.
The default search will fail in most instances. The message “Unable to verify account name or password” will appear, along with a new settings box area where you can enter the server names directly.
To ensure that Mac Mail will save the correct settings, you must re-enter all fields again. If you fail to rewrite each field, it may not save or may go to an older account for settings. However, entering the data again will ensure it is saved correctly.
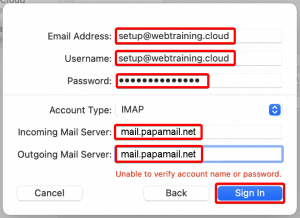
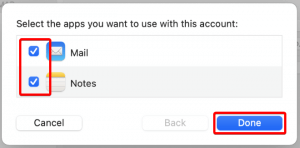
Once all the data is re-entered, click the Sign In option. You will next be asked to confirm the services to link to the account. The Mail option is required.
Click Done when ready to complete the setup.
Default Email Account Settings (Basic/Advanced Email)
NOTE: The username is always the full email address you are setting up.
Secure SSL/TLS Settings (Recommended)
| Username: | Use the full email you are setting up. |
| Password: | Use the email account’s password. |
| Incoming Server: | mail.papamail.net
|
| Outgoing Server: | mail.papamail.net
|
| IMAP, POP3, and SMTP require authentication. | |
If you need help with your HostPapa account, please open a support ticket from your dashboard.
