Integrating Google Workspace with Windows 10 can significantly enhance productivity by allowing seamless access to your Google apps and data directly from your Windows device. This guide will help you learn how to manually set up your Google Workspace email in Windows 10 Mail, integrate Google Workspace with your Windows system, and enable enhanced desktop security for your devices.
Setting up Gmail in Windows 10 Mail
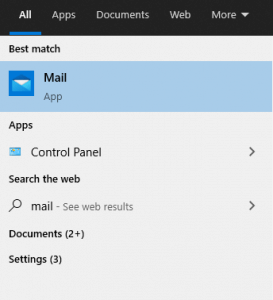
First, click Start in Windows and open the Mail App.
NOTE: You will need to change some of the settings to match your setup, administrator, or workstations. It is important to have a supported version of Google Chrome for seamless integration.
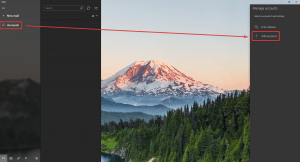
Next, click the Accounts option in the left menu.
A new window area on the right called Manage accounts, will appear. In this area, click on the + Add account option, as shown below.
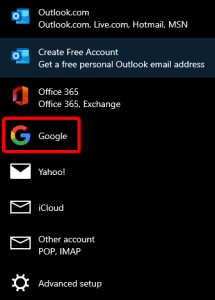
A new box will appear. Click on Google.
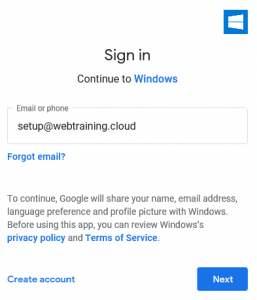
A new window will appear, showing web login options for your Google Workspace account. Follow the login options to connect.
If you have a 2 Step Verification setup, you’ll also need to authenticate your account from your mobile device when prompted.
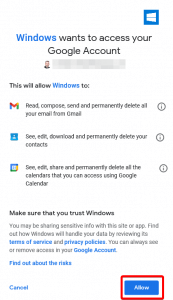
You will also need to allow Windows Mail to access your Google account to read emails, contacts, and calendars successfully.
Ensure you have at least 100 MB of available disk space for Google Chrome and 3 MB for the Google Credential Provider for Windows (GCPW).
Scroll to the bottom of the options and click on the Allow button to proceed.
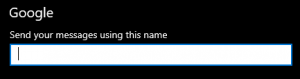
After a good connection is made in the background, Windows Mail will ask for the name you wish to appear when sending emails from this email account. Simply fill this in, then click Sign In at the bottom of the window.
The Mail application will then notify you that the setup has been completed successfully!
Once you’ve set up your Gmail account in Windows 10 Mail, you’ll be able to access your email, contacts, and calendar seamlessly from within the app. This integration ensures that all your important information is readily available on your Windows device.
How to Install Google Credential Provider
Installing the Google Credential Provider for Windows (GCPW) is a crucial step in integrating Google Workspace with your Windows 10 devices. This provider allows users to log in to Windows using their Google Workspace credentials, streamlining the authentication process and enhancing security.
If you haven’t installed it already, here’s how you can get started:
- Download the GCPW installer from the Google Admin Console.
- Once downloaded, double-click the installer file and follow the on-screen instructions to complete the installation.
- Ensure that your system meets the necessary requirements and has sufficient disk space before proceeding.
- After installation, configure the settings via the Admin Console to automatically enroll devices and apply security policies.
This setup not only simplifies user access but also helps admins manage user devices efficiently within the organization. Remember to verify your system requirements and disk space before installing.
Set Up Default Email Account Settings
To set up your default email account settings for Google Workspace Email, follow these steps:
- Begin by accessing the Windows 10 Mail app.
- Navigate to the Accounts section and select your Google Workspace email account.
- Under account settings, ensure that your incoming and outgoing server settings are correctly configured to match Google’s recommended secure SSL/TLS settings. This includes using imap.gmail.com for incoming mail and smtp.gmail.com for outgoing mail, with the appropriate ports.
- Additionally, verify that authentication is enabled for IMAP, POP3, and SMTP.
NOTE: You can use the SSL or TLS option for the outgoing email port, as shown below – both should work without issue.
| Secure SSL/TLS Settings (Recommended) | |
| Username: | Use the full email you are setting up. |
| Password: | Use the email account’s password. |
| Incoming Server: | imap.gmail.com*(or pop.gmail.com if using POP account type)** IMAP Port: 993 * POP3 Port: 995 |
| Outgoing Server: | smtp.gmail.com * SMTP Port: 465 for SSL or 587 for TLS |
| IMAP, POP3, and SMTP require authentication. | |
Enabling Enhanced Desktop Security in All Your Devices
For safe Windows device management, you’ll need to activate enhanced desktop security. This is a feature that allows you to manage and secure your Windows 10 devices through the Google Workspace Admin Console.
To enable enhanced desktop security, follow these steps:
- Sign in to the Google Workspace Admin Console.
- Navigate to the devices section.
- Click on Windows and then select enhanced desktop security.
- Follow the prompts to enable Enhanced Desktop Security for your devices.
Once you’ve enabled Enhanced Desktop Security, you’ll be able to manage and secure your Windows 10 devices directly from the Google Workspace Admin Console. This feature provides an added layer of security, ensuring that your enterprise devices are protected and compliant with your organization’s policies.
If you require assistance with your HostPapa account, the most efficient method is to open a support ticket directly from your HostPapa dashboard. This process allows you to describe your issue in detail, ensuring that the support team has all the necessary information to assist you effectively.
