This tutorial describes how to set up Google Workspace email on an Android device.
Please note that if you have not already done so, you will first need to configure and activate your Google Workspace email service.
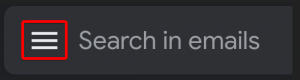
Open your Android Mail app, then click the hamburger icon to go to the main menu. At the bottom of the screen, choose Settings.
From inside the settings area, tap the Add Account option.
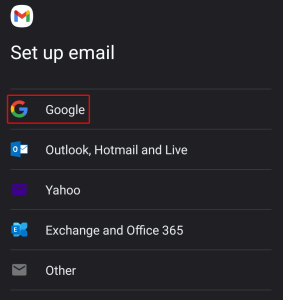
On the Set up email screen, tap the Google option from the list.
NOTE: For this tutorial, we will use setup@webtraining.cloud as our test email account. You will need to change some of the settings to match your setup.
Next you’ll be asked to fill in your Google Account email address. Simply fill in the address, then click Next.

Next, enter the password for your Google Workspace email account.

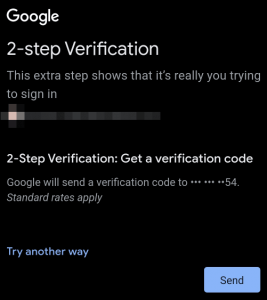
Depending on how this account is already set up, you may also be asked to confirm the login with 2 Factor Authentication.
You will now be prompted to agree to the Google Terms of Service/Use. Once you have done so, your account setup will be complete.
Default Email Account Settings (Google Workspace Email)
NOTE: You can use the SSL or TLS option for outgoing email port, as shown below – both should work without issue.
Secure SSL/TLS Settings (Recommended)
| Username: | Use the full email you are setting up. |
| Password: | Use the email account’s password. |
| Incoming Server: | imap.gmail.com (or pop.gmail.com if using POP account type)
|
| Outgoing Server: | smtp.gmail.com
|
| IMAP, POP3, and SMTP require authentication. | |
If you need help with your HostPapa account, please open a support ticket from your dashboard.
