Welcome to HostPapa’s Website Builder! With our Website Builder, you can create a beautiful, responsive website choosing from hundreds of professionally designed templates. This article walks you through the basics of using HostPapa’s Website Builder to create and publish a basic, fully functional website.
Note: This article is specifically for websites created using a Legacy version of HostPapa Website Builder. If you purchased the Website Builder + Business Email bundle, check this article for more information.
If you are unsure of what Website Builder version you have, please get in touch with our support team.
Launching Website Builder
Log into your HostPapa Dashboard and click My Services. Expand the Marketing Tools section and click Details next to the site you want to create with Website Builder.
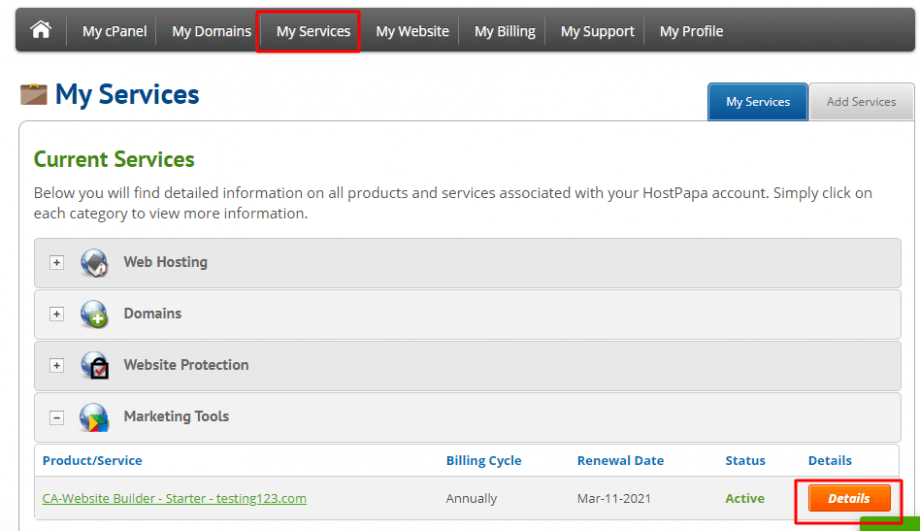
In the expanded Product/Service Detail section, click Launch.

You can also launch the Website Builder from your HostPapa Dashboard by clicking My Website, then Launch.

Choosing a template
The first time you launch Website Builder, you’ll see the Template Gallery. Hover your mouse cursor over the template image and click Details to see a description of the template and its features. Select the template you want by clicking on Use this template.
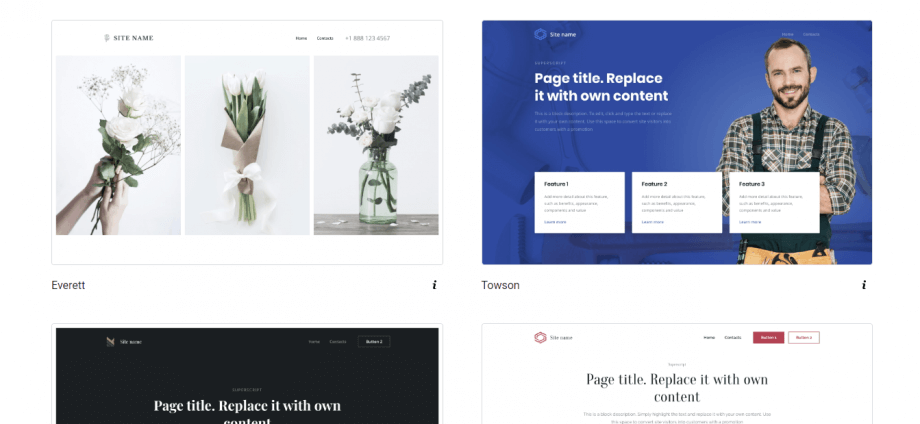
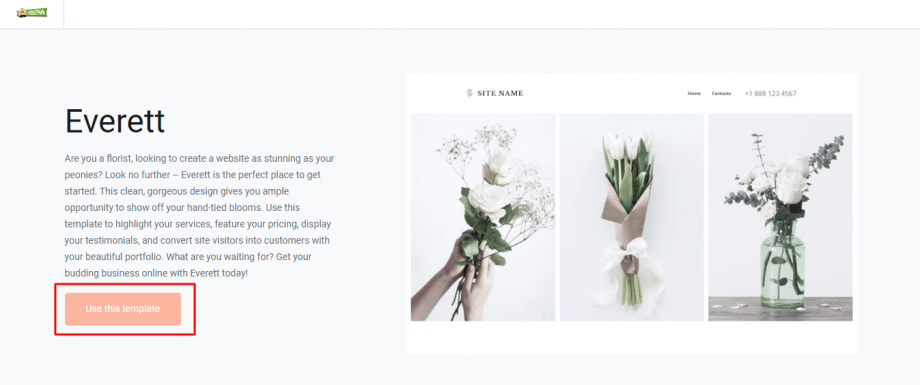
You can change your template at any time by resetting your website. This is helpful if you want to change the entire look and feel of your site.
Note: All your customization will be deleted after the reset, so make sure you have saved all your content in folders with text files and images to easily recreate your website with the new template.
You can reset your site by following these steps:
- Go to the Website menu and choose Settings.

- Scroll down to the Danger Zone and click Reset Site.

- You will have to confirm your decision by entering the word RESET. Click Submit.

- You will then be redirected to the Template Gallery. Choose your template and follow the Site Setup Wizard to configure your site again.
In the Site Setup Wizard section, you will have to pick a name and a category for your website.
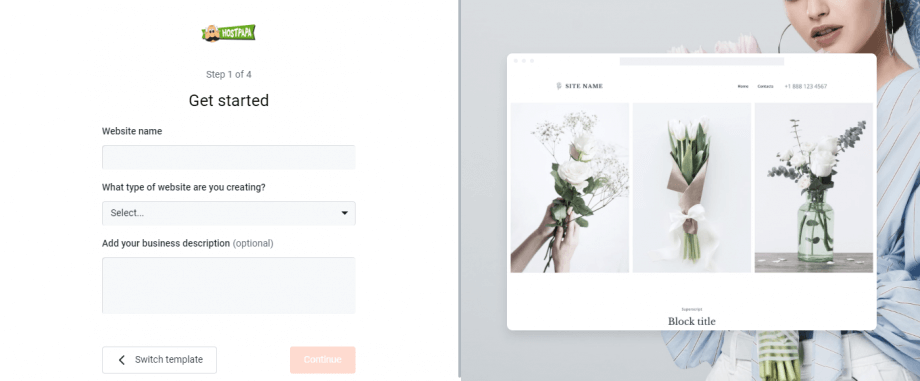
Add all your information and contact details, which will be displayed on your site’s contact page, and click Finish Setup.
Your site is now ready for you to add your content and customize it! Your site is created with a home page (also called an index page) and a Contact page. These pages include default sample images and text.
Getting to know the user interface
Before we begin customizing your site and adding content, take a bit of time to get familiar with the Website Builder user interface.
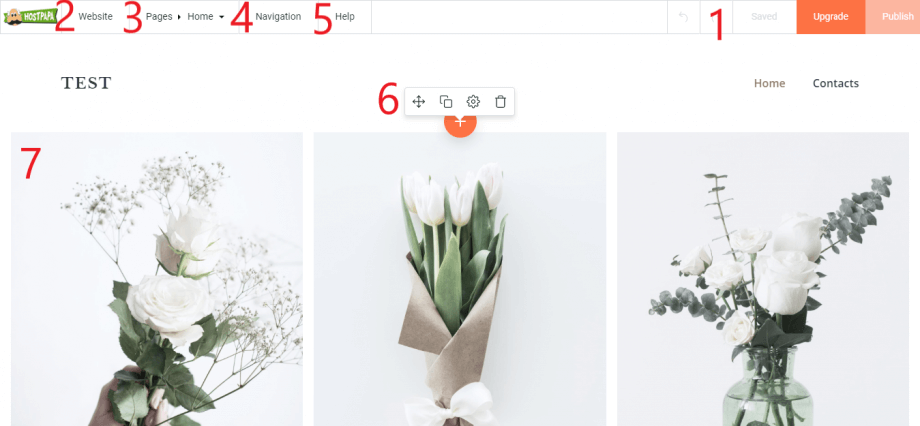

- Save, Upgrade, Publish – Save your most recent changes. When you are done, click Publish. Your published site will be updated with your changes. Click Upgrade for upgrading your account settings.
- Website menus – Access all the great Website Builder functionalities and settings.
- Page – Add or delete pages or change the page layout.
- Navigation – Here you can effortlessly add pages to update your site navigation.
- Help – This takes you directly to the customer care center.
- Editing toolbar – Toolbars allow you to access specific functions and make changes, depending on which Website Builder menu is active.
- Widget blocks – Blocks of content created when you drag widgets onto the page. These are also sometimes referred to as components. Depending on the type of widget, you can drag blocks around the page to move them or double-click them to edit text or images.
- Text editing toolbar – This toolbar is displayed when a text component is selected and it’s similar to word processing toolbars. Use it to change text format and properties: change font, colour, size, create lists, links, and add images.
Customizing your site
Now let’s make a style change and edit the default content.
Editing content
Your site’s home page is the first page your visitors see, so it’s important that the content is updated and engaging. Click Pages and then select Home.

Click inside any text widget block you want to edit. The text editing toolbar will appear near the top of the page.

Select the header text (in our example, it’s “Block title”) and replace it with your own text. We’ll use “Welcome to our site!” Now select the paragraph text below and replace that, too.

Now let’s change the colour of the template elements.
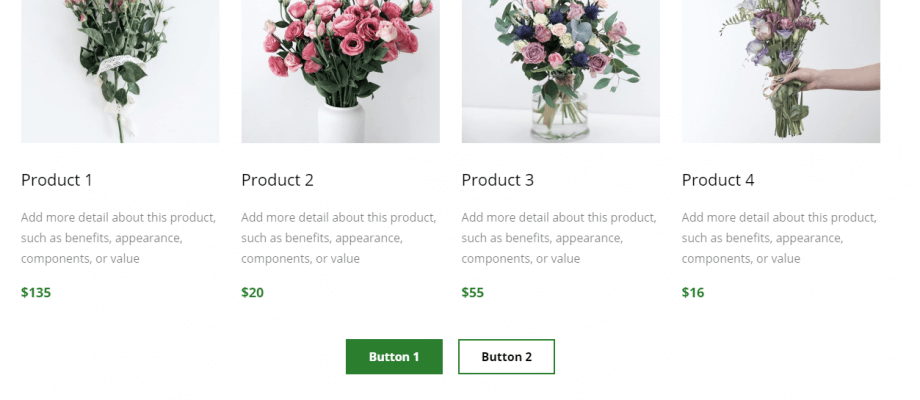
Click Website > Design.

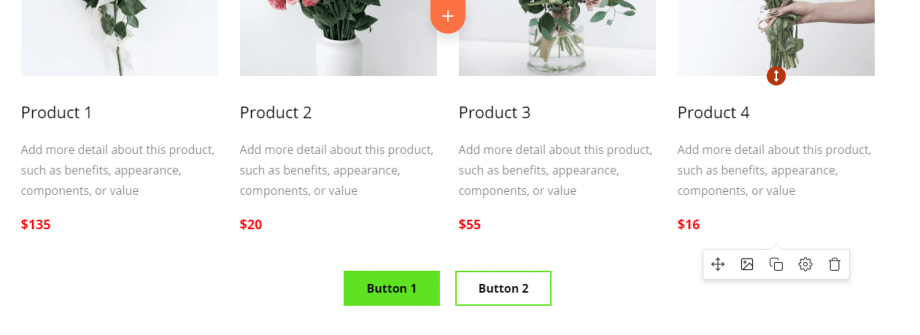
In the Colors section, go to Custom Palettes and click the settings icon to edit.

Select the colours for your palette and click Submit and then Save.

The template’s colours have now been changed.
Here are some other ways you can customize your content in Website Builder:
- Add bold, underlined, or italicized text.
- Add more headings or change Heading 3 to Heading 2.
- Change the text alignment to right, left, or center.
- Add images or videos.
- Add a link to another page on your site or to another website.
- Change the page layout to add or remove columns.
Adding and deleting pages
Website Builder automatically creates a few default pages for you, but you’ll want to add some of your own and probably delete some, too. The Website Builder Starter plan includes two pages, while the other plans allow up to 1000 pages.
To add pages, on the Pages menu, click the + icon.

Add a name for the new page. If you want a link to this page to be displayed on the home page, select Display in navigation. Click Submit. Now you can start adding blocks to your new page.

To delete a page, on the Pages menu, click the Delete icon. Choose Submit.

Changing site navigation
Site navigation is how your visitors find pages on your site. Website Builder navigation supports pages and subpages. To change your site navigation, click Navigation.

To change the order of how pages are listed, click any page and drag it up or down the list. When the pages are in the correct order, click Submit.
To change your page settings, hover over the mouse and click on the Settings icon.

Publishing your webite
When you’re happy with your site’s design and content, it’s time to publish! Click Publish in the upper right corner of the page. You’ll see a message that notifies you your site is being published.

When publishing finishes, the message will disappear. If you’re using the Website Builder Starter plan, you’ll see a message letting you know that publishing was successful.

That’s it! Website Builder makes it easy to create and publish a great-looking website in just a few steps. Website Builder has even more great features we haven’t had a chance to cover here.
For more information, check out the HostPapa Website Builder tutorial section in our knowledge base or contact HostPapa Support. If you need help with your HostPapa account, please open a support ticket from your dashboard.
