If you’re experiencing the WordPress not sending email issue, it’s usually due to problems with your server configuration.
Like many web applications, WordPress uses the PHP ()mail function to send emails. On a correctly configured server, the feature should work seamlessly. However, server hosts may place temporary or permanent restrictions on the use of PHP ()mail to reduce automated spam.
If your WordPress is not sending email, switch over to SMTP (Simple Mail Transfer Protocol). You can use SMTP on either your email account or Google.
Use your email account’s SMTP servers
You can switch to SMTP with your email account to fix the WordPress not sending email issue in ten simple steps.
- Download, install and activate the WP Mail SMTP plugin from the WordPress repository.
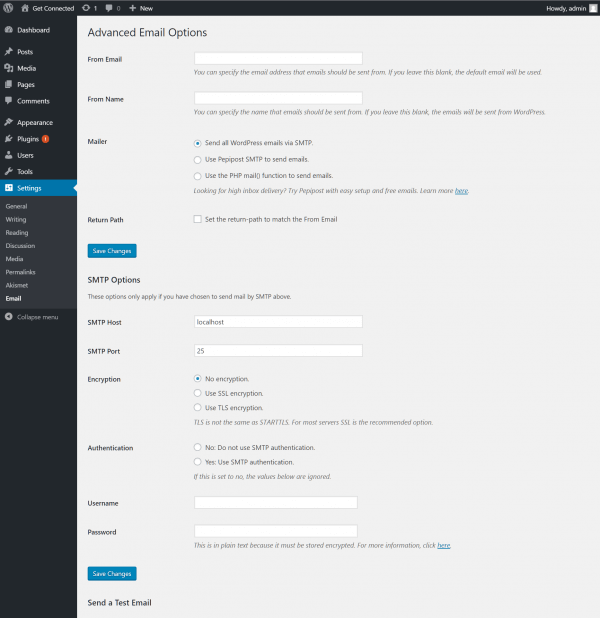
2. Once the plugin is activated, click the Settings link (or Settings > Email link in the sidebar) to configure the plugin.
3. Enter your email address and name.
4. In the Mailer section, ensure Send all WordPress emails via SMTP is selected.
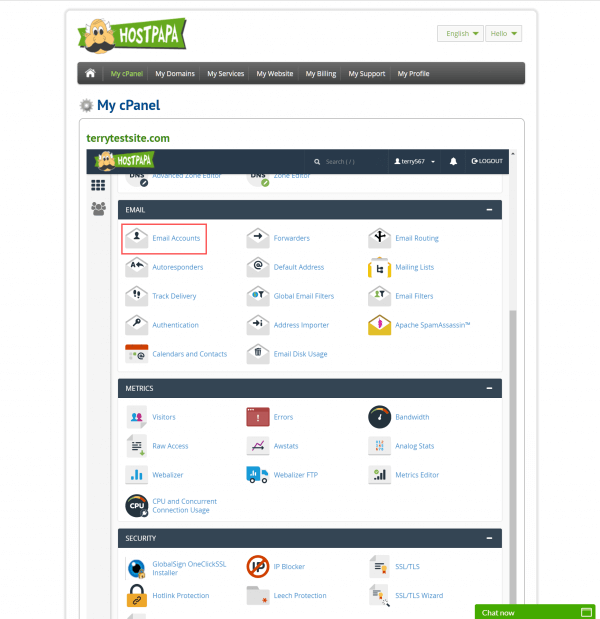
5. In SMTP Options, complete configuration using your HostPapa email server settings. You can find these in My cPanel in the HostPapa Dashboard by clicking the Email Accounts button.
6. Scroll down to Email Accounts and click the Set Up Email Client link to view your SMTP settings.
7. Ensure that Yes: Use SMTP authentication is selected and enter your SMTP login details.
8. Click the Save Changes button.
9. Test your settings by entering an email address in the To field under Send a Test Email.
10. Click the Send Test button to proceed. If you do not receive an email, check your SMTP settings.
Use Google SMTP email servers
The second solution to fixing the WordPress not sending email issue uses a free Gmail account from Google and the company’s SMTP servers. Head over to the Gmail website and set up an account. The following configuration steps work with free Gmail or Google Apps accounts.
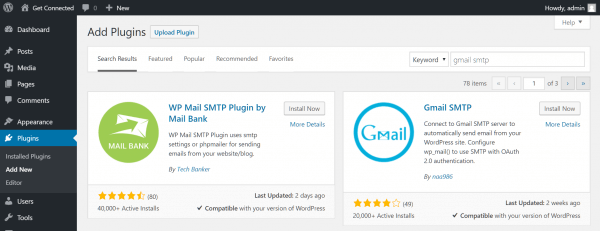
- Once you have your Gmail account set up, download and install the Gmail SMTP plugin from the WordPress Plugin repository.
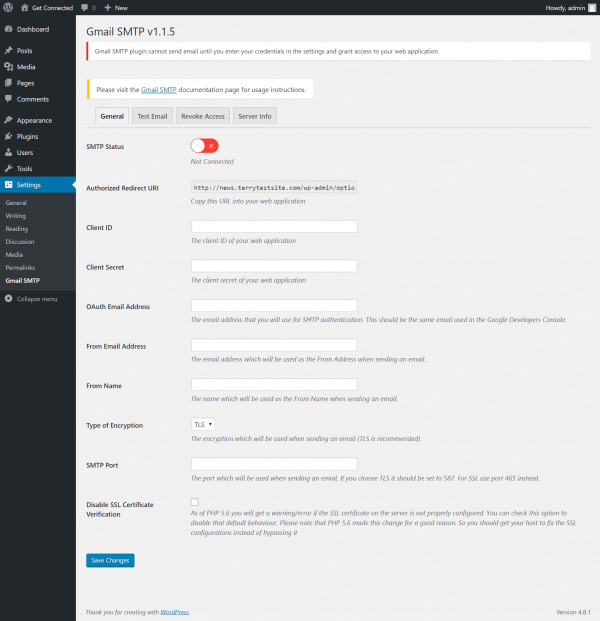
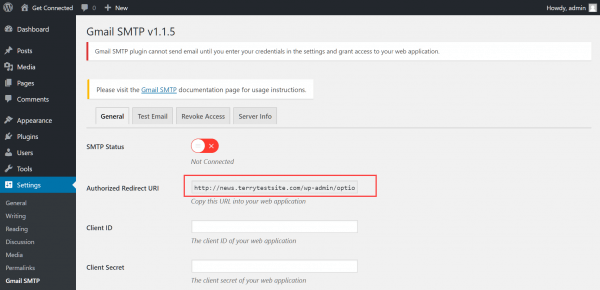
2. Once activated, click Settings > Gmail SMTP to configure the plugin.
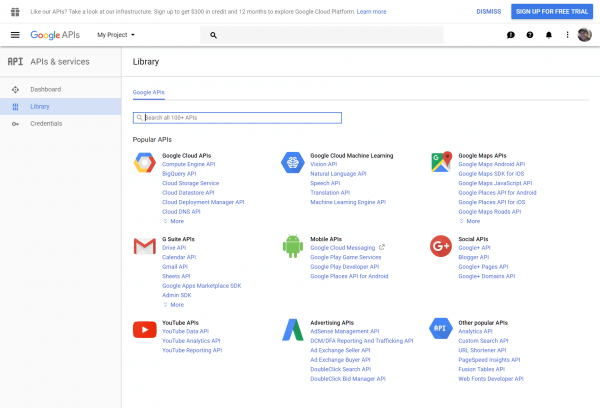
3. To authorize the use of Google’s email servers on your WordPress, you need to create a set of secure credentials. First, open a new browser window/tab and visit console.developers.google.com.
4. Log in with your Gmail account details.
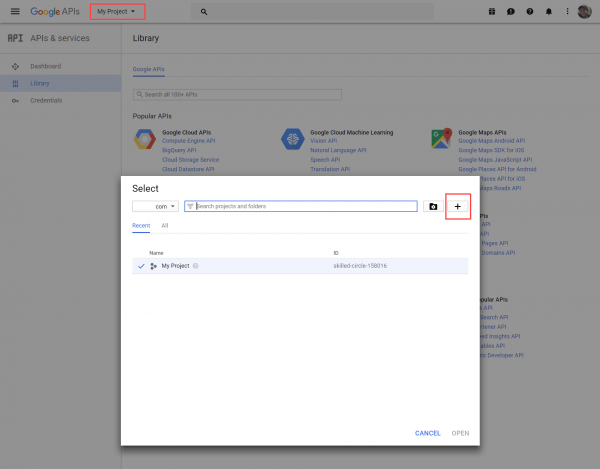
5. Click the My Project link at the top of the screen.
6. In the panel that appears, click the Add (+) button to create a new project.
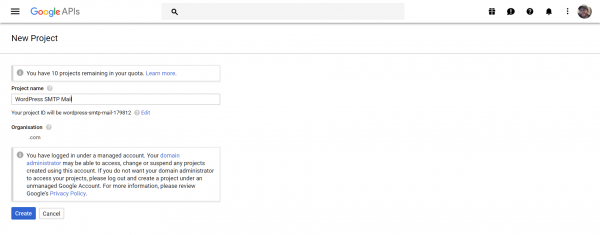
7. Create a name for the project and click the Create button to proceed.
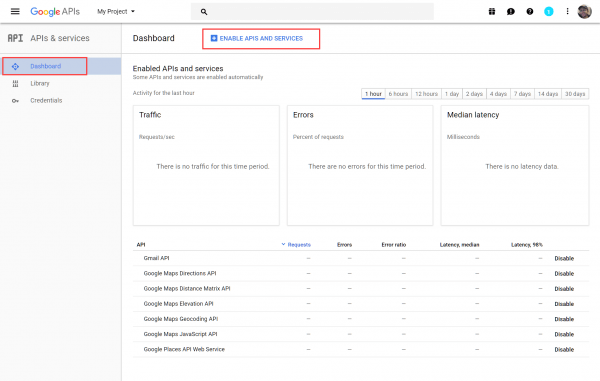
8. In the sidebar, click Dashboard, then click the Enable APIs and Services link at the top of the screen.
9. Find and select the Gmail API link listed under Google Workspace APIs.
10. At the top of the screen, if you see an Enable link, click it to proceed.
11. We now need to create access credentials for use with the Gmail API. Select Credentials from the sidebar, then click the Create credentials button.
12. In the menu that appears, select OAuth client ID.
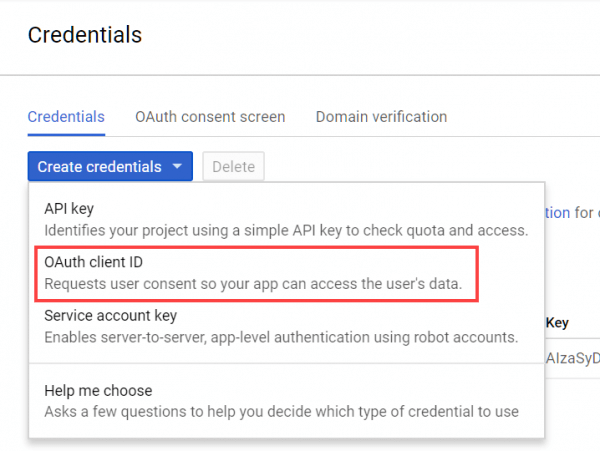 13. In the Application type screen, select Web application and then click the Create button.
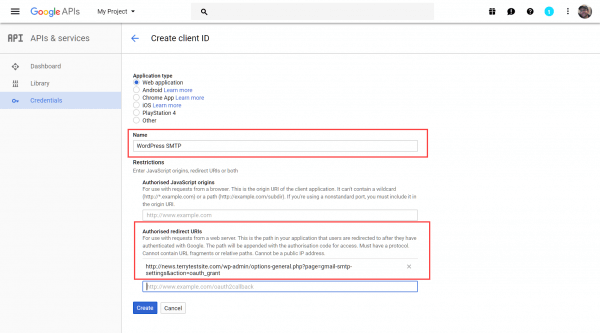
14.. To create an OAuth client ID, you need to set a product name. Enter a name, then head back to your WordPress admin dashboard.
15. Copy the contents of the Authorized Redirect URI field into the relevant field of the Gmail API Create client ID page.
The results should look something like this:
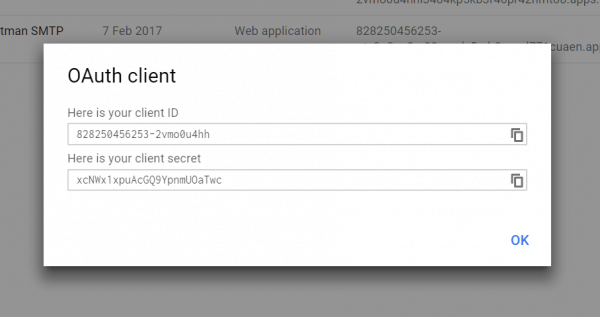
16. Now click the Create button. A set of OAuth client credentials will be displayed on the screen.
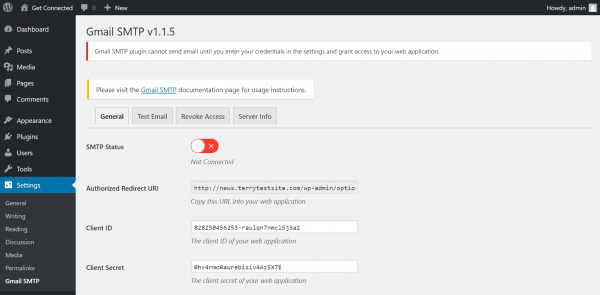
17. Copy and paste the Client ID and Client Secret into the plugin’s Settings page.
18. Proceed to configure the remaining plugin settings.
- OAuth Email Address: The email address that you will use for SMTP authentication. This should be the same email used in the Google Developers Console.
- From Email Address: The email address to be displayed when sending an email.
- From Name: The name to be displayed when sending an email.
- Type of Encryption: The encryption to be used when sending an email (either TLS/SSL). By default, it should be set to TLS.
- SMTP Port: The port to be used when sending an email. If you choose TLS, it should be set to 587. For SSL, use port 465 instead.
19. Click Save Changes to proceed.
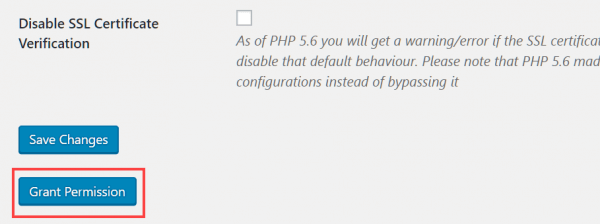
20. Click the Grant Permission button that appears.
21. Enter your Gmail account credentials to authorize the connection.
22. Check that your SMTP Status now reads Connected.
23. You can now proceed to the Test Email tab to try out the new email connection.
If you need help with your HostPapa account, please open a support ticket from your dashboard.
