Follow the steps in the article below to either enable or disable your email signature.
To enable an email signature:
- Access your HostPapa webmail.
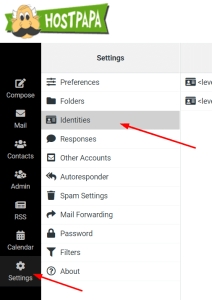
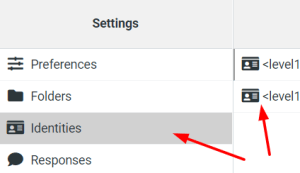
- In the Settings tab, click Identities.
- Select your email account or Create.
- In the Signature field, enter the signature details to appear at the end of all outgoing email messages.
Note: If you primarily send formatted (HTML) messages, you can enable the HTML option to add formatting to your signature.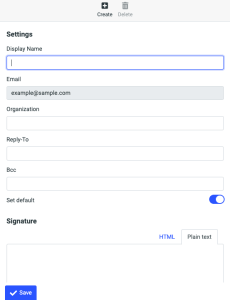
- Click Save.
To disable an email signature:
- In the Settings window, click Identities.
- Select your account.
- Delete the text in the Signature text field.
- Click Save.
If you need help with your HostPapa account, please open a support ticket from your dashboard.
