Letting your website visitors see a clear contact information section on your website is great for building trust. In today’s world, the number of fraudulent or suspicious activities is giving many potential customers cause for concern.
HostPapa’s Website Builder is unique in that it allows you to easily create a clear and informative contact information section.
To learn how to access your Website Builder to get started, please visit this article.
Clear contact information not only reduces customer uncertainty but also improves user experience. Think of a time when you have felt frustrated by the lack of easy-to-find contact information.
Website Builder keeps customers coming back by eliminating annoying friction, such as finding out where to ask questions or request support for a product or service.
Contact information: Getting started
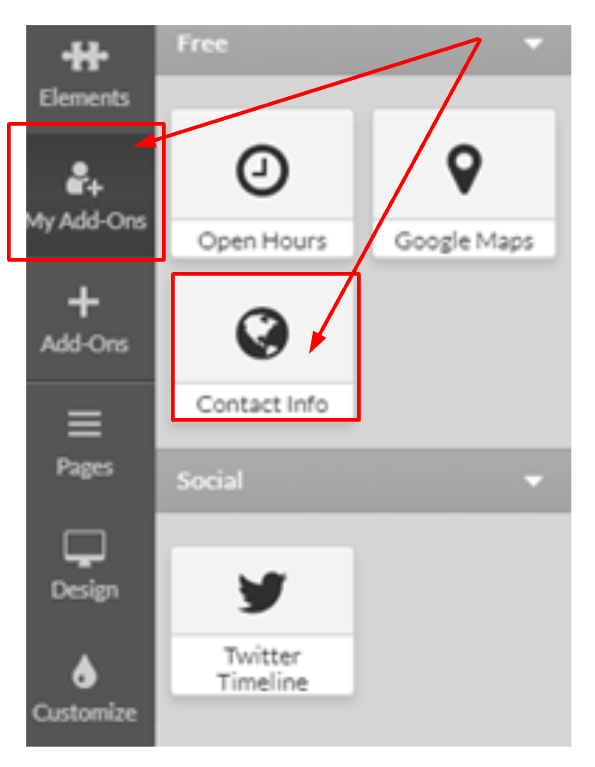
On the left-hand side of your screen, you can select the features you would like added to your website in the Add-Ons section. Now, please:
- Go to your account.
- Click My Add-Ons.
- Select the Contact Info icon and drag it to a position on your webpage that you are happy with.
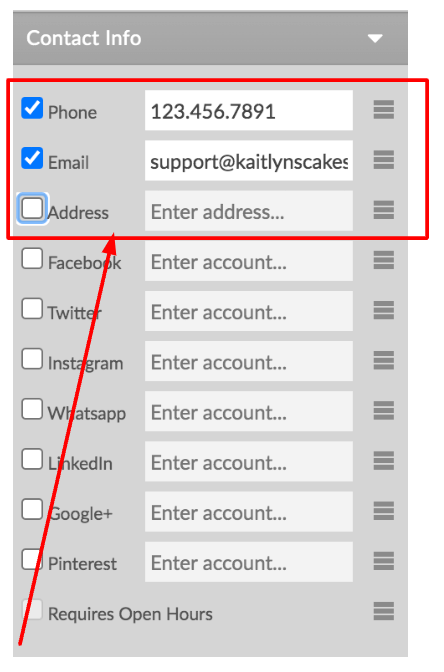
You can alter the information in the Contact Info widget via the right-hand panel. You can choose which information you want displayed on your website, such as your:
- Address.
- Email.
- Phone number.
- Social media profiles.
To add your contact information
- Click on the Contact Info section on your website.
- Select the checkboxes corresponding to the information you would like to add.
- Enter your phone, email, and address details, etc.
Adding social media accounts to contact information
- Enter your account name to add your contact information for popular social media such as:
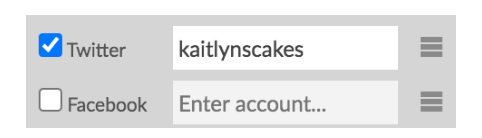
Please note: If you are unsure of the details to enter, you can check your profile’s URL path:
- https://twitter.com/kaitlynscakes
To add your LinkedIn profile information:
- Enter the account URL or the URL path.
- Type in the business name to link to a business profile.
- Select the Company Profile checkbox.
To add your WhatsApp information:
- Enter your account number.
- Click and drag the icon on the right to change the order on your website.
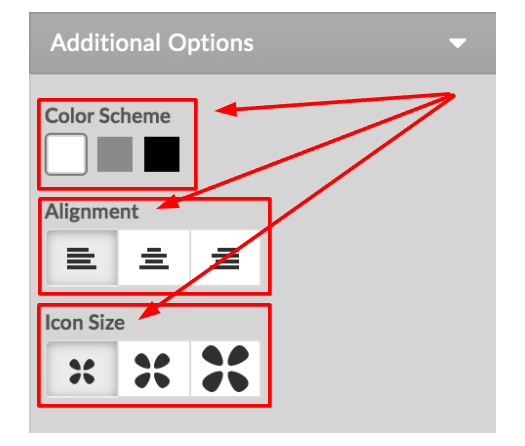
Additional Options
You can use the Additional Options sections to change how your contact information is displayed on your website. You can change the following:
- Alignment on the page.
- Color.
- Icon size.
If you need help with your HostPapa account, please open a support ticket from your dashboard.
