Your HostPapa service features Apache SpamAssassin, to help filter spam email. To get started, you need to install SpamAssassin on your server. For example, on Ubuntu, you can use the command sudo apt install spamassassin.
Apache SpamAssassin is a smart email filter that not only identifies spam email but learns as it goes to get even better at its job. This article describes how to set up Apache SpamAssassin on your account.
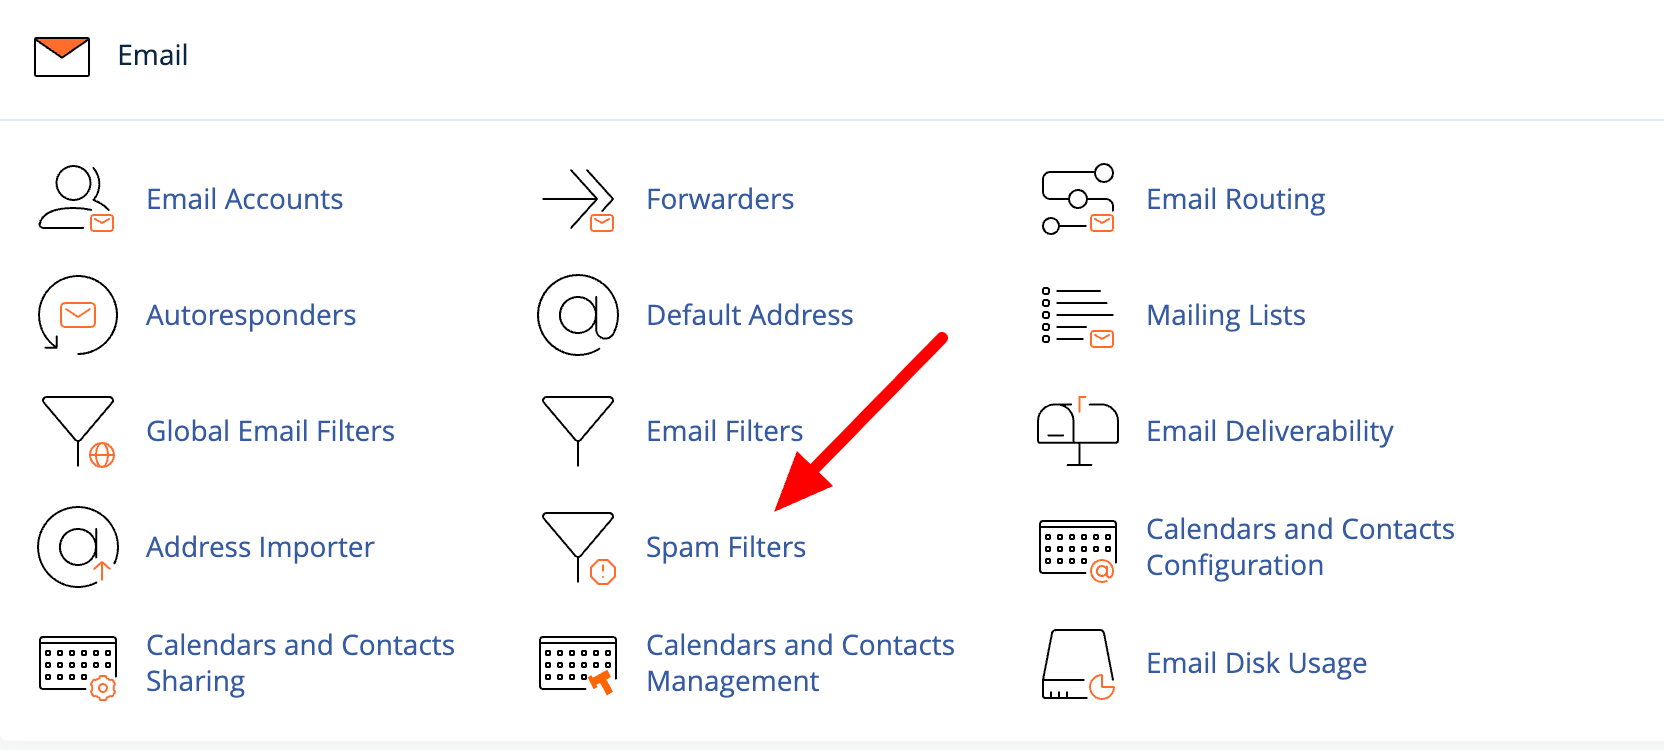
Apache SpamAssassin is disabled by default. To enable the feature, first, log in to your HostPapa Dashboard and select My cPanel.
Scroll to the Email section and click Spam Filters.
The Apache SpamAssassin page opens. At the top of the page, click the Process New Emails and Mark them as Spam button.
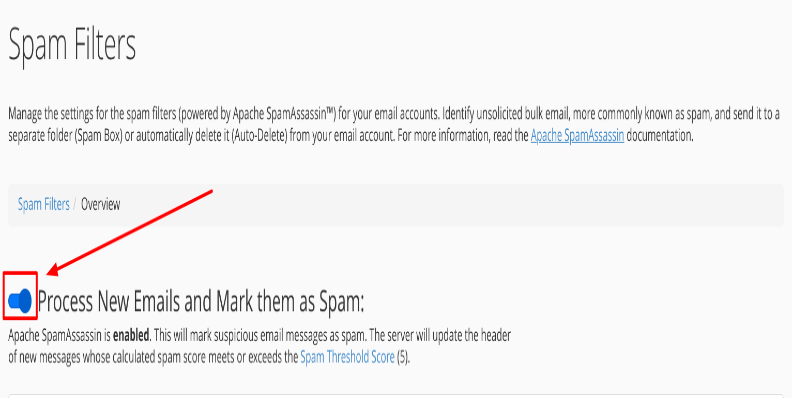
When Apache SpamAssassin has been successfully enabled, you’ll see the following message at the top right corner of the page:

What is SpamAssassin?
SpamAssassin is a powerful, open-source spam filtering tool that uses a variety of techniques to identify and block spam emails. It’s widely used by individuals and organizations to keep their inboxes free of unwanted messages.
SpamAssassin employs a combination of network tests, spam filtering, and Bayesian filtering to assign a score to each email, determining whether it’s spam or not.
By analyzing various characteristics of an email, such as its content, headers, and sender information, SpamAssassin calculates a spam score. If the score exceeds a certain threshold, the email is considered spam and can be filtered accordingly.
Enabling SpamAssassin
To enable SpamAssassin, follow these steps:
- Log in to your cPanel account.
- Navigate to the Email section and click on the Spam Filters link.
- Click on the Enable SpamAssassin button to activate the spam filter.
- Once enabled, you can configure the SpamAssassin settings to suit your needs. For instance, you can set the spam threshold score—which determines the sensitivity of the filter. A lower score means more emails will be flagged as spam.
- You can also enable the auto-delete feature to automatically delete emails that exceed the spam threshold score.
- After making your desired changes, click Save to apply the settings.
By enabling and configuring SpamAssassin, you can reduce the number of spam emails reaching your inbox.
Configuring Apache SpamAssassin spam filter
While Apache SpamAssassin is excellent at preventing spam from reaching your email inbox, it’s not perfect. To customize SpamAssassin settings, you will need to edit the configuration file, typically located at /etc/mail/spamassassin/local.cf.
An email message could occasionally be incorrectly identified as spam, so you’ll need to check your spam folder periodically for emails that shouldn’t be indicated.
HostPapa recommends you set up Apache SpamAssassin as described below.
The Auto-Delete threshold score section
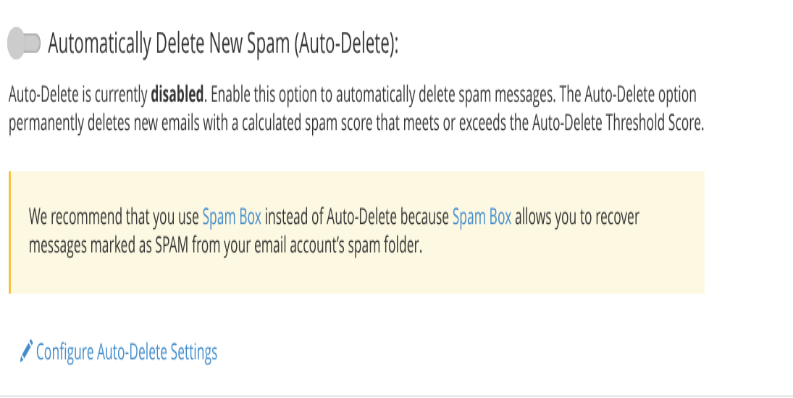
When you check this section, you’ll see that Automatically Delete New Spam is disabled by default. This means that messages Apache SpamAssassin identifies as spam will not automatically be deleted when they’re detected. HostPapa recommends you leave this setting at the default.
You can set an auto-delete threshold score to automatically delete emails that exceed a certain spam score, ensuring that high levels of spam are managed effectively.
If you enable this choice, you can click on Configure Auto-Delete Settings link, where you will be able to set the filter’s sensitivity from 5 to 10, with 10 being the least aggressive.
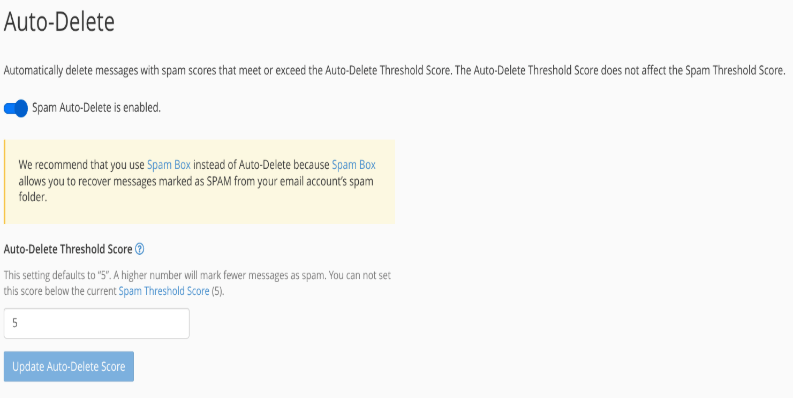
The initial default setting is 5. If you’re seeing too many non-spam messages marked, increase the setting to 6 and re-test.
Some users find 7 is an optimal setting, but experiment with the settings to see what works best for your situation.
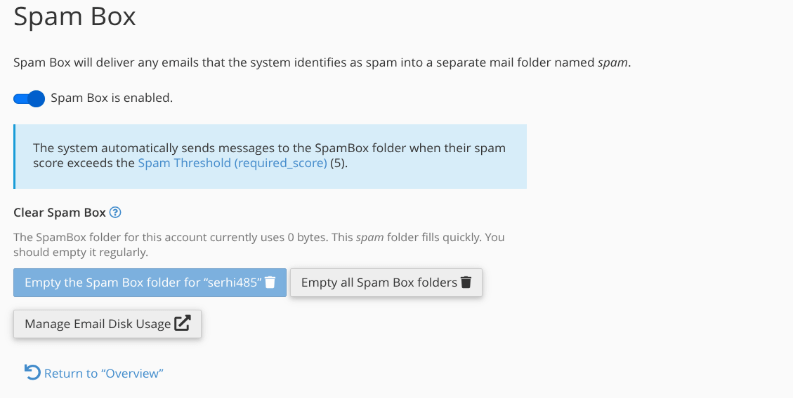
The configure spam box settings section

Spam Box will automatically send any message labelled as spam into a separate email folder named Spam. Setting limits on the size of mail messages can help server performance and the processing of emails.
Check your spam folder regularly for emails that shouldn’t be noted as spam. HostPapa recommends you enable the Spam Box. To enable Spam Box, click the Move New Spam to a Separate Folder (Spam Box) button.
You’ll see the following message at the top right corner of the page once Spam Box is enabled:

Once you enable Spam Box, you’ll be able to click on a Configure Spam Box Settings link to set it up as needed:
Advanced Apache SpamAssassin configuration

The last section of the Apache SpamAssassin page gives you access to advanced configuration settings. The SpamAssassin spam filter can be configured to suit your specific needs, including adjusting sensitivity settings and managing spam markings for emails.
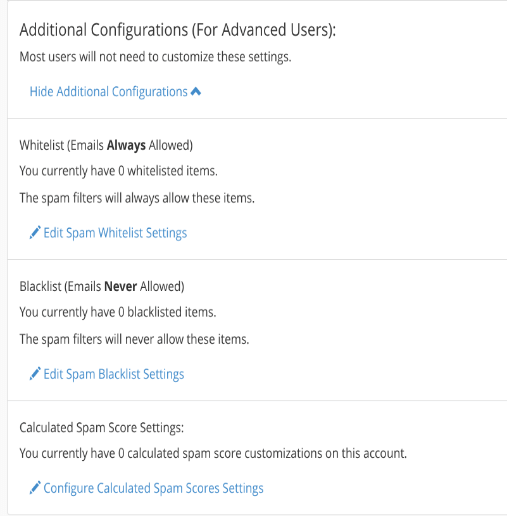
When you click the Show Additional Configurations button, you’ll be able to see advanced options:
More advice
From there, you can do the following:
- Blacklist domain names or specific email addresses in the blacklist_from sections, ensuring that all messages from the specified domain or email address are tagged as spam. Enter one domain name or email address per line.
- Blacklist an email from a specific email address: Enter person@domain.com.
- Blacklist all emails from a specific domain: Enter *@domain.com or *.domain.com.
- Set a required spam score. This setting is the same as the one you set in the Filters section of the main Apache SpamAssassin page. This field allows you to further your numerical score settings; you might, for example, set the score to 4.3. Experiment to see what works best for your situation. (The remaining score items are for specific settings related to more detailed Apache SpamAssassin configuration. HostPapa recommends you leave these as they are unless otherwise instructed.)
- Whitelist domain names or specific email addresses in the whitelist_from sections, ensuring that such messages are never picked out as spam. Enter one domain name or email address per line.
- Whitelist an email from a specific email address: Enter person@domain.com.
- Whitelist all emails from a specific domain: Enter *@domain.com or *.domain.com.
After installing, you can start the application by running the command mail spamassassin start.
If you need help configuring Apache SpamAssassin, contact HostPapa Support for assistance.
Testing and troubleshooting
To ensure SpamAssassin is working correctly and to troubleshoot any issues, follow these steps:
- Send a test email with a known spam signature to your email account. This action can help you verify if SpamAssassin is correctly identifying spam messages.
- Check the email headers of the received message for information about the spam check. The headers will include details about the calculated spam score and whether the email was questioned as spam.
- Verify that the email was correctly marked as spam or non-spam. If the email was not pointed out as expected, you may need to adjust the spam threshold score or other settings.
- If you encounter any issues, check the SpamAssassin logs for errors or warnings. These logs can provide insights into what may be going wrong.
- Based on the log information, adjust the SpamAssassin settings as needed to resolve the issue. This process may involve tweaking the spam threshold score, updating blacklists or whitelists, or modifying other configuration files.
By regularly testing and troubleshooting SpamAssassin, you can make sure that your spam filter is protecting your inbox from unwanted messages.If you need help with your HostPapa account, please open a support ticket from your dashboard.
