HostPapa’s email services support both POP and IMAP accounts, which are protocols used to send and receive emails.
If you want to learn how to change from POP to IMAP on Apple Mail, this article will show you how in three easy steps:
Back up your mailboxes
Switching from a POP3 connection to IMAP can result in your existing email being deleted, so you should create a backup of your mailboxes to avoid losing anything important.
1) Open Apple Mail and select one or more mailboxes.
2) From the top menu, select Mailbox > Export Mailbox.

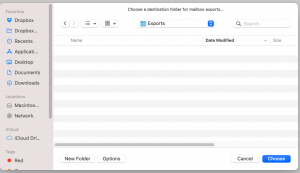
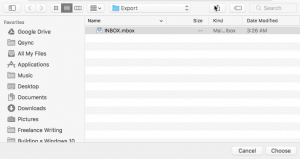
3) Choose a location for your backup or create a new folder, then click Choose. Mail exports your mailboxes as .mbox files.
Delete your POP account
With the backup completed, you can now delete the POP account in Apple Mail on your computer. You should also delete the account on any other devices you use for email.
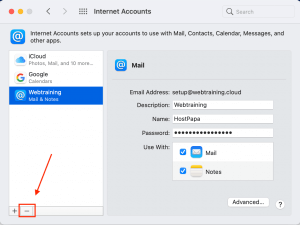
1) From the top menu, select Mail > Accounts.
2) Next, select your account from the list and use the minus (-) button to delete it.
Set up your IMAP account
The next step is to create a new email account on your computer using your IMAP server details. These instructions vary according to the email type being used and are provided below:
- How to set up cPanel email in Apple Mail for Mac
- How to set up HostPapa Basic or Advanced Email in Apple Mail for Mac
- How to set up Google Workspace email in Apple Mail for Mac
- How to set up Microsoft 365 email in Apple Mail for Mac
Note: Our Knowledge Base article How to set up your email on your devices provides step-by-step instructions for other types of email accounts, too!
Advanced settings
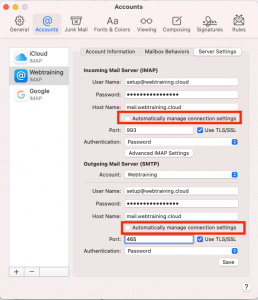
If you are asked to confirm the port configuration, use the following details:
Incoming Port: 993
Outgoing Port: 465
You can view your port settings in Apple Mail by following these steps:
1) Select Mail > Preferences from the Menu bar.
2) On the popup, click the “@ Accounts” icon.
3) Choose your account from the panel’s sidebar, then click the Server Settings tab.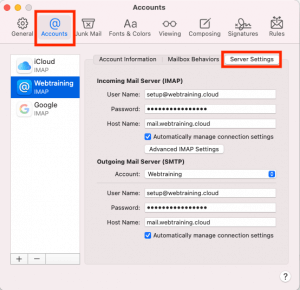
4) If you wish to change the preconfigured port settings, uncheck the
Restore your mailbox
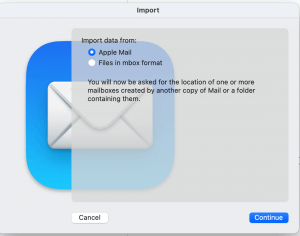
1) If you wish to restore the mailboxes and email you backed up earlier, choose File > Import Mailboxes from the menu bar.
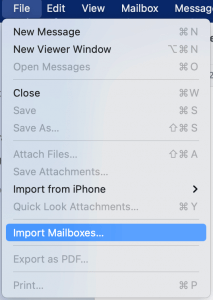
2) Select the email app you want to import messages from. In this example, we’ll select Apple Mail, then Continue.
3) Navigate to your backup file and click Choose.
4.) The messages are imported into a new mailbox called Import in the Mail sidebar.
You can reorganize your email by dragging folders and messages from the Import mailbox, then deleting the Import mailbox.
If you need help with your HostPapa account, please open a support ticket from your dashboard.
