In this article, we’ll show you how to manage additional user accounts in Plesk, as well as update Plesk user permissions.
When you create a Plesk subscription, a user account will also be created that will be used to sign in to Plesk and perform any operations your hosting provider has given you permissions for. However, you might need an additional user account to help perform certain functions. If you want them to have control over some tasks but not all, you can set these user permissions in Plesk.
Additional user accounts can be created and given permissions for specific predefined functions, such as creating a mailbox, performing backups, or managing databases.
To create an additional user account, follow these steps:
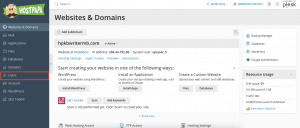
1. Access your Plesk control panel through your HostPapa Dashboard.
2. Click on Users.
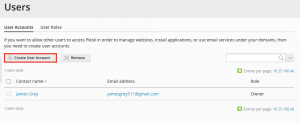
3. Click on User Accounts.
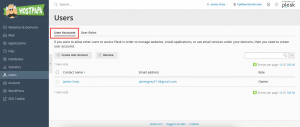
4. Click Create User Account.
5. You’ll need to provide details, including a contact name, email, password, and username.
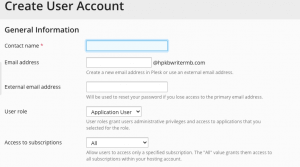
6. Pay attention to the following settings:
- User role: select one of the pre-configured user roles from the menu to assign to a user. User roles define what Plesk functionality is available to additional users. Each additional user must be given a user role. Each role includes a set of permissions that determine the operations the user is permitted to perform in Plesk.
- Access to subscriptions: if your customer account has more than one subscription, you can enable the user to see/manage either all subscriptions or a single subscription of your choice.
- User is active: if the checkbox is not selected, the user won’t be able to log in to Plesk. The checkbox is selected by default. To disable an additional user account without removing it, go to Users > Users Accounts, click the user to be disabled, click Change Settings, and clear the User is active checkbox.
To create a user role, follow these steps:
1. Click on Users.
2. Click on User Roles.
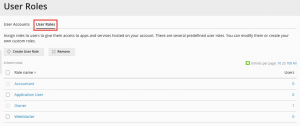
3. Click on Create User Role.
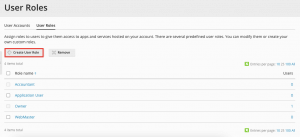
4. Enter a user role name.
5. Configure the desired user role permissions. For each permission on the list, select either Granted or Denied. For each permission marked Granted, additional users will be assigned this role and perform particular actions. Here is the complete list of permissions:
- Manage users and roles: gives the ability to manage additional users and user roles (Note: additional users granted this permission can edit their user account, including changing their user role)
- Create and manage sites: gives the ability to create domains and subdomains, as well as manage specific web hosting settings
- Configure log rotation: gives the ability to configure log rotation settings
- Configure spam filter: gives the ability to manage SpamAssassin settings for all mailboxes (Note: this permission will do nothing unless the Create and manage mail accounts permission is also enabled)
- Configure antivirus: gives the ability to manage the antivirus settings for all mailboxes (Note: this permission will do nothing unless the Create and manage mail accounts permission is also enabled)
- Create and manage databases: gives the ability to create and manage database and database users, as well as export and import backup dumps
- Configure and perform data backup and restoration: gives the ability to backup and restore the configuration and content of subscriptions the user has access to
- View statistics: gives the ability to view Plesk and web statistics
- Install and manage applications: gives the ability to install and manage web applications
- Design sites in Presence Builder: gives the ability to design sites using the Presence Builder tool
- Upload and manage files: gives the ability to upload and manage files using File Manager
- Create and manage additional FTP accounts: gives the ability to create and manage other FTP users
- Manage DNS settings: gives the ability to manage DNS settings
- Create and manage mail accounts: gives the ability to create and manage mail accounts
- Create and manage mailing lists: gives the ability to create and mail mailing lists (Note: this permission will do nothing unless the Create and manage mail accounts permission is also enabled)
6. Click OK to save the user role.
Note: The permissions included in user roles are overridden by permissions configured on the subscription level.
If you need help with Plesk, please open a support ticket from your dashboard.
