WordPress Toolkit is a management interface that allows you to install, configure, and manage WordPress in Plesk easily. In this article, we’ll show you how to update WordPress installations in Plesk. Start out by accessing your Plesk control panel through your HostPapa Dashboard.
Please note that WordPress Toolkit can install, configure, and manage WordPress version 4.9 and later, and the extension is free with the Web Pro and Web Host Plesk editions. It’s available for a fee for the Web Admin edition.
How to update WordPress installations
The WordPress core needs to be regularly updated to keep your website secure and any installed plugins or themes. This can be done either automatically or manually:
- Manual updates: These give you control over installing updates, but you risk falling behind if you don’t remember to update regularly.
- Automatic updates: These give you peace of mind because your WordPress will always be up-to-date. We recommend auto-updates for security reasons.
To update a WordPress installation manually, follow these steps:
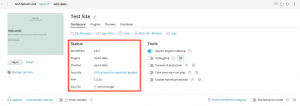
1. Go to WordPress. If your installation needs to be updated, you’ll see a message in the Status section.
2. Click any message about available updates.
3. Wait for WordPress Toolkit to load the list of available updates, then select the updates you want to install.
To configure automatic updates for a WordPress installation, follow these steps:
1. Go to WordPress.
2. Choose the installation you want to update automatically.
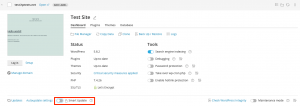
3. On the installation card, click Autoupdate settings.
4. Choose your desired auto-update settings. You can configure auto-updates for WordPress core, plugins, and themes separately.
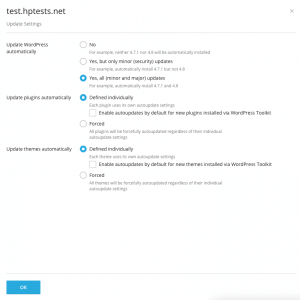
- Select No next to Update WordPress automatically to turn off auto-updates of the WordPress core. Note: This is insecure.
- If your website is public and you’re concerned that auto-updates may break it, select Yes, but only minor (security) updates.
- If your website is a staging version of a WordPress website, select Yes, all (minor and major) updates. This will keep your staging website up to date and ensure that it will happen on the staging site and not the public one if something breaks.
5. Click OK.
If you’re concerned about WordPress auto-updates breaking your website, use Smart Updates. With Smart Updates, WordPress installations are continually updated safely so your website won’t break.
How to use Smart Updates
Smart Updates are a premium feature available with WordPress Toolkit 3.x or later that helps keep your public websites up to date without the risk of breaking your website. Smart Updates analyze the potential consequences of installing updates and advise you whether it’s safe.
To keep your website secure, you need to update your WordPress themes, plugins, and core regularly. However, these updates run the risk of breaking your websites. Manual updates are time-consuming and can’t ensure your website will continue to function.
Smart Updates features do the following:
- Clones the installation, then analyzes the clone, taking screenshots of the website’s pages (including dynamic content and carousels)
- Updates the clones and analyzes them again, then retakes screenshots.
- Detects issues (PHP issues, HTTP response code errors, changed page titles, and others), not only those the update can cause but also those that existed before the update
- With manual updates, Smart Updates will show you the before and after screenshots and let you know whether it’s safe to update or not.
- With automatic updates, Smart Updates automatically updates the production website unless the update causes one or more issues. Otherwise, the update will not be performed. You’ll receive an email with the analysis results and screenshots in both cases.
To enable Smart Update, follow these steps:
1. Talk to your hosting provider. You need to enable Smart Update separately for each installation.
2. Go to WordPress.
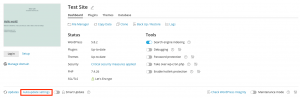
3. Turn on Smart Update on the installation card. You have now enabled Smart Update and can use it with manual or auto-updates.
Note: Smart Update should not be used as an alternative to backups. We recommend that you still regularly backup your WordPress installations, especially if you use auto-updates.
To use Smart Update manually, follow these steps:
1. Ensure you have enough disk space for a full copy of the installation you’d like to update.
2. On the installation card, click Check updates.
3. Select the updates you want to install.
4. Click Update.
5. Wait while Smart Update clones and analyzes your site. This could take some time, depending on your website’s size. The analysis is performed in the background, and closing the window will not interrupt the update.
6. Check out the before and after screenshots of the different website pages separately or in the Comparison mode.
7. Select one website page at a time and check out the issues found for each one. You can also see problems encountered for the entire website and download a report in the Website Summary tab.
8. If Smart Update didn’t detect any issues with the update (and the screenshots confirm this), click Apply Updates, then click OK. Smart Update will update the installation and delete the clone.
9. If you don’t want to update the installation, click Discard.
To use Smart Update automatically, follow these steps:
1. Ensure you have enough disk space for a full copy of the installation you’d like to update.
2. When an update is available, Smart Update will clone the installation and update the clone, then analyze the clone after the update.
3. If the update doesn’t cause any issues, Smart Update will automatically update the production installation. However, if at least one problem is detected, the update will not be applied. You’ll receive an email with a link to follow to open a report with a before and after comparison.
If you need help with Plesk, please open a support ticket from your dashboard.
