In this article, we’ll show you how to manage the Automated Website Backup service in the HostPapa dashboard.
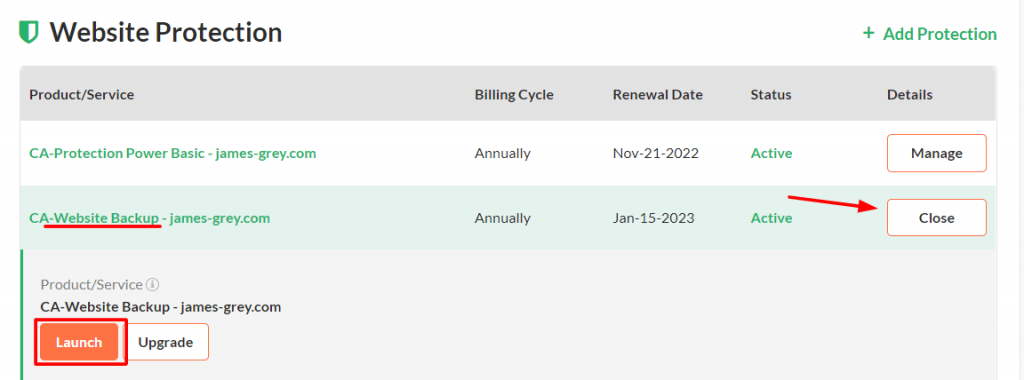
1. Log in to your HostPapa dashboard.
2. Click on My Services.
3. Select the Website Protection category.
4. Find and select the Website Backup service for the domain you want to restore.
5. Click Details.
6. Click Launch. The HostPapa Automated Website Backup Control Panel will open.

How to restore files
In the HostPapa Automated Website Backup Control Panel:
1. Under Websites, find the website you would like to restore the files for and click the Restore Files button on the right.

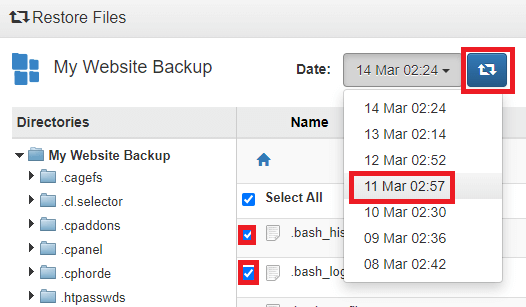
2. Choose a Backup Date from the dropdown list.
3. Choose the file(s) you wish to restore. If you want to restore everything from the backup, simply Select All.
4. Click on the Restore Files icon on the top. Please note: Before you restore, please ensure you have selected all of the files you want to restore. You are unable to undo a restore once you proceed.

5. If you’re satisfied with your file selection, check the warning message and click the Restore button.
Your files will now be successfully restored. The same steps can be used to restore your databases/emails.
How to change the backup frequency
In the HostPapa Automated Website Backup portal:
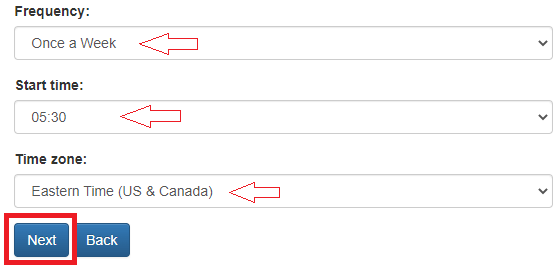
1. Locate the backup which you want to adjust and select the Edit Schedule button.

2. Scroll down to the Frequency section and select the desired frequency.
3. Click Next, then Save.

How to exclude specific folders from the backup service
In the HostPapa Automated Website Backup portal:
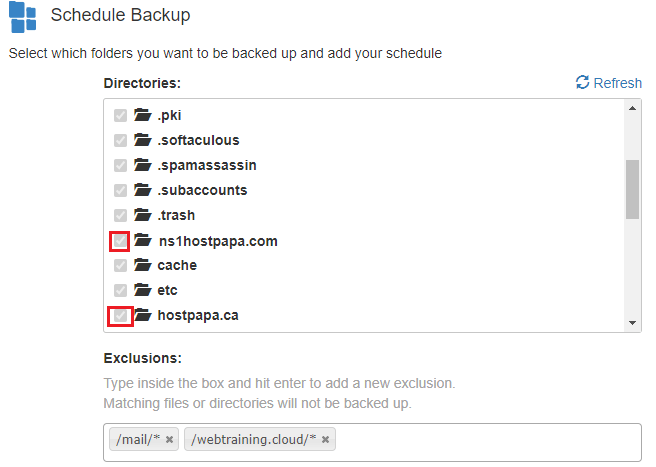
1. Locate the backup which you want to adjust and select the Edit Schedule button.
2. In the first section, you can select the directories to be backed up. You can also mention the folders that should not be included in the backup file; always use this format: /folder_name/*
3. Click Next, then Save.

How to add new databases to the backup service
The databases are automatically added to the Backup service when you create those in the cPanel account. If a database is missing or you removed it from the backup interface by mistake, you can manually add it to the HostPapa Automated Website Backup Control Panel.

1. Use the Add database functionality (top-right side).
- The database type is: Mysql
- The port is: 3306
- The hostname is your servername; (e.g. hp100.hostpapa.com)
- The Database Name, Username and Password are the ones for the database you want to include in the backup service.
How to remove a database from backup
In the Automated Backup Service portal:

1. Navigate to the Databases section.
2. Locate the database you want to exclude from backups.
3. Select Delete.
There is also an option called Edit Connection for databases, where you can modify the database’s parameters if any of these have been changed.
How to clean the backup service
In the HostPapa Automated Website Backup portal:

1. Click on the Backup History button for the backup you want to clean.
2. Click Delete on the backup you want to remove.
3. Select Yes.
If you need help with your HostPapa account, please open a support ticket from your dashboard.
