If you chose to install demo data during your CS-Cart installation, you may want to delete it after you’ve set up your store with your own products. Because there’s no way to delete all the demo data at once, you’ll need to delete each type of data separately. For example, first delete the demo products, then delete the demo orders, and so on. The steps to delete each type of data are similar.
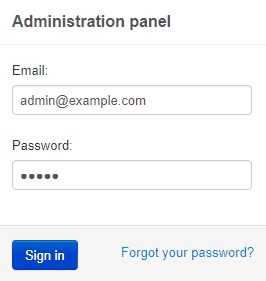
To begin deleting demo data, sign in to your CS-Cart administration panel.
Delete the demo products
There are two options for deleting demo products:
- Delete demo categories, which also deletes the products in the categories.
- Delete the demo products individually.
Option 1 – Delete demo product categories
Use this option to delete demo product categories and all the products included in the categories.
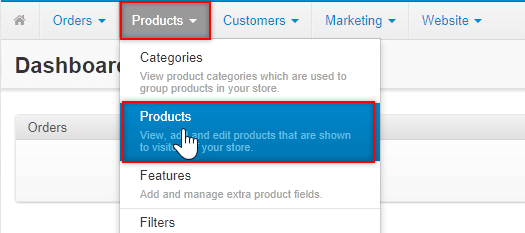
Go to Products
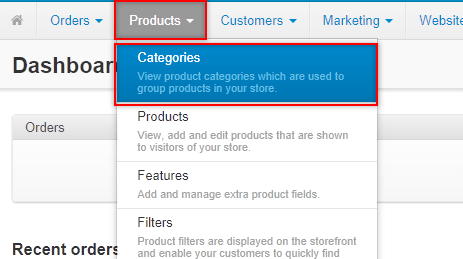
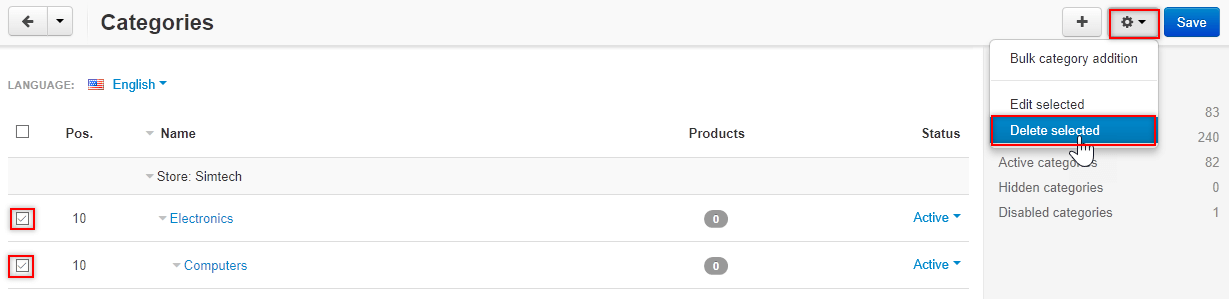
Select each demo category you want to delete and then click the gear icon
In the confirmation dialog box, click OK.
Note:
Deleting a category also deletes any subcategories and products in the subcategories.
Option 2 – Delete individual demo products
Use this option to delete individual demo products. Note that this option doesn’t delete the demo product categories, so if you want to delete the demo categories, use Option 1.
Go to Products
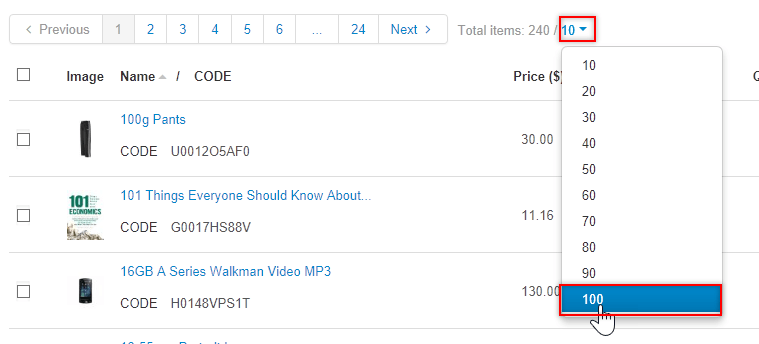
Select the Total items drop-down and change the number to 100.
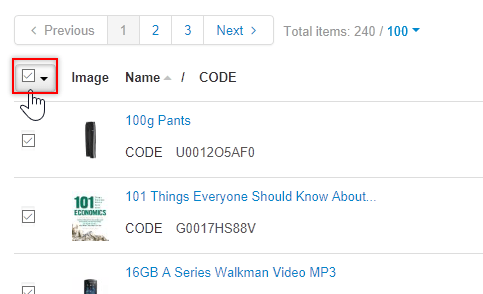
Select the check box at the far left of the header row to automatically select every product displayed on the page. If you want to delete only some products, select their check boxes individually.
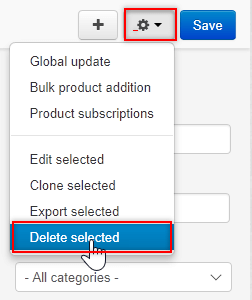
Click the gear icon
In the confirmation dialog box, click OK.
If you have more than 100 demo products to delete, repeat the steps beginning with checking the ‘select all’ product check box.
Delete the demo orders
Go to Orders
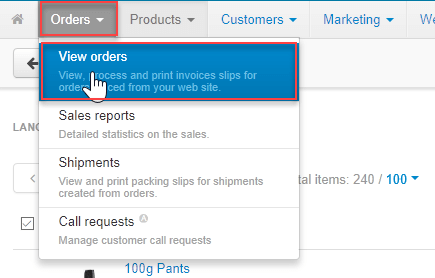
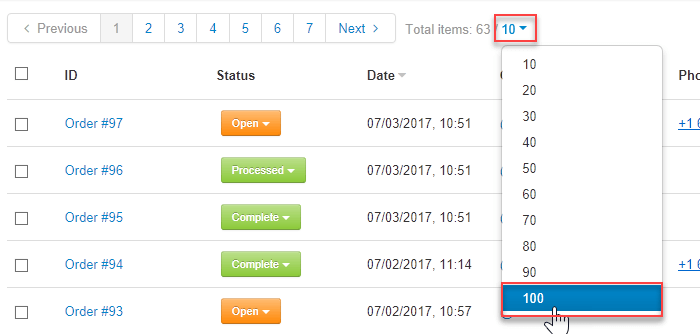
Select the Total items drop-down and change the number to 100.
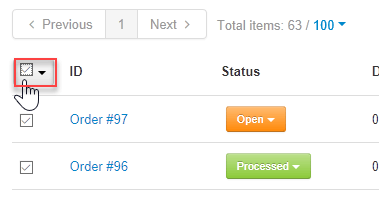
Select the check box on the left side of the header row to automatically select every order displayed on the page.
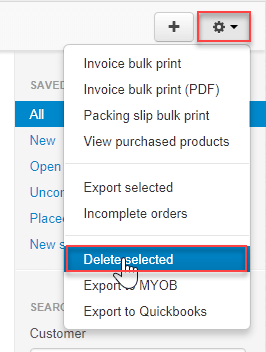
Click the gear icon → Delete selected.
In the confirmation dialog box, click OK.
Delete the demo product filters
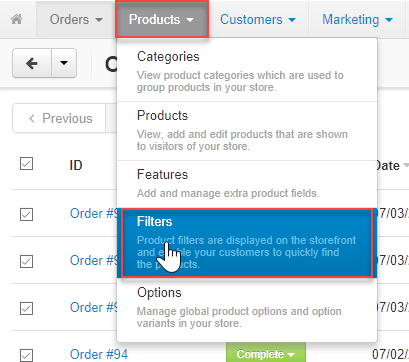
Go to Products → Filters.
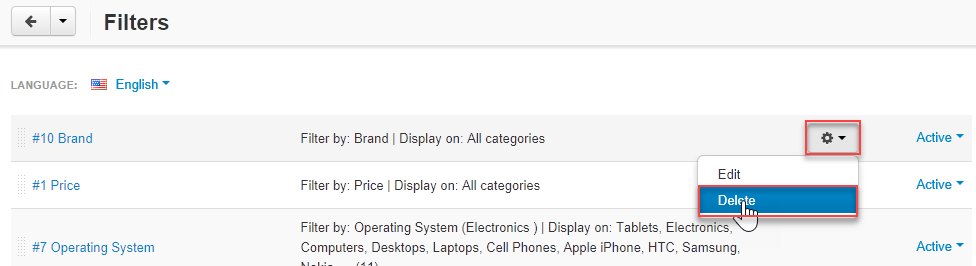
For each demo product filter, click the gear icon and select Delete.
In the confirmation dialog box, click OK.
Delete the demo discounts and coupons
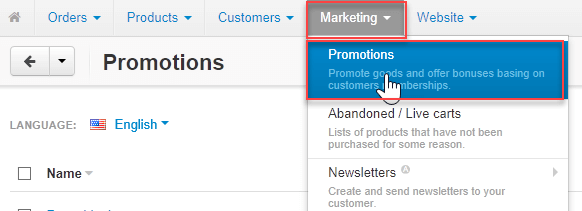
Go to Marketing → Promotions.
Select the check box on the left side of the header row to automatically select every promotion displayed on the page.
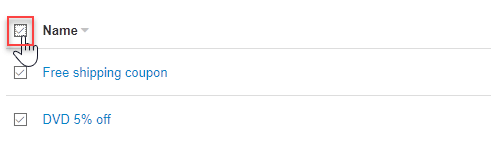
Click the gear icon → Delete selected.
In the confirmation dialog box, click OK.
Delete the demo banners
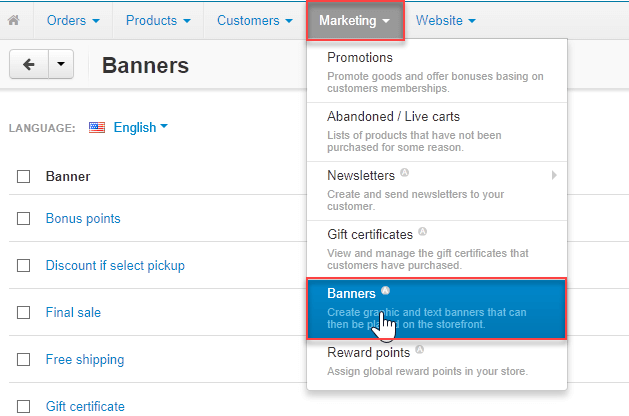
Go to Marketing → Banners.
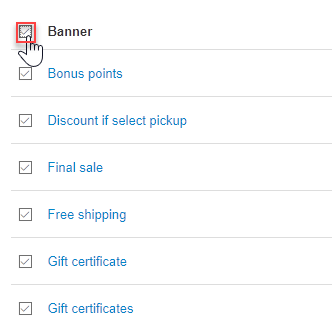
Select the check box on the left side of the header row to automatically select every banner displayed on the page.
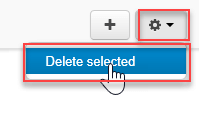
Click the gear icon → Delete selected.
In the confirmation dialog box, click OK.
Delete the demo blog posts
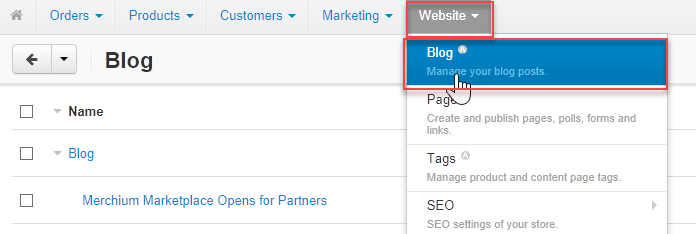
Go to Website → Blog.
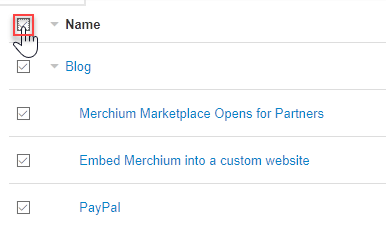
Select the check box on the left side of the header row to automatically select every blog post displayed on the page.
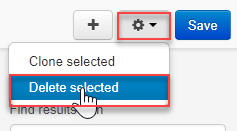
Click the gear icon → Delete selected.
In the confirmation dialog box, click OK.
Delete the demo tags
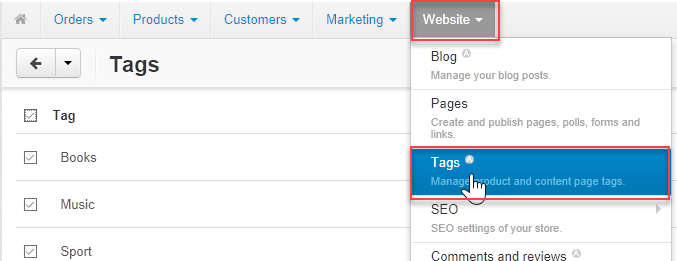
Go to Website → Tags.
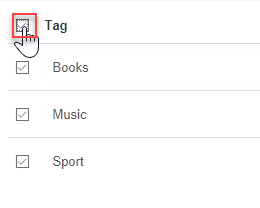
Select the check box on the left side of the header row to automatically select every blog post displayed on the page.
Click the gear icon → Delete selected.
In the confirmation dialog box, click OK.
You’re done! The demo data is now deleted from your store.
If you have any questions about this or any CS-Cart topic, please contact us by opening a support ticket. Details about how to open a support ticket are here.