Once you’ve configured and activated your HostPapa email service, you can proceed to set up your POP3 email account in Apple Mail.
Need more help? Watch our tutorial on setting up POP email accounts in cPanel.
This article is written for our Basic & Advanced Email services, however, same settings apply for shared hosting email account setup and all you need to replace is mail.papamail.net hostname with mail.yourdomain.com (replace yourdomain.com with your actual domain).
POP3 (Post Office Protocol) is an older method of retrieving emails from a mail server, but works well for many users. When you use POP3, your emails are downloaded to your local computer and deleted from the server. If you wish to retain a copy of your emails on the server, you should configure an IMAP email account, rather than POP3.
Open Apple Mail from the Dock, using the stamp icon. Alternatively, use Spotlight to search for “mail”.
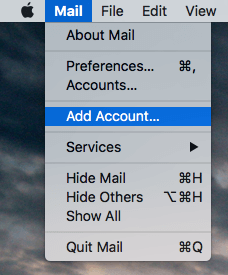
In the menu bar at the top of the screen, select Mail > Add account.
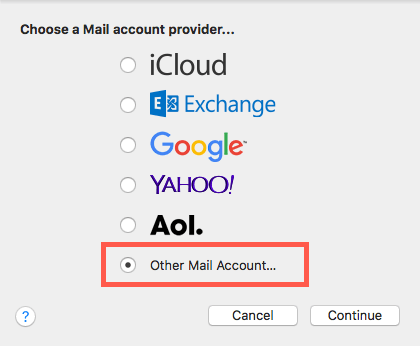
A panel will open, asking you to choose a Mail account provider. Click the radio button next to Other Mail Account… then select Continue.
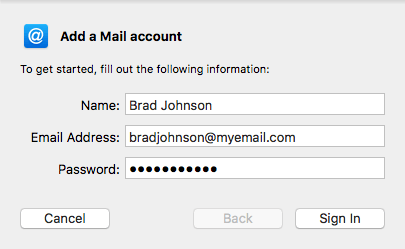
In the next panel, Add a Mail account, enter your Name, Email Address and POP3 account password. Then, click Sign In. Apple Mail will attempt to automatically retrieve your email server details.
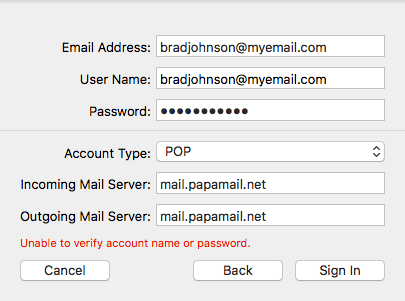
If your server details are not automatically retrieved, you should enter them manually in the next panel. Locate your POP3 account details and enter them as follows:
- Email Address: Your full email address.
- User Name: Your email account user name.
- Password: Your email account password.
- Account Type: Use the dropdown menu to select POP.
- Incoming Mail Server: mail.papamail.net.
- Outgoing Mail Server: mail.papamail.net.
Once the details have been entered, click Sign In.
You should now be able to use your POP3 email account.
Advanced settings
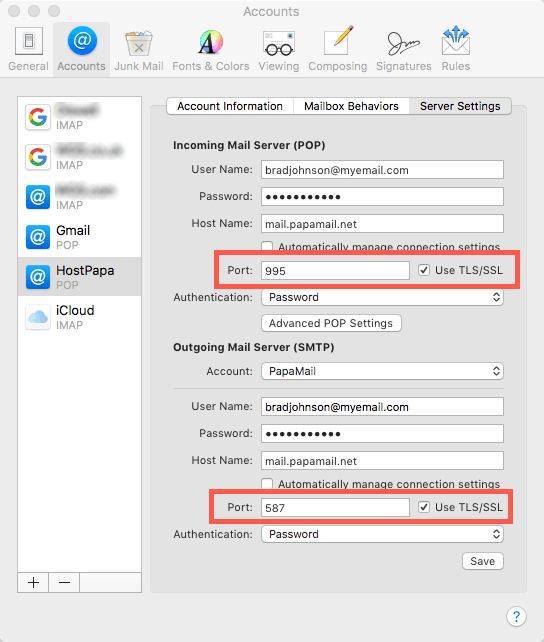
If you are asked to confirm the port configuration, use the following details:
Incoming Port: 995
Outgoing Port: 465
You can view your port settings in Apple Mail by selecting Mail > Preferences from the Menu bar. Select your account from the sidebar of the panel that opens, then click the Server Settings tab. If you wish to change the preconfigured port settings, uncheck the Automatically manage connection settings option for both the Incoming Mail Server (POP) and Outgoing Mail Server (SMTP) sections. You can now edit the port configuration.
If you notice any problems or if you need any help, please open a new support ticket from your HostPapa Dashboard.
