To attract more people to your website, you can introduce some fun and novelty in the shape of a daily deal. By regularly refreshing special offers on your site, you’ll attract more visitors whose curiosity about your latest deal will see them heading over to your site regularly.
The Daily Deals application also offers you control over your deals by helping you to manage them while also setting a time and quantity limit on each deal.
To learn how to access your Website Builder to get started, please visit this article.
Getting started with the Daily Deals application
To begin using Daily Deals, please:
- Activate the Local Promotions add-on.
- Place the Daily Deals app on a page, then drag and drop the element on a blue area of your page.

- If you’d like to edit a deal, please move your mouse over the element and then click the cogwheel icon.
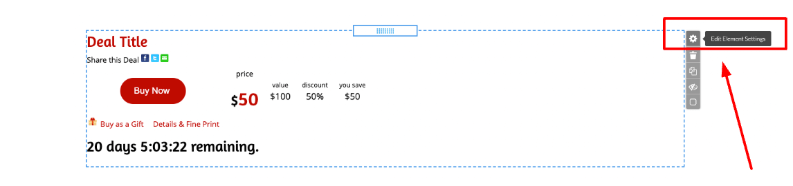
You’ll now see the following pop-up window appear, where you can configure the application:
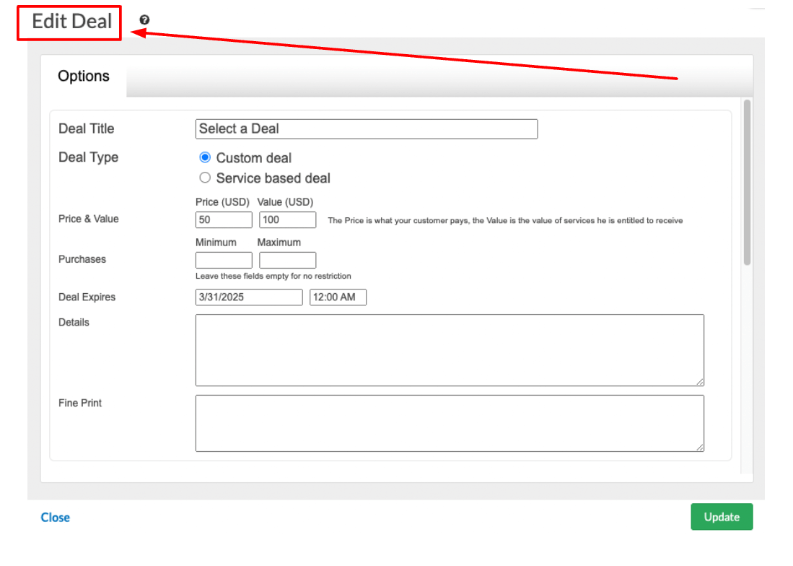
In the Options tab, you can set a Deal Title with a custom Price & Value. The Price is the special offer, while the Value is the normal price of the service. These two figures are used to calculate the discount to website visitors.
The Options tab also allows you to set a minimum and maximum amount of the special offer that can be purchased. You can also add an expiry date and time, which will also create a countdown clock to when the deal comes to an end.
The Details field box and the Fine Print field allow you to add text related to your offer. The text that you add will be connected to a link above the Buy Now button that will open a pop-up with the information that you have added.
In the Options tab, you’ll also be given the opportunity to add your payment details. Please:
- Add the email associated with your PayPal account.
- Select the preferred currency from the drop-down list you would like to be paid in.
You can also create a customized Buy Now Button while on the Options tab.
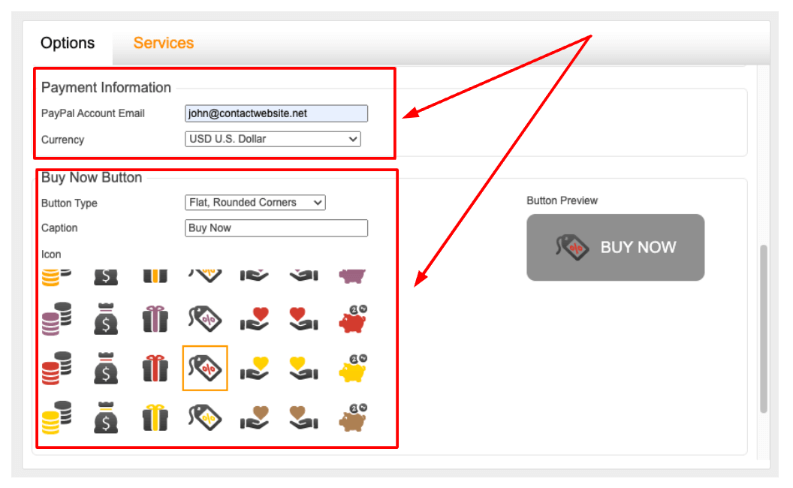
Below the button’s configuration, you can also update your branding details:

If we go back to the Edit Deal window, you can see there is another option called Service-based deal.
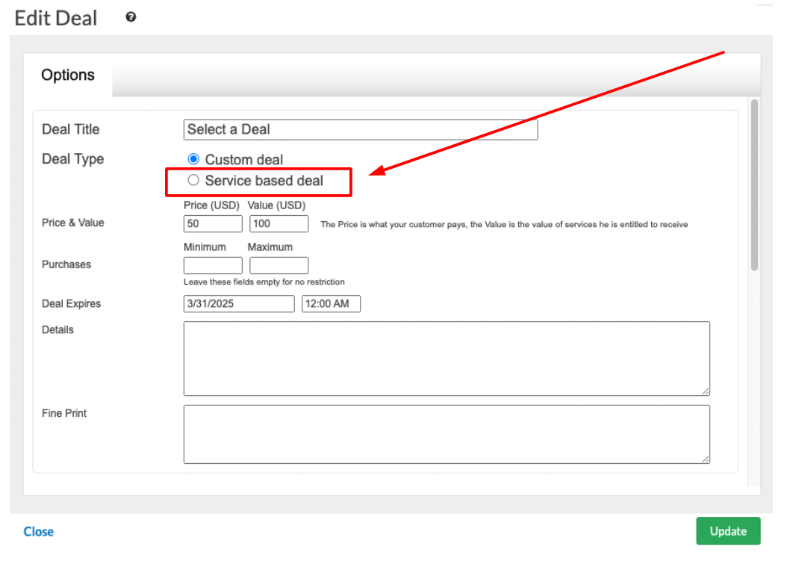
Enabling the Service based deal option opens an additional tab called Services, which is located next to Options.
Using services
The Services tab allows the creation and management of deals that can be purchased. Suppose you have the Appointment Scheduler app-enabled and configured.
In that case, the services set in it will automatically appear in the Services tab within the Daily Deals. The same applies to the Gift Certificate app as well.
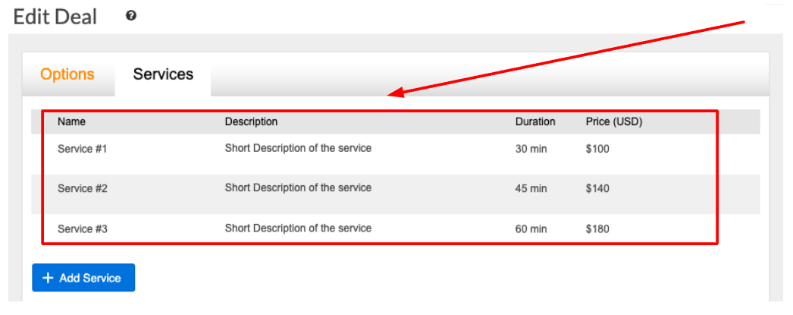
You can roll your mouse over an existing service to edit its properties or delete it. There is also the option to use the Active check box, which will allow the service to be purchased with a gift certificate.
Please note that when using the following applications:
- Appointment Scheduler
- Daily Deals
- Gift Certificates
Any changes that are made to the Name, Description, Duration, or Price will take effect across all three applications. This also applies to the deletion of any services.
Analyzing Daily Deals
You can easily monitor deals that have been purchased and keep an eye on your recent activity. This action is possible via the Manage option of the application in the left menu.
The Dashboard tab shows how many Gift Certificates and Daily Deals have been sold (and redeemed) in the last month. There is also a handy Search field in which you can enter an ID.
IDs are generated whenever a customer purchases a certificate. They can be found in the Recent Activity section of the Dashboard. The purpose of Recent Activity is to list sold items and it contains a link to a preview of the item.
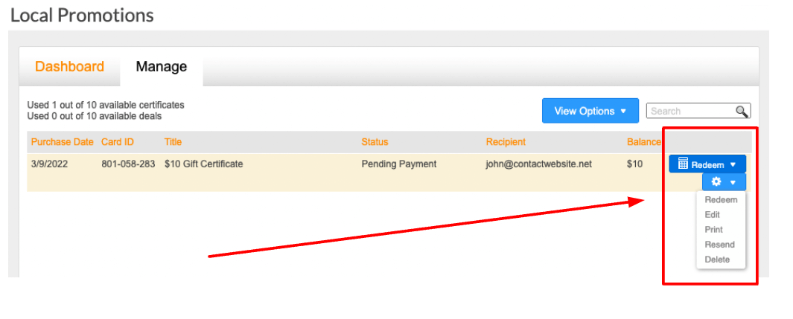
Using the Manage tab, you can easily locate all of your deals and certificates. They are all neatly arranged by purchase date. The Manage tab lists:
- The title of the item.
- The item’s recipient.
- The cash balance.
If you roll your mouse over an item, you will then see the following options:
- Redeem
- Edit
- Resend
- Delete
All of these options are available via the cogwheel drop-down menu. Please note that you can use the Redeem option if you want to partially redeem a deal.
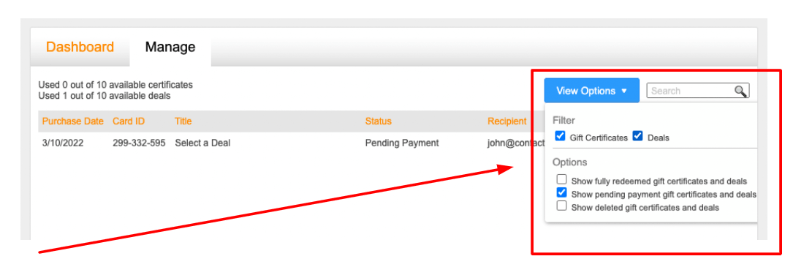
Using the View Options drop-down, you can filter which certificates or deals from the Gift Certificate application to be visualized. There is also a search bar.
The application has a Lite version with a limit of 10 deals. The limit applies to the number of deals that are currently active. A deal that has been fully redeemed will reduce the current count.
Please note that If you had 10 active deals, your website would then display this message: This deal is SOLD OUT! Please check again later.
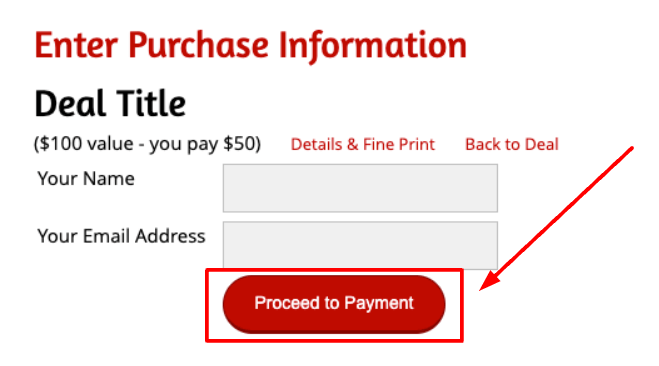
Understanding the User Experience
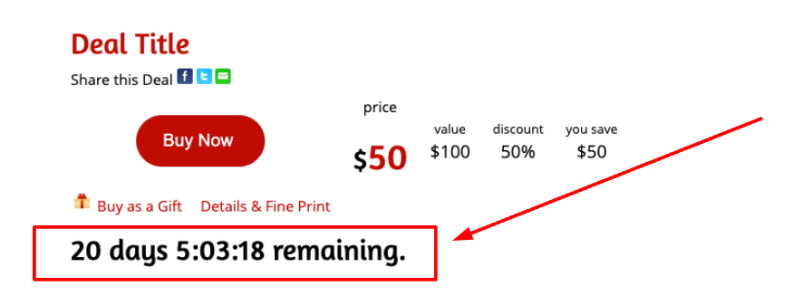
When a deal appears on your website, it can be purchased via the customized Buy Now button. The Details & Fine print will also be visible to the buyer if you have set them.
Additionally, suppose the Gift Certificate application has been enabled. In that case, your website visitors will be able to purchase the deal in the form of a gift certificate via the Buy as a Gift button. The counter underneath shows the time remaining until the deal expires.
Once the customer has clicked the Buy Now button, they will be asked to enter their name and email address. When they click the Proceed to Payment button, they will be taken through the steps of making payment via PayPal.
If you need help with your HostPapa account, please open a support ticket from your dashboard.
