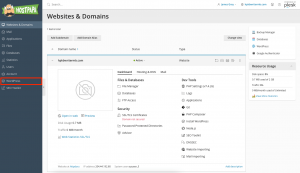
WordPress Toolkit is a management interface that allows you to install, configure, and manage WordPress in Plesk easily. In this article, we’ll show you how to secure WordPress with Plesk. Start out by accessing your Plesk control panel through your HostPapa Dashboard.
Please note that WordPress Toolkit can install, configure, and manage WordPress version 4.9 and later, and the extension is free with the Web Pro and Web Host Plesk editions. It’s available for a fee for the Web Admin edition.
How to secure WordPress
WordPress Toolkit can enhance the security of your WordPress installations. Specific security measures are critical and are automatically applied to all newly created installations.
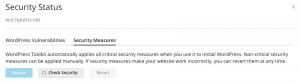
Next to Security on the installation’s card, you’ll see the following security messages:
- Fix security: not all critical security measures were applied, and we strongly recommend that you apply them all.
- Check security: all critical security measures were applied, while some recommended measures were not applied.
- View settings: all security measures (both critical and recommended) were applied
Note: Some security measures can be reverted once applied, and some can’t. We recommend that you backup a WordPress installation before you secure it.
You can secure WordPress installations individually or secure multiple installations at a time.
To secure an individual WordPress installation, follow these steps:
1. Go to WordPress.
2. Choose the installation you want to secure.
3. On the installation card, click the message next to Security.

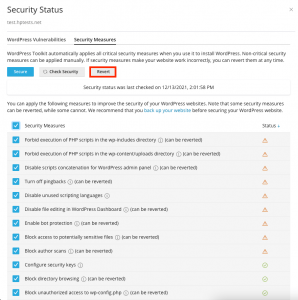
4. Wait for WordPress Toolkit to display the security measures you can apply.
5. Select the security measures you want to apply.
6. Click Secure.
To secure multiple WordPress installations, follow these steps:
1. Click Secure. The selected measures will be applied.
2. Go to WordPress.
3. Click Security.
4. You will see the list of your WordPress installations. You’ll see how many critical (red icon) and recommended (orange icon) security measures can be applied to each installation. If all security measures have already been applied, you’ll see a green icon.
5. Click the forward arrow next to the desired installation to learn more about all security measures and manage them for an individual WordPress installation.
6. To return to managing the security of multiple installations, click the backward arrow next to Security Status Of Selected Websites.
7. Select the installations that you want to apply security measures to.
8. Click Secure.
9. Only critical security measures will be selected to be applied by default. You can also select:
- Security measures of your choice by clicking Custom selection
- All security measures at once by clicking All (critical and recommended)
How to revert security measures
In some rare cases, applying security measures can break your site. If this happens, you can revert the applied security measures. You can do this in an individual installation or multiple installations at a time.
To revert applied security measured for an individual installation, follow these steps:
1. Go to WordPress.
2. Choose the installation where you want to revert a security measure.
3. Click the message next to Security on the installation card.
4. Select the security measures you want to revert.
5. Click Revert.
To revert applied security measured for multiple installations, follow these steps:
1. Go to WordPress.
2. Click Security.
3. You’ll see a list of your WordPress installations and whether or not critical and recommended security measures were applied to them.
4. To see more about all security measures and manage them for an individual WordPress installation, click the forward arrow next to the desired installation.
5. To return to managing the security of multiple installations, click the backward arrow next to Security Status Of Selected Websites.
6. Select the installations for which you’d like to revert security measures.
7. Click Revert.
8. Click on the security measure you want to revert.
9. Click Revert. The applied security measures will be reverted.
How to protect a website with a password
You can set up a password to protect access to your website. Anyone who visits your password-protected website must enter a valid username and password to view the website’s content.
Password protection is helpful if:
- Your website is under development, and you don’t want anyone to see it.
- You want to show a demo version of the website only to specific visitors.
To protect a WordPress website with a password, follow these steps:
1. Go to WordPress.
2. Choose the installation you want to protect with a password.
3. Turn on Password protection.
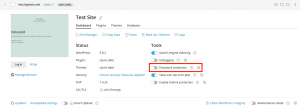
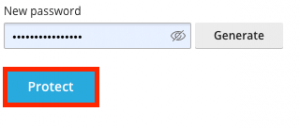
4. Create or generate a password. You can also change the username (the installation’s administrator username is used by default).
5. Click Protect.
6. To disable Password protection, turn it off.
If you need help with Plesk, please open a support ticket from your dashboard.
