Would you like to offer your website visitors a catalog they can download as a PDF? Or how about downloadable images of your products and documents? Having a downloadable file area gives you the power to offer visitors access to useful resources.
In this Knowledge Base article, we’ll show you how easy it is to create a downloadable file area in HostPapa’s Website Builder.
To learn how to access your Website Builder to get started, please visit this article.
How to add a File Area to your webpage
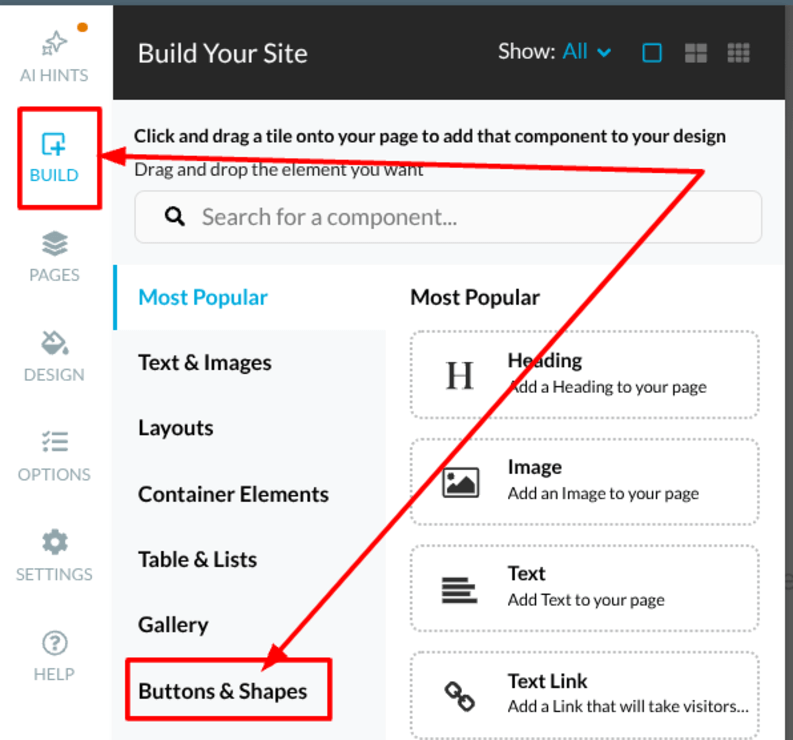
- Go to the Build tab from the left menu.
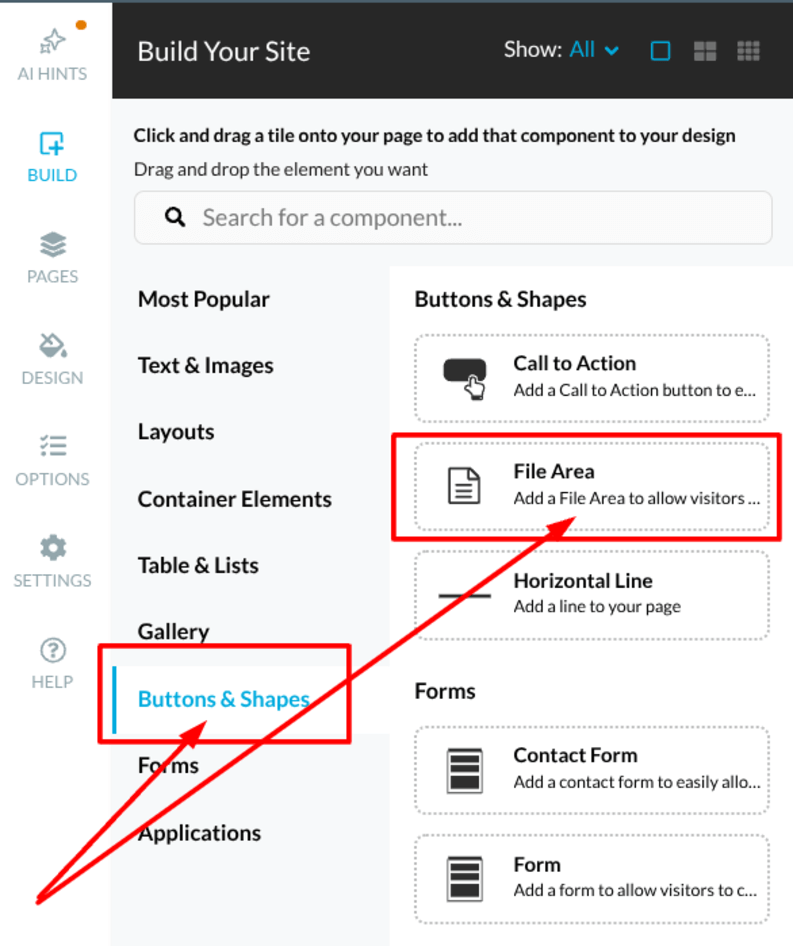
- Select the Buttons & Shapes category.
- Choose the File Area element that is now visible.
- Drag–and–drop the File Area onto the desired section of your webpage.
- Blue rectangles indicate where the element can be placed.
Once the File Area has been added, click the gear (⚙) icon to access and edit its properties, where you can customize the Header and Footer names and adjust how the uploaded files are displayed on the page.
How to customize the file area
Header & Footer: The Header and Footer are optional text fields displayed above and below the file area. These can be used to provide additional context, instructions, or descriptions.
Display Options
In the View drop-down menu, you can customize how each file is presented, including:
- File Icon: Displays an icon representing the file type.
- Description: Shows a short text description for each file.
- Size: Displays the file size.
- Date: Shows the upload date.
- Comments: Includes any extra notes related to the file.
Additionally, files can be displayed in a list format (stacked vertically) or in columns for a more compact layout. There is also an option to enable large file icons for better visibility.
How to add files to a File Area
To upload files
1. Roll your mouse over the File Area and click the ⊕ icon.
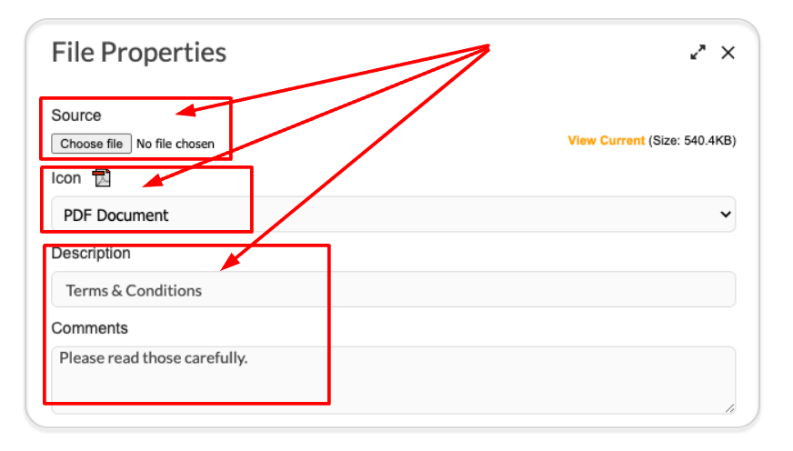
2. The Add File pop-up will appear.
3. In the Source field, browse and select a file from your local storage.
4. Choose an appropriate File Icon if needed.
5. Optionally, enter a Description and Comments (these will only be displayed if enabled in the File Area View settings).
File upload restrictions
Maximum file size: 120MB
Unsupported file types: .exe, .dll, .bat, .sys
How to manage file access and permanent URLs
Access Control and security
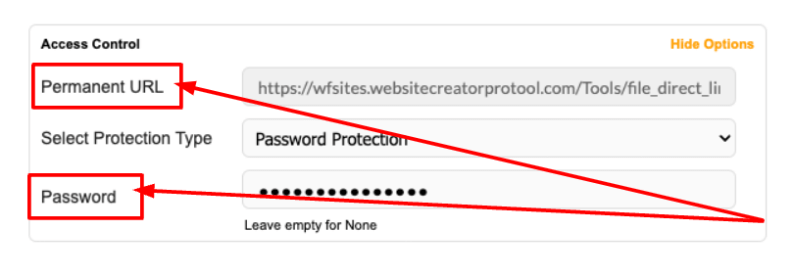
Once a file has been uploaded, the Access Control section allows you to:
- View and copy the Permanent File URL.
- Protect the file with a common password for restricted access.
Permanent File URL
Each uploaded file has a unique Permanent File URL that does not change, even if the file is updated. This URL can be used whenever linking to the file, but first make sure to publish your website to activate the Permanent URL.
To retrieve the Permanent File URL
- Move your mouse over an existing file and click on its gear (⚙) icon.
- Navigate to the Access Control section.
- Copy the Permanent File URL.
Important note
Moving a File Area to another section of your website will result in new Permanent URLs being generated for all the files within it. If you have linked to these files elsewhere, be sure to update those references, as the original URLs will stop working after republishing the page.
If you need help with your HostPapa account, please open a support ticket from your dashboard.
