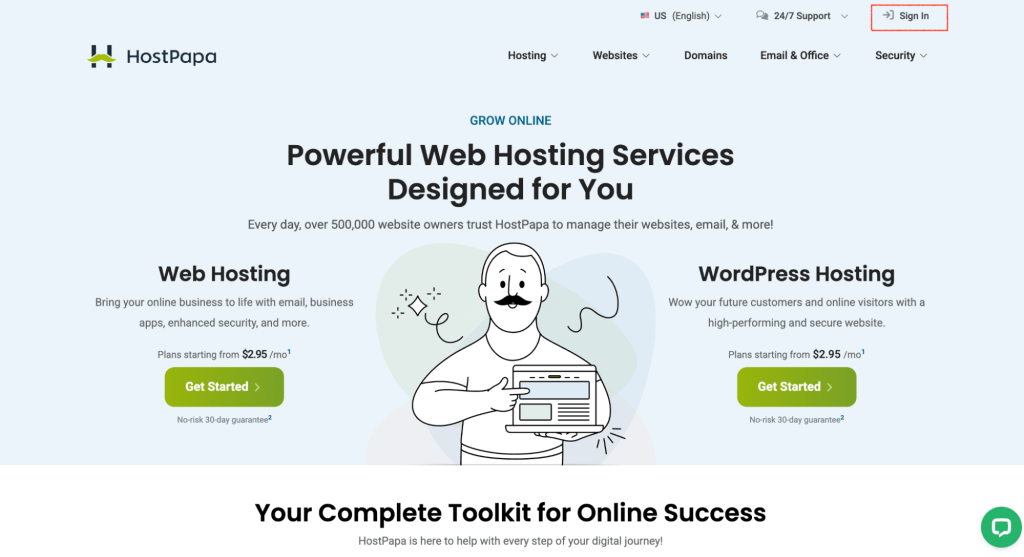
Building an online presence can feel overwhelming, but with HostPapa’s all-in-one Website Builder bundle, it’s never been easier. Our AI-Driven website builder helps you create a professional, customized website in minutes, with no need for design or coding skills.
Our intuitive platform tailors your website to your goals, whether you’re launching a blog, business site, or online store. You also get a Professional Business Email included in the plan, meaning—that from day one—you can communicate with customers using a branded, credible email address.
In this guide, we’ll walk you through each step of the process—from selecting your design to publishing your website. In plain English, we provide clear instructions and screenshots to get you up and running.
- Choose the type of website you want to create
- Let’s start building your dream website
- Preview and publish your website
Launching Website Builder
Step 1: How to Log in to Your HostPapa Account
You will have received your account login information in your welcome email. If, at some point, you accidentally forget your password and need to reset it, you can follow our video tutorial via the following link: HostPapa Dashboard–How to retrieve a forgotten password
- Visit the HostPapa Login Page.
- Enter your login credentials (email and password), then click Sign in.
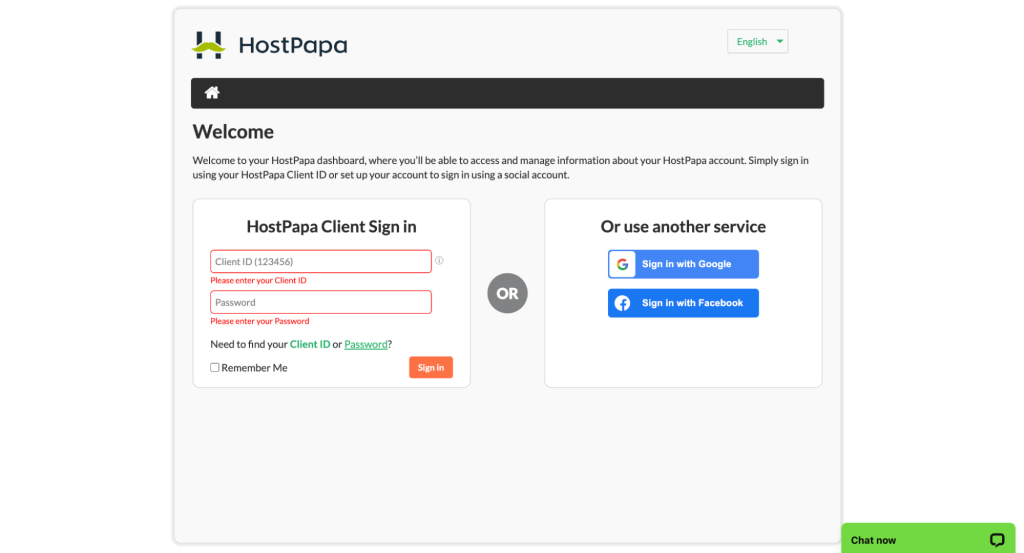
- Once logged in, you’ll be directed to the Dashboard.
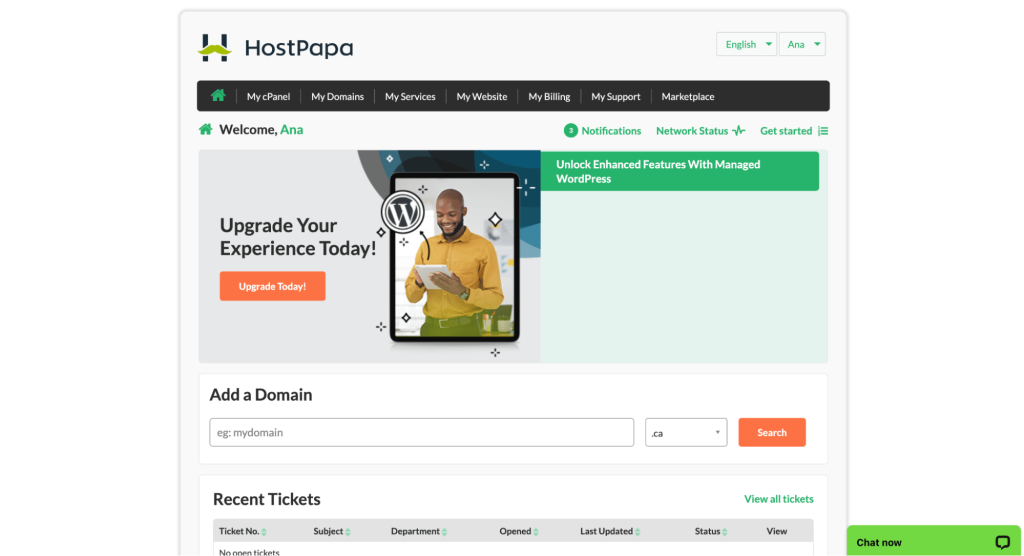
In the following sections, we’ll walk you through the steps to launch your website and set up your business email with ease.
Step 2: How to Launch Your Website Builder Service
- Locate the Website Builder service in the My Services section of your Dashboard. You can also access it by clicking on the My Website section, as shown below. Then click Manage for the site you want to edit with the website builder.

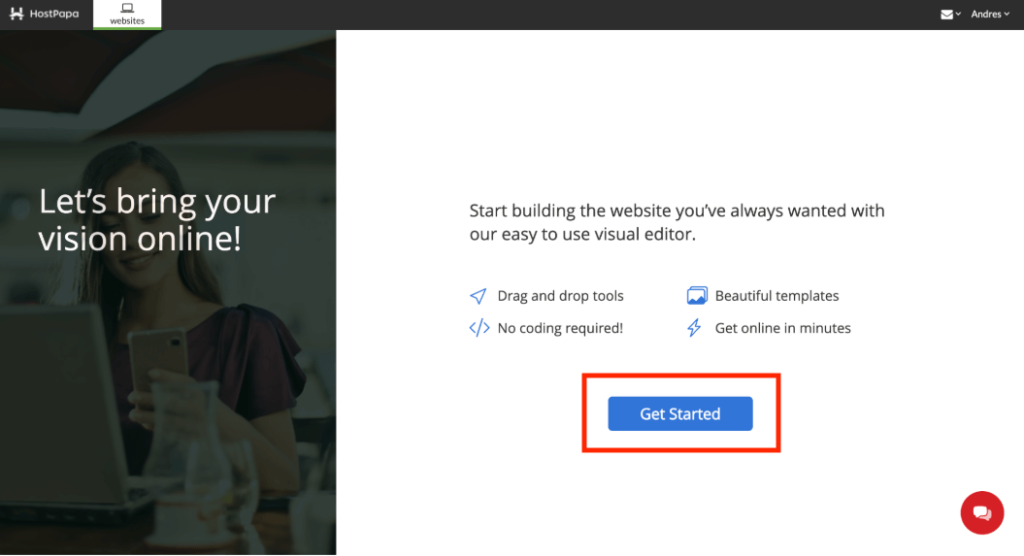
Log in to your HostPapa account to begin the website creation process. This action is the first and most essential step in getting your website up and running.
- Click on the Launch button to open the Website Builder.

- You’ll then be redirected to the Website Builder interface.
Creating Your Website
Step 1: Choose the Type of Website You Want to Create
- Click on Get Started to launch the Website Builder for your site.
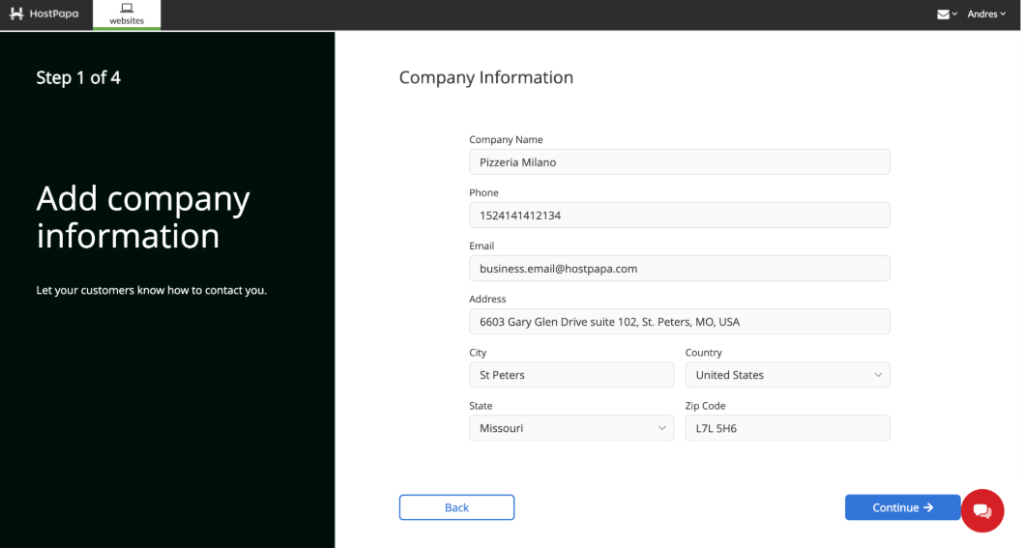
- Next, add your company information so customers know how to contact you and learn more about your business. Click Continue to start building your website.
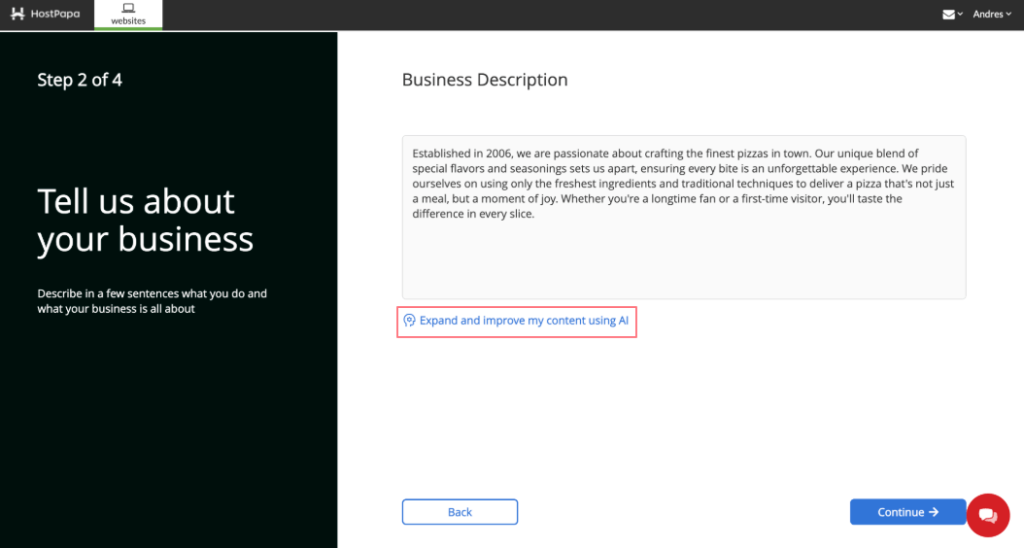
- Now, define the focus and purpose of your website by describing your business category or niche. This information helps HostPapa’s system recommend the best templates for your project.
Start by selecting one of the AI-Generated layouts, or begin typing your website’s theme. You’ll start to see the relevant templates appear in the Template Gallery.
You can also use the Expand and improve my content using AI feature to generate a clear and compelling business description for your website.
After completing your business description, click Continue to select your website layout.
- Now, you can choose AI-Generated designs tailor-made for your type of business. Click Continue to begin customizing your website. You can also explore hundreds of professionally designed templates to find the perfect fit.
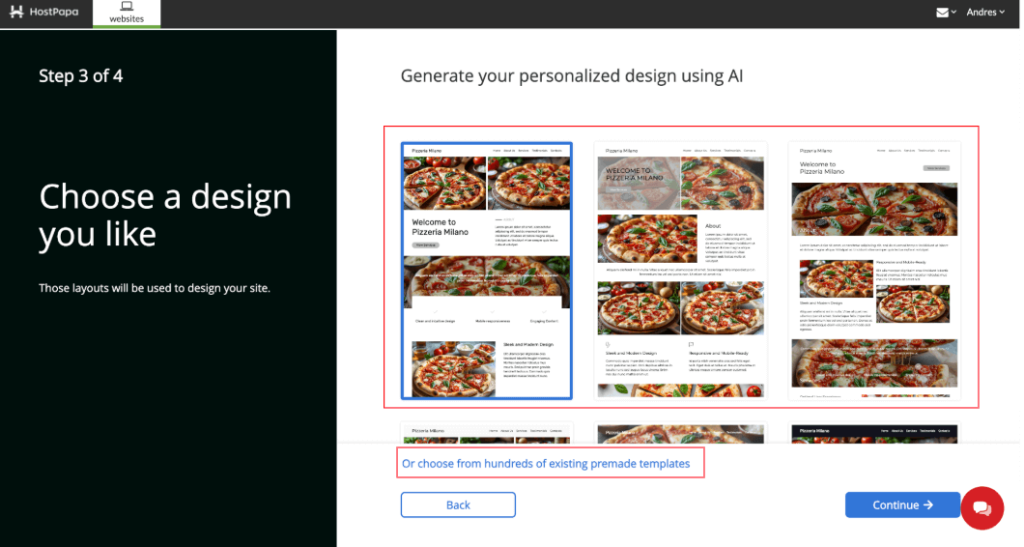
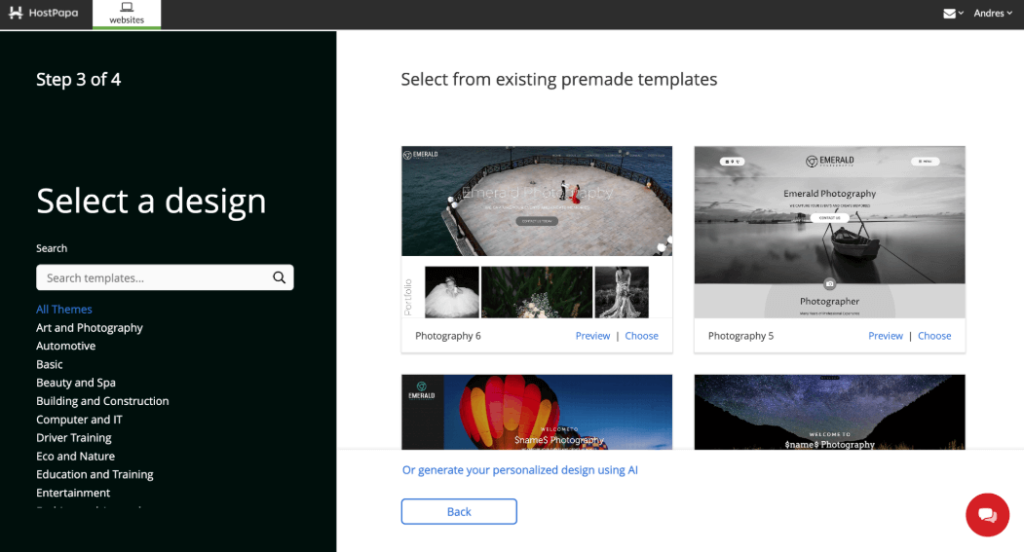
- Select a template from many different existing premade templates by category. Click Preview to try each premade template, or click Choose to select them.
- After selecting your design, your website will be automatically generated. In just a few seconds, you’ll be able to click Continue to Your Website to start customizing it.
Step 2: Let’s Start Building Your Dream Website
In this step, you get to choose how you’d like to build your website. One of the fastest ways to get started is by letting Artificial Intelligence (AI) do all the heavy lifting.
Generate your website in seconds: By selecting this option, our AI—using your preferences—will create a homepage for you. This process is a quick and easy way to establish your online presence with very little effort.
While AI helps to generate content and offers initial ideas, remember that it’s just a starting point. To make a website your own, you’ll need to refine the design and customize the content.
For those who know exactly what they want or prefer a bit more control right from the start, you can choose from several designer-made templates.
Your unique design is what will make your website really stand out, but the AI-Driven tool will help you speed up the process.
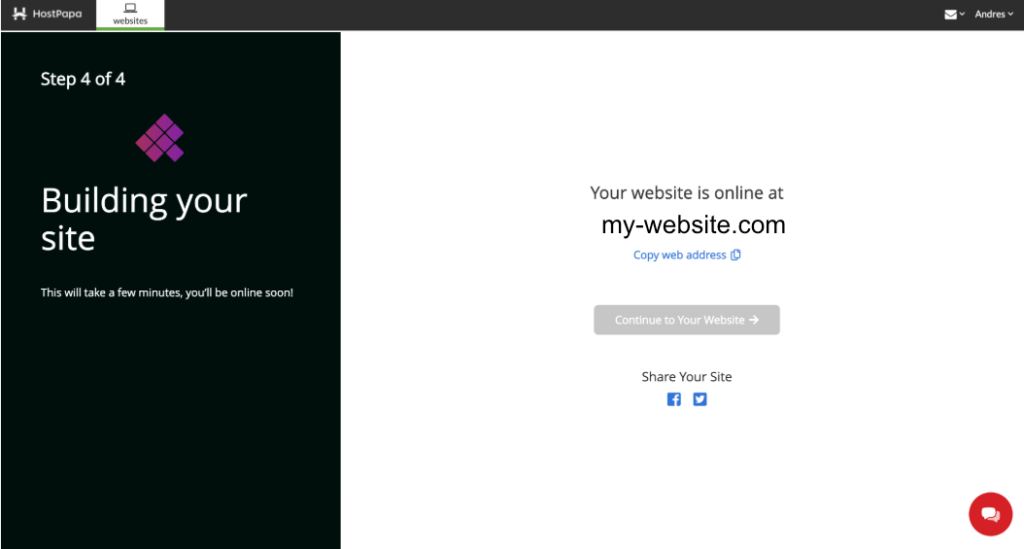
Step 3: Preview and Publish Your Website
Once you’ve finished customizing your website, it’s time to preview and publish.
- Preview: Click the Preview button at the top of the editor to see how your website will look on different devices such as desktops, tablets, and mobiles. Please check everything looks the way you want it to.
- Publish: When you’re satisfied with the preview, click Publish.
Once published, your website is live and ready to be viewed by the world!
Setting up Your Business Email
Once the domain and email package are purchased, you can start your business email setup. As you log in, you will see the Email section under the My Services menu. From there, we’ll walk you through the steps to set up your business email with ease in this article.
Additional Resources
For more in-depth guides, visit our HostPapa Knowledge Base or reach out to our 24/7 support team if you need any help. We also offer step-by-step tutorials for more advanced features like adding eCommerce functionality, optimizing SEO, and more.
If you need help with your HostPapa account, please open a support ticket from your dashboard.
