By creating tasks, you can improve your quality of life while reducing the pressures of your workload. Managing your tasks effectively can improve your ability to collaborate and reach your goals.
With Website Builder, HostPapa is pleased to announce that tasks are included to simplify and streamline your workflows.
To learn how to access your Website Builder to get started, please visit this article.
Task creation has many benefits, some of which include:
- The ability to limit distractions and increase focus.
- A chance to upgrade your time management skills.
- A process that helps you focus on your most important work items.
How to prioritize tasks
To first prioritize your tasks, consider:
- Which of your tasks is the most important.
- What times of the day will you have the right amount of energy to complete a task?
Consider the continuous improvement of your tasks
Remember that you can constantly refine what your task requires and how it can be streamlined. Small daily and weekly changes to your tasks can lead to consistent improvements that save you time and money.
Creating a task in Website Builder
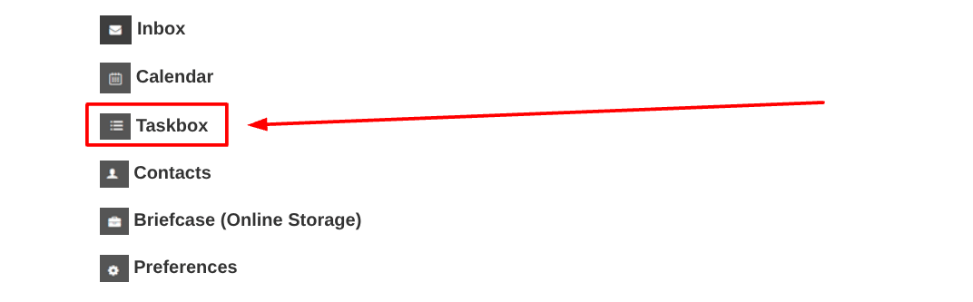
To create a task, you’ll first need to go to the Taskbox. To do so:
- Go to the primary navigation menu located on the left-hand side of your screen.
- Select Taskbox from the list of options.
You can create tasks directly from Taskbox or by saving an email as a task.
To create a task
In the task list:
Click on the Add New Task icon:

You’ll now see the New task form appear:
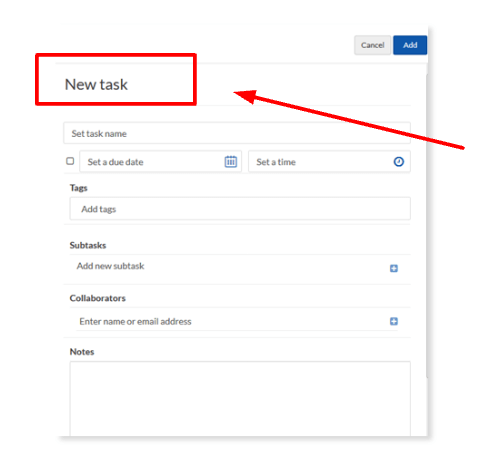
To set up your task, it’s recommended that you add as much detail as possible to the New Task form. The following are just some of the fields available in the form:
- Use the Set task name field to enter a name for your task.
- Adjust the Set a due date field to set a deadline for your task. You can also use the Set a time field to specify a completion time.
- Add a tag in the Tags field to enable searching for your task if needed.
- Type in the details of any subtasks associated with your main task in the Subtasks field.
- The Collaborators field allows you to add the names and email addresses of your colleagues who are also involved in the task. Click the plus icon to add someone. You can later withdraw them from a task using Remove.
- Enter a brief description of your task, if needed, into the Notes field.
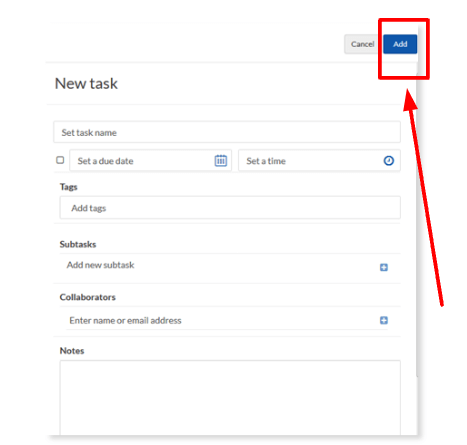
When you’re happy you’ve entered the required information about your task, simply:
- Click the Add button.
Editing a task
If you later decide to alter your task, you can:
- Click on the task that you want to edit.
- Make changes to your task.
- Click Save when you are finished.
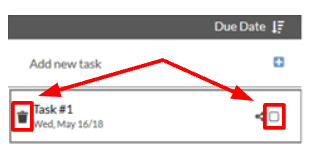
Deleting a task
To get rid of a task once and for all:
- Select the task you want to delete.
- Click on the trash can icon.
How to archive a task
- Select the task that you want to archive from the task list.
- Click the Archive icon:

If you need help with your HostPapa account, please open a support ticket from your dashboard.
