A cPanel backup lets you capture a complete, point-in-time copy of your site’s files and databases directly from your hosting control panel. Creating a manual cPanel backup gives you a reliable copy you can restore if something goes wrong. Creating your own backups is a good habit before making major changes such as updating software, editing configuration files, or migrating to a new host. This article walks through creating a full backup as well as partial backups of just your files or a single database.
Before You Begin
Make sure you have your cPanel login credentials and the URL for your hosting control panel, which is usually your domain followed by /cpanel or a port such as :2083. Confirm you have enough free disk space in your account to store the backup, since a full backup temporarily consumes space equal to the size of your site. If your account is large, consider downloading the backup to your local computer and then removing the server copy to free space.
Option 1: Create a Full cPanel Backup
A full backup includes your home directory, databases, email forwarders, and filters. Note that on most shared hosting plans a full backup can only be downloaded and restored by your hosting provider, not self-restored through cPanel.
- Open the cPanel account associated with your website in the HostPapa Dashboard.
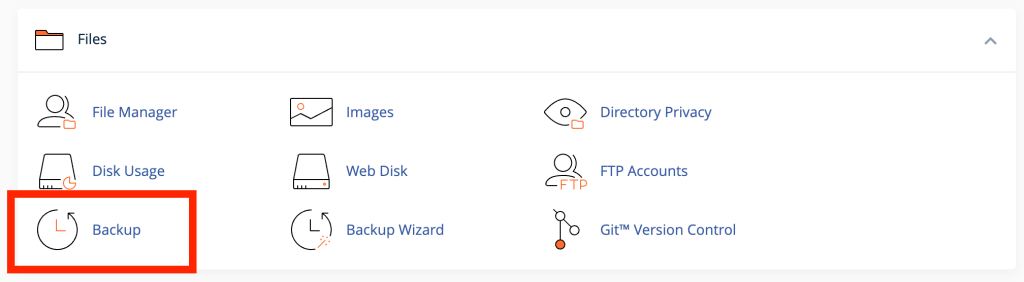
- In the Files section, click Backup.
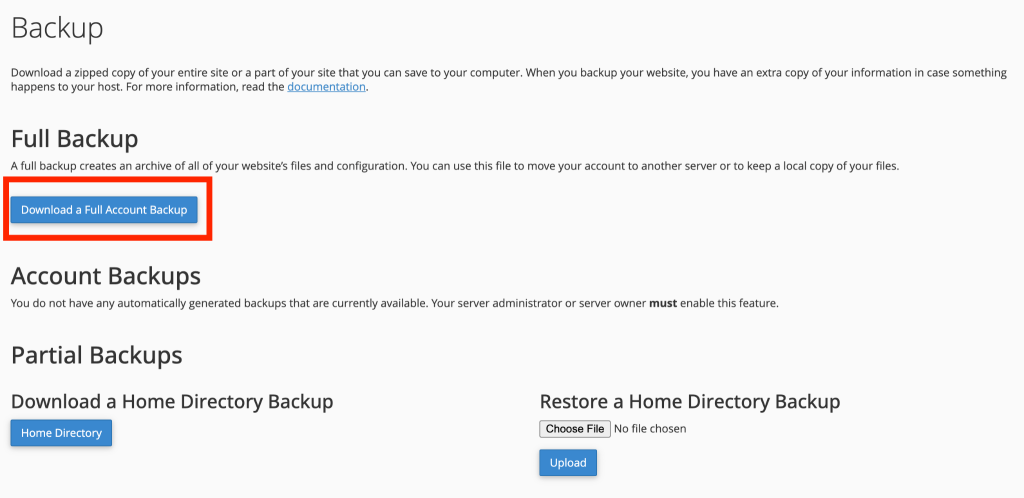
- Under Full Backup, click the Download a Full Account Backup button.
- Choose the Backup Destination. Select Home Directory to store it in your account, or choose a remote destination such as an FTP or SCP server if you have one.
- Optionally enter an email address to be notified when the backup completes.
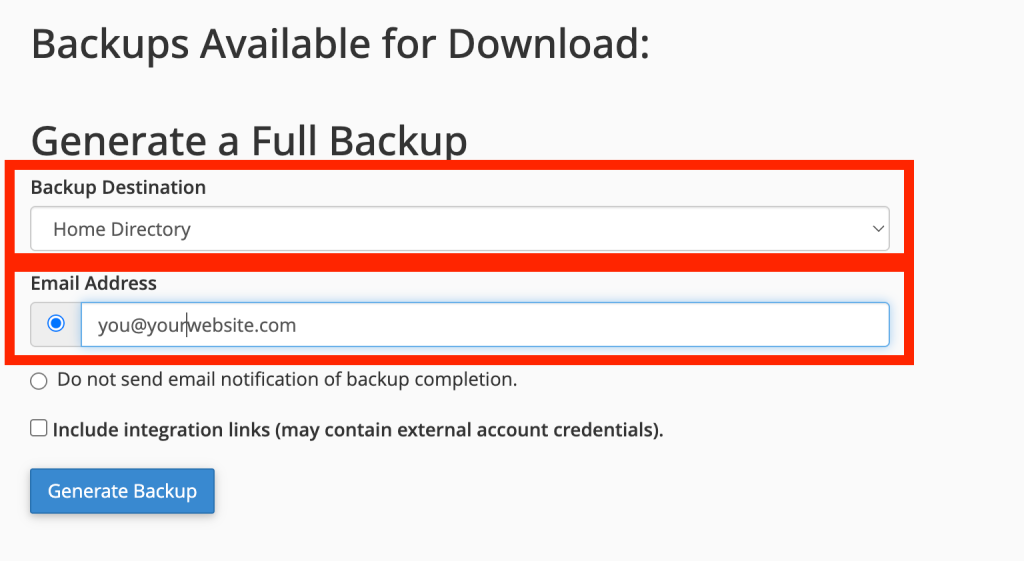
- Click Generate Backup.
- Wait for the process to finish. Large accounts may take several minutes. When ready, the backup appears as a compressed .tar.gz file that you can download.
Option 2: Back Up Only Your Files (Home Directory)
If you only need your website files, a partial backup is faster and can be restored yourself.
- Log in to cPanel and open Backup in the Files section.
- Under Partial Backups, find the Download a Home Directory Backup section.
- Click the Home Directory button.
- The .tar.gz archive will download to your local computer.
Option 3: Back Up a Single Database
Backing up your database separately is useful for content management systems such as WordPress, Joomla, or Drupal.
- Log in to cPanel and open Backup.
- Under Partial Backups, locate the Download a MySQL Database Backup section.
- Click the name of the database you want to back up.
- The .sql.gz file downloads to your computer.
You can also use phpMyAdmin for more control. Open phpMyAdmin from the Databases section, select your database in the left panel, click the Export tab, choose the Quick export method with the SQL format, and click Go to download the file.
Using File Manager as an Alternative
For a quick copy of specific files or folders, open File Manager in the Files section, navigate to public_html or the folder you want, select the items, and click Compress to create an archive. You can then select the archive and click Download.
Storing Your Backups Safely
Keep at least one copy of each backup off the server, such as on your local computer or in cloud storage, so a server failure does not take your backup with it. Label backups with the date and a short note about what changed, and keep several recent versions rather than overwriting a single file. Test a restore occasionally so you know your backups actually work when you need them.
Troubleshooting
If you do not see the Backup icon, your hosting provider may have disabled it or may use a different backup tool, so check with their support. If a backup fails partway through, the most common cause is insufficient disk space, so free up space and try again. If downloads are very slow or time out, try a partial backup instead of a full backup, or ask your host about generating the backup on the server and retrieving it via FTP.