A database editor in a website is a software tool or feature that allows users—typically administrators or developers—to interact with and manage a website’s underlying database. This process is done through a graphical or web-based user interface. A database editor allows you to view, add, edit, delete, and search database records.
HostPapa’s Website Builder comes with a built-in database editor. In this Knowledge Base article, we’ll explain how it works and how to use it.
To learn how to access your Website Builder to get started, please visit this article.
Getting started with the Database Editor
The Database Editor application lets you create, import, export, and store database sheets on your site.
Most applications store their data in databases within the Database Editor. Some of these applications include:
- News & Events.
- Media Library.
- Appointment Scheduler.
Because of the above, you are given an additional option to alter the data of your add-ons. The Form element can also store data from the submitted forms in databases.
To enable this useful add-on, please:
- Go to the left menu to select the available option.
Exploring the Database Editor
To view all databases on your site:
- Go to the manage option available from the left menu.
You’ll now see that the Databases interface is open. This facility lists all available databases on your site. It also contains the information for each database, including:
- Description.
- Number of rows.
- File size.
- Date created.
- Date modified.
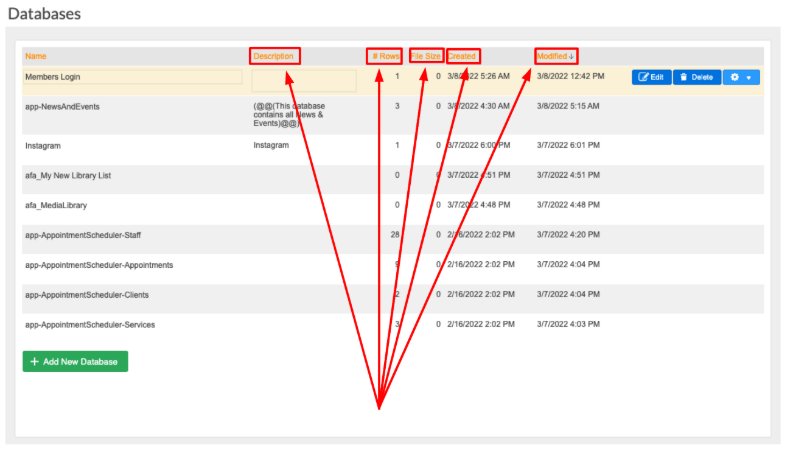
You can roll your mouse over a database to view certain options, including:
- Edit.
- Delete.
The following options are available using the drop–down menu located under the cogwheel:
- Duplicate.
- Export.
- Import.

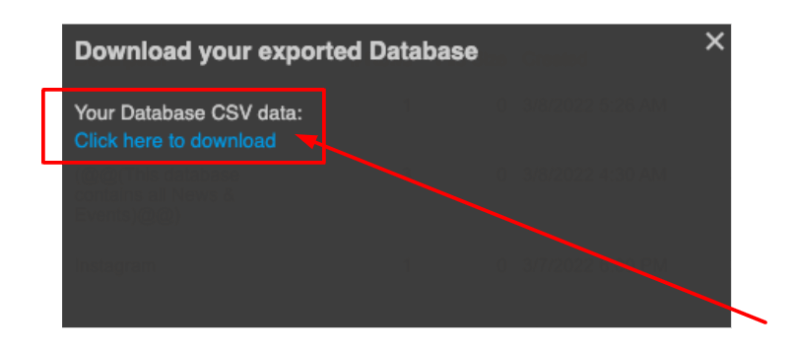
When you choose to export a database from your site, a pop-up window will open. You’ll then be prompted to download the file in CSV format.
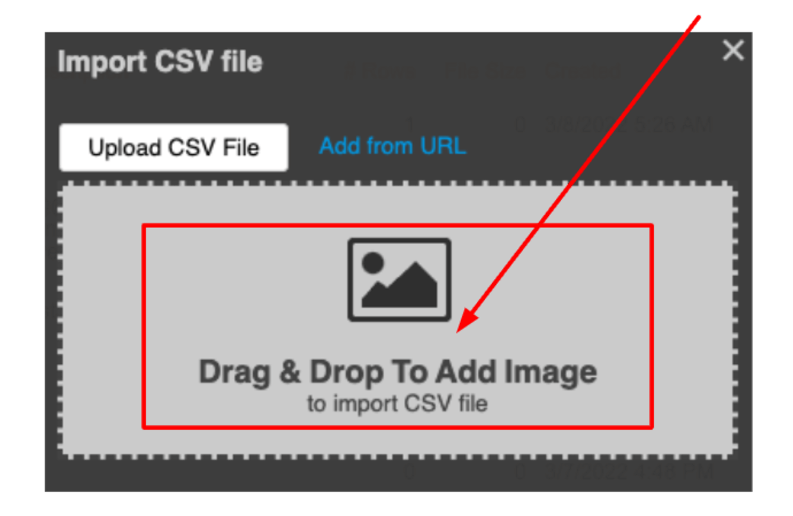
Choosing the import option will open the pop-up shown in the image below, prompting you to upload your desired file:
You may find the duplicate feature useful if you need to manually alter a database and later replace the original with your updated version. Alternatively, you can create a new database from scratch. You can do this by:
- Using the Add New Database button. It’s located at the bottom of the menu.
How to edit databases
To manage your databases, please:
- Go to the left menu.
- Select the Edit option for the required database.
- Apply the necessary changes to the database, which will appear in a pop-up window.
To add a new record to your database:
- Double–click on a cell to type inside it.
- Click on the green + New Record button at the top of the Database Editor. Alternatively, you can click on the green + sign at the bottom of the editor.
- Right-clicking on a cell allows you to cut, copy, paste, or clear the cell.

To add a new column, click the Add New Column icon at the top. The following column types are supported:
- Combo.
- Date.
- Drop–down.
- File Float.
- ID.
- Multichoice.
- Number.
- Password.
- Rich Text.
- Text.
The column types match the type of text fields that are in a web form. When adding a new column to a database, the type of column must be consistent with the text field in the web form.
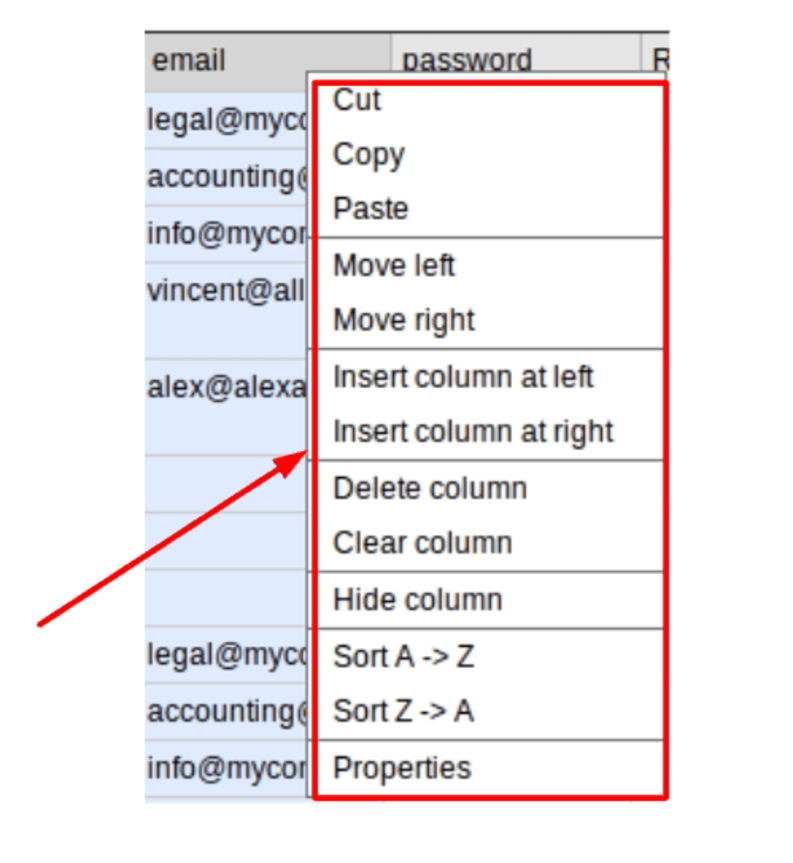
By right-clicking on the column, you can:
- Cut.
- Copy.
- Paste.
- Move.
- Insert.
- Delete.
- Clear.
- Sort A—Z.
- Sort Z—A.

Right-click on the column and select Properties. You can now edit the properties and view and edit the type.
Most columns can be set to unique, meaning data in its cells cannot be duplicated. Mandatory columns are marked with an asterisk (*).
Columns of type File and Appearance set to Preview allow images to be uploaded to the database. The width and height of the images can be customized. Columns of type Rich Text open an edit box for typing and inserting rich text.
To access the Database Editor’s preferences, select the row header and click the Preferences gear icon, available at the top right corner of the pop-up. You’ll now be able to customize the height of your rows and the size of their fonts.
If you need help with your HostPapa account, please open a support ticket from your dashboard.
