Taxes for your store need to be based on location-based tax rules. In this article, we’ll show you how to apply tax rules in AbanteCart.
Tax rules are applied based on three settings:
- Product Tax Class, which defines the class of taxes to which your product belongs. The default setting is Taxable Goods, which is a reasonable choice for most products. You can add other classes, such as “Tax Free”. (See below for instructions on adding tax classes.)
- Tax Rates set the rate for taxes based on specific geographic locations. For instance, the tax rate for North Carolina is 4.75%. (See below for instructions on adding tax rates.)
- Location and Location Zone. To apply a tax rate to a specific location zone (state, territory, province), create the rate and assign it to the appropriate location zone from the Insert Tax Rate page.
You can apply tax classes to store products and shipping methods. Tax classes make it easy to charge taxes based on the type of product you’re selling. For instance, food items are often taxed differently from non-food items.
The basic flow for setting up taxes
The basic flow for setting up taxes is a three-step process:
- Define locations and location zones. Select System > Localizations > Locations and click Add to add a location.
- Click Add Location Zone to add specific zones. For example, in the United States, you’ll need to add Location Zones for every state.
- Set the tax rate for each tax class – see instructions below.
- The default tax class is the Taxable Goods class, and it’s assigned to all products. Add other product tax classes as described below.
How to add tax classes
To add other tax classes that apply to what you’re selling:
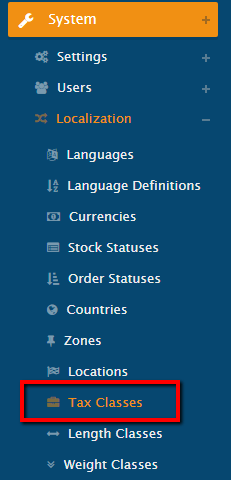
- From the left menu, select System > Localization > Tax Classes.
- On the Tax Classes page, click the + icon to add a tax class.
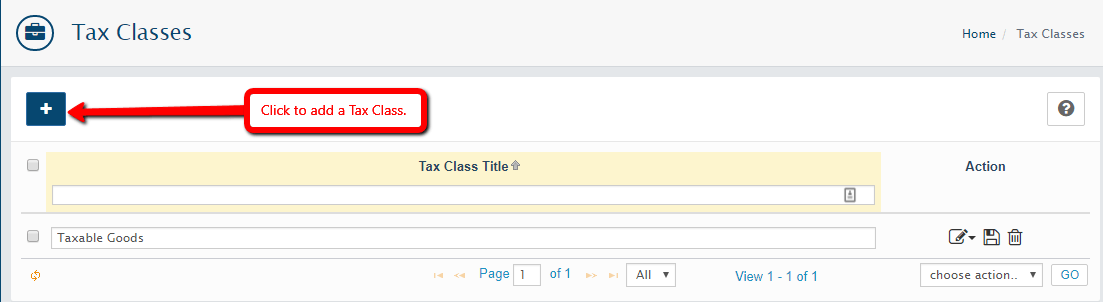
- On the Insert Tax Class page, enter the Tax Class Title and a Description Visible to Customers.
- Click Save to save the new tax class. Once you’ve saved, AbanteCart presents the Insert Tax Rate page, where you can set the Location Zone, details, and rates for all tax classes.
Tax rates and locations in AbanteCart
When you set up AbanteCart, the only tax class created is called Taxable Goods. For that tax class (and for all others you create), you must specify the tax rates. When you sell to different geographic locations, you need to set the tax rates that apply to all the locations you serve. If you sell in the United States, you need to specify the tax rates for each state because they are different for each state.
Note: If you have added a tax class, you’ll automatically be taken to the Insert Tax Rates page.
How to specify tax rates
To specify tax rates:
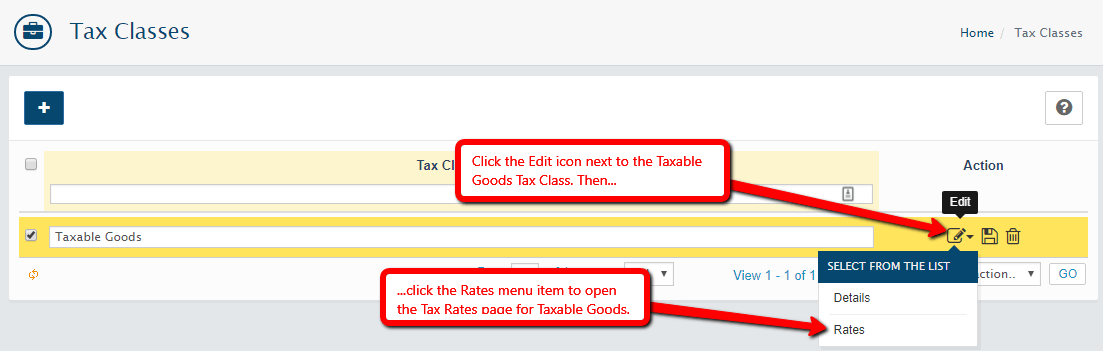
- Go to the left menu and select System > Localization > Tax Classes.
- In the list of Tax Classes, click Edit for the tax class you wish to edit and select Rates.
- On the Edit Tax Class page for the selected tax class, click the + icon to add a tax rate.
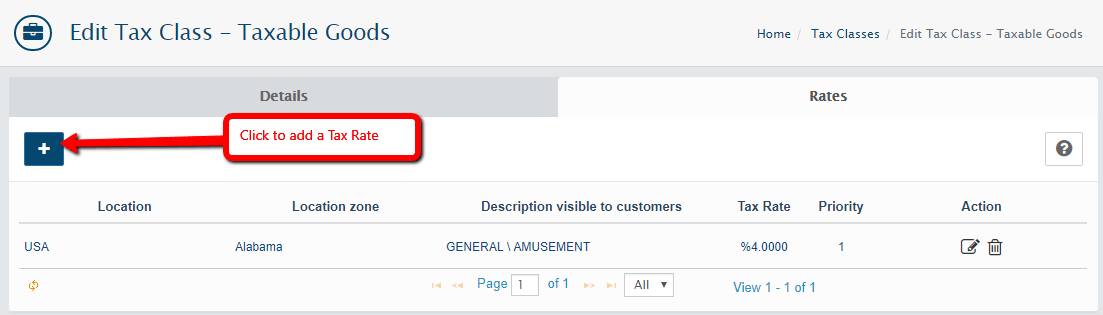
- On the Insert Tax Rate page, set up the tax rate as follows:
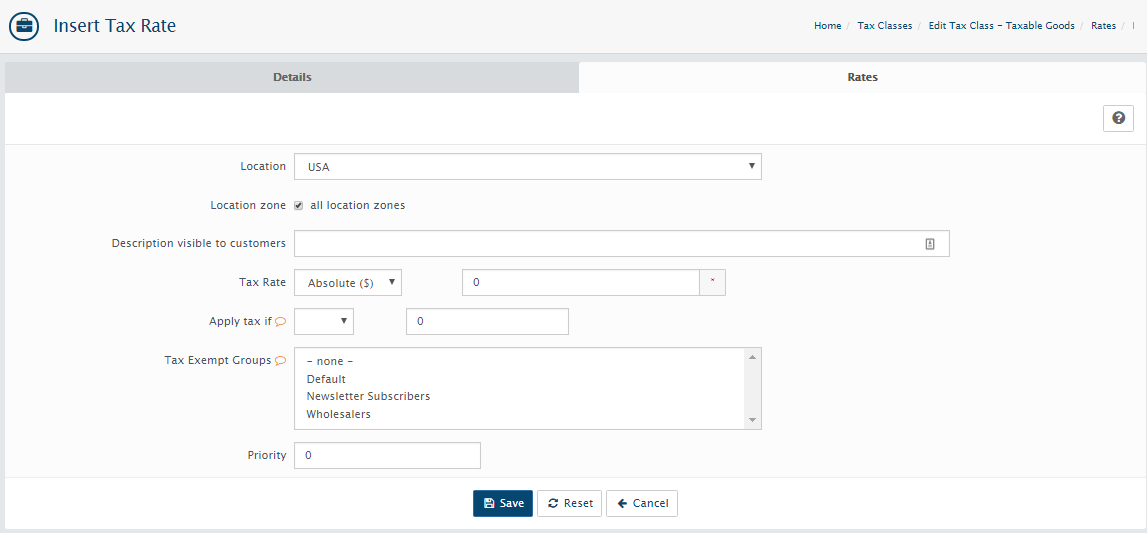
| Value | |
|---|---|
| Location | Select a specific location from the drop-down menu. (To add new locations, select System > Localization > Locations.) |
| Location Zone | When you sell to different geographic locations, you must set the tax rates that apply to all the locations you serve. If you sell in the United States, for example, you must specify the tax rates for each state because the tax rate for each state is different. You may also have to set specific tax rates for counties and cities within a given state.
To set the location zone for a specific state, uncheck the all location zones checkbox and select State from the drop-down menu as the Location Zone. (AbanteCart automatically provides a list of States, Provinces, and Territories from which you can select. If you need to add new zones, select System > Localization > Zones.) |
| Description | Provide descriptive text for the tax rate. |
| Tax Rate | Enter the tax rate. It can be set either to a Percentage or to an Absolute Amount. Select the appropriate setting and enter the tax rate in the number field to the right. |
| Tax Apply Condition | Use the Tax Apply Condition to specify when AbanteCart should apply the tax rate. When the shopping subtotal matches the condition you set here, the tax rate will be applied. For instance, you can select the > (greater than) symbol from the Apply tax if drop-down and enter 0 for the dollar amount. All non-zero orders will be taxed at the tax rate. |
| Tax-Exempt Groups | Use this setting to specify that a group – such as a church or other non-profit organization – is exempt from sales tax. |
| Priority | When a customer’s tax rate location overlaps another, the Priority for the current tax rate determines which tax rate is used. For example, a customer residing in California (state tax rate = 7.75%) and living in Santa Cruz County (but not in the city) must pay a sales tax rate of 8.5%. If that same customer lived in the City of Santa Cruz, they must pay a sales tax rate of 9%. This means that you must set a tax rate for the State of California, Santa Cruz County, and the City of Santa Cruz. Assign a priority to each rate to ensure customers pay the proper sales tax for their location. |
- When done, click Save. Your new tax rate appears in the list of Tax Classes. You must create rates for every geographic location you serve. Continue adding tax rates until done.
Other useful tax settings
Default store tax rate
The default store tax rate allows you to use your store’s address to apply a tax rate to users with an unknown shipping address status in AbanteCart. Select System –> Settings –> Checkout to set the Store Default Zone.
Note: If Display Prices With Tax is enabled, guest customers (those for whom the shipping address is unknown) will see the default store tax rate applied to their order.
Display prices with tax
The Display Prices With Tax feature allows you to display product prices, including tax. If the feature is set to Off, tax information is included only on the Checkout Confirmation page for the customer’s purchase. Select System > Settings > Checkout to enable this feature (disabled by default).
Use customer tax address
The Use Customer Tax Address setting allows you to set the customer address for tax calculations to Billing Address or Shipping Address. (Set this to Shipping Address for most situations.) Select System > Settings > Checkout to select this option.
Shipping and tax estimate
The Shipping and Tax Estimate feature is an easy way to enable your customers to quickly see what shipping and taxes for their order will be before they decide to check out. Select System > Settings > Checkout to enable this feature (recommended).
If you need help with your HostPapa account, please open a support ticket from your dashboard.
